To tint your car headlights, you’ll need to remove and thoroughly clean the assembly with isopropyl alcohol. Choose between vinyl film for DIY flexibility or spray tint for budget-friendly application. For film, mist the lens with soapy water, apply the tint from center outward using a squeegee, then heat edges to 190-200°F. With spray tint, apply multiple thin coats 12 inches away, waiting 15-40 minutes between layers. The following guide covers proper preparation techniques, material selection, and professional-grade application methods.
Preparing Your Headlights for Tinting
Proper preparation determines whether your headlight tint will last months or fail within weeks. Begin by removing the headlight assembly from your vehicle following your repair manual’s instructions. This prevents overspray and allows precise application. Place the units on a stable, clean surface.
Execute thorough cleaning techniques using isopropyl alcohol or soapy water with microfiber cloths to eliminate dirt, grease, and residues. For oxidized lenses, sand with 1500-2000 grit sandpaper, then buff with polishing compounds to restore clarity. Pay special attention to masking edges and corners where tint commonly lifts.
Perform a final sanitization with isopropyl alcohol. Before applying film, mist the lens lightly with soapy water—this allows repositioning and prevents premature adhesion. Guarantee complete dryness when using spray tints to avoid trapped moisture and bubbling.
Selecting the Right Tint Material for Your Vehicle
When selecting headlight tint material, you’ll face four primary options that differ considerably in durability, cost, and installation complexity. Vinyl film offers flexibility and straightforward DIY installation through air channel technology that prevents bubbles. Polyurethane film provides superior abrasion resistance for high-durability applications. Tinted paint protection film (PPF) delivers maximum clarity and protection but requires professional installation due to its thickness. Paint-based options like VHT Nite-Shades cost less but yield inconsistent finishes and poor weather resistance.
Your tint material selection must balance aesthetic goals with safety requirements. Consider light transmission percentages—darker tints dramatically reduce nighttime visibility. Research tinting legalities in your jurisdiction before purchasing, as many regions restrict headlight modifications. Self-healing films with UV resistance offer long-term value despite higher initial costs. High-quality tints also protect headlights from scratches, chips, and UV damage while maintaining clarity over time.
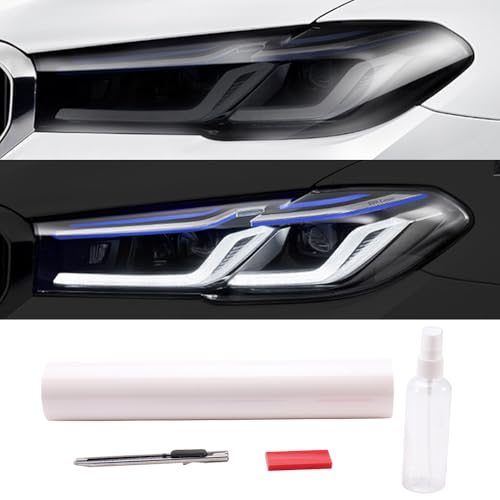
Material - The photochromic headlight tint is made of TPU material, durable andwear resistant. The headlight tint film has good light transmittance, does not affect the light source of the headlight, taillight light.

Superior Protection: Our TPU material is designed to withstand the rigors of daily driving, protecting your headlights and taillights from scratches, debris, UV rays, and weathering. The self-healing properties of TPU ensure minor scratches and swirl marks disappear over heat, keeping your lights looking pristine.

【EXTERIOR PROTECTION】Defends your paint from road debris, gravel, and abrasions. Protects your car's paint from stones, sand, mud, and weather. This TPU PPF extends your vehicle’s lifespan while maintaining a deep, glossy shine.
Step-by-Step Film Application Process
Successfully tinting your headlights requires meticulous surface preparation before you even touch the film. Begin lens preparation by dismounting the assembly and thoroughly cleaning with soapy water, removing stubborn grime with a razor blade. Dry completely, then wipe with isopropyl alcohol to eliminate oils. Mask surrounding paint and trim for protection.
For film application, mist both the lens and film’s adhesive side with soapy water solution. This enables repositioning during alignment. Tack the film onto a flat section first, then gradually smooth toward curved edges, applying heat to stretch and conform. Use your squeegee from center outward, removing air bubbles and water. Trim excess film carefully. To maintain clarity after tinting, consider applying a protective coating or wax to prevent yellowing and oxidation over time.
Post-heat edges to 190-200°F using a heat gun, activating the adhesive fully. Once the tint has cured, test your light output to ensure it meets legal standards and provides adequate visibility for safe nighttime driving. Allow several days for complete curing.

【Protective Effect】:This headlight tinting film not only hides scratches or wear marks on the lights, but also isolates bad light. It's like putting an invisible protective coat on your car, so that the lights are always in good condition and away from the signs of age.
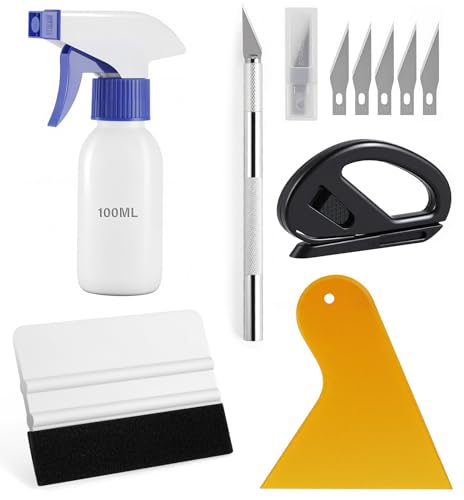
Window Tint Kit: Package included 5 pcs of window tint tools, a squeegee with a soft cloth, a yellow vinyl squeegee, a safe membrane cutter, a 100ml spray bottle, a craft knife and 5 spare sharp blades for replacement.

ULTIMATE GLOSS: By far the glossiest headlight tints modern technology can produce, with a finish that rivals the best gloss paint
Spray Tint Application Methods
While film provides a removable option, spray tinting offers a more permanent solution that creates a seamless finish on headlight lenses. Before beginning, wear a disposable mask and thoroughly clean your headlights with soap, water, and rubbing alcohol to remove all contaminants. Tape off surrounding areas to prevent overspray damage.
Master proper spray techniques by holding the can one foot from the lens, using smooth side-to-side motions. Apply multiple thin coats rather than one heavy layer, keeping the can perpendicular to avoid runs and pooling. Work on one lens at a time for consistency.
Follow these drying tips: allow 15–40 minutes between coats and a full 24-hour cure after your final application. Consider adding a UV-protective clear coat for enhanced durability and fade resistance. For optimal results, maintain an ideal working temperature of 71F (22C) during the application process.
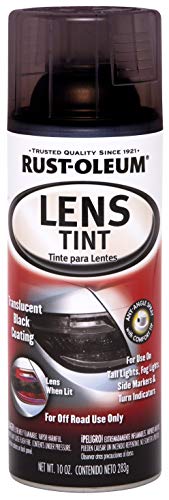
Use to add a translucent tint to automotive tail lights

KIT INCLUDES: 1 - Disc Pad Holder, 3.25 in (8,2 cm) 6 - 3M Gold Sanding Discs 500 Grit, 3 in (7,6 cm) each 4 - 3M White Finishing Discs 800 Grit, 3 in (7,6 cm) each 1 - 3M Trizact Refining Disc 3000 Grit, 3 in (7,6 cm) 2 - 3M Quick Headlight Clear Co

Restores Clarity & Enhances Visibility:This headlight restoration kit effectively removes yellowing, haze, and oxidation from headlight lenses. Helps improve nighttime visibility, giving your headlights a clearer and brighter appearance without the need for sanding or power tools.
Finishing Touches and Long-Term Care
After completing your headlight tint installation, proper finishing work and ongoing maintenance will determine how long your results last and how professional they appear. Use a heat gun at 190°F to secure film edges and eliminate air bubbles, working methodically with a squeegee from one side to the other. Perform flush cuts around headlight perimeters for clean, factory-like edges.
For headlight maintenance, wait 24 hours before washing your vehicle. Clean tinted surfaces using mild soap, water, and soft microfiber cloths—never harsh chemicals or high-pressure washes. Apply UV-resistant sealants for tint protection against oxidation and yellowing. Inspect regularly for damage from debris, bird droppings, or tree sap, removing contaminants immediately. Replace compromised film promptly to prevent peeling or water ingress, ensuring lasting clarity and durability. With proper care, your headlight tint film can maintain its appearance for up to 5 years.