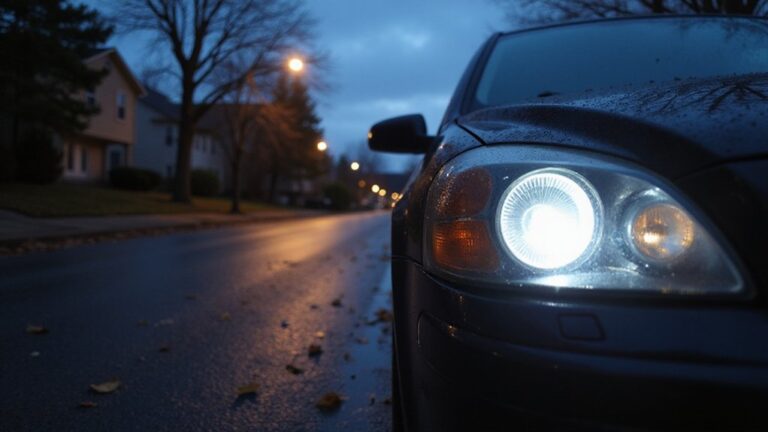
To replace your Nissan Murano’s headlight bulbs, you’ll need to access the assembly by removing approximately 14 plastic clips from the hood’s top cover and pulling back the fender liner sections. For high beams, unplug the connector, rotate the bulb counterclockwise, and install the replacement without touching the glass. Low beam access requires removing the rubberized cover and following the same rotation procedure with H11 bulbs while wearing nitrile gloves. The complete procedure includes essential safety checks, proper tool selection, and generation-specific variations that guarantee ideal headlight performance.
Model Years and Variations Covered
Because the Nissan Murano underwent significant redesigns across three distinct generations, you’ll need to identify your vehicle’s model year before selecting replacement bulbs or following access procedures. First-generation models (2003–2007) use different headlight assemblies and bulb types than later versions. Second-generation Muranos (2009–2014) share common access procedures and part numbers across their production run. Third-generation vehicles (2015–2022) introduced revised housings that require different replacement steps. Model year differences become critical during crossover years—2004–2007 and 2007–2009 models may need production-date verification for correct fitment. Bulb type variations also depend on trim level: factory-equipped xenon/HID or LED packages require ballast or module replacement rather than standard halogen swaps, fundamentally changing the service procedure you’ll follow. The proper installation technique, such as aligning the bulb’s widest part, ensures secure fitment and optimal headlight performance. Before beginning the replacement process, open the hood to access the headlight assembly and verify the bulb types installed in your specific vehicle.
Tools You’ll Need for the Job
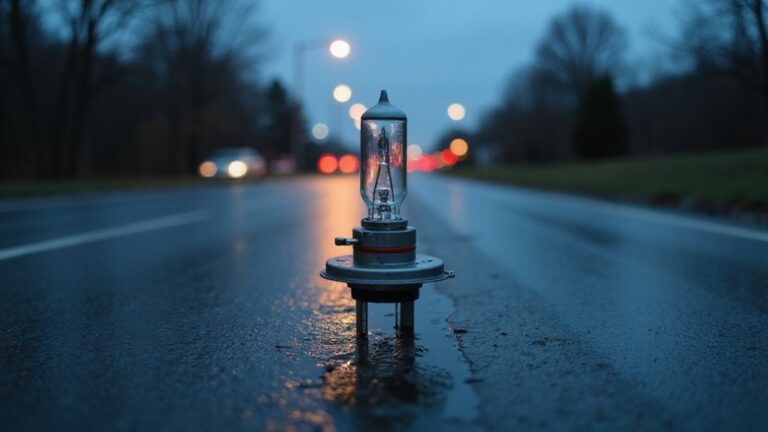
Once you’ve confirmed your Murano’s generation and bulb type, gather the proper tools before starting the replacement procedure. Essential toolkits include nitrile gloves to prevent skin oils from contaminating halogen bulbs like H11 or 194NA, which degrades glass clarity and shortens operational life. You’ll need flathead screwdrivers for socket alignment and counterclockwise bulb removal, plus wrenches or sockets to access plastic brackets securing the headlight assembly. For headlight maintenance tips, engage the parking brake and disconnect the battery when working with HID/Xenon systems containing ballasts. Eye protection safeguards against glass fragments during bulb handling. Stock replacement bulbs—H11 for low beams, 194NA amber for parking lights—and inspect connectors for burnt terminals or housing cracks before installation. When selecting bulbs, consider the light output measured in lumens to ensure adequate nighttime visibility and safety. Understanding color temperature and brightness levels will help you select the most appropriate replacement bulbs for optimal nighttime visibility. The high beam bulb requires a 9005 bulb type, which differs from the low beam specifications.

HID HEADLIGHT BALLAST REPLACEMENT - Also known as headlight control unit, a crucial part of hid lighting system, provides the voltage needed to start the lamp and regulates the electrical current of the light once it is lit. A failed ballast will cause your bulb to burn. When the voltage is input, the output power of the ballast can be kept constant at about 35W or 50W to protect the HID bulb from damage. The ballast fits either the left or right hid headlights.

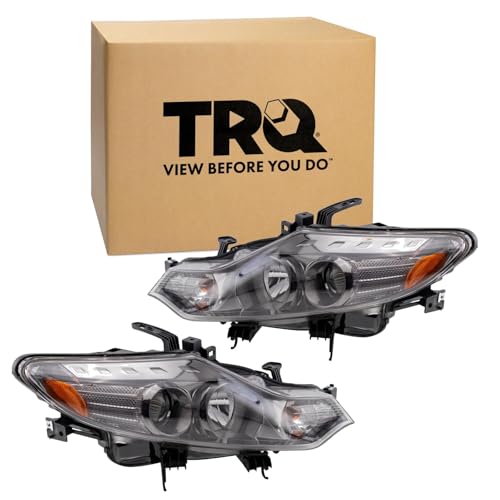
Headlights Lamps Set Compatible With 2009-2014 Nissan Murano
CONFIRM FIT — Use the "Amazon Confirmed Fit" tool at the top of this page. Enter your vehicle information to verify fit. IMPORTANT: Check the bottom of the tool for a fitment note — click "See More" if needed — and ensure it describes your vehicle.
Accessing the Headlight Assembly
Before you can replace a Murano headlight bulb, you’ll need to expose the headlight assembly by removing several protective covers and trim pieces. Start by opening the hood and removing approximately 14 plastic clips from the top cover using a trim tool. Twist the Phillips-head push-clips to release, then lift the cover to reveal mounting points. Remove any engine-room trim blocking access to the headlight’s upper area.
Next, detach mud flap or splash shield fasteners at the wheel well. Remove 10 mm bolts securing the bumper cover to the fender and inner splash shield. Pull back fender liner sections to expose side fasteners and wiring harness paths. Finally, remove the headlight assembly’s four mounting bolts—typically 10 mm—while supporting the unit. Preserve any shims or grommets for proper headlight alignment during reinstallation. Always wear safety gloves when handling bulbs to protect against cuts and to prevent skin oils from contaminating the new bulb surface.
Replacing the High Beam Bulb
With the headlight assembly exposed, you can now access the high beam bulb for replacement. The high beam is positioned separately from the low beam, typically as the upper bulb in the housing. For proper high beam maintenance, press the middle pin on the electrical connector to unplug it from the bulb. Rotate the bulb counterclockwise to release it from the housing, then pull it straight out. Avoid touching the glass surface, as oil contamination reduces bulb lifespan—note that headlights naturally dim up to 20% before complete failure. When selecting a replacement bulb, consider the color temperature options available to match your preference for light output. Insert the new bulb by aligning its widest section first, rotate clockwise to secure, and reconnect the electrical connector until it clicks. Always replace bulbs in pairs to maintain uniform brightness across both headlights. If you need additional guidance, seek video guidance for step-by-step instructions specific to your Nissan Murano model year.
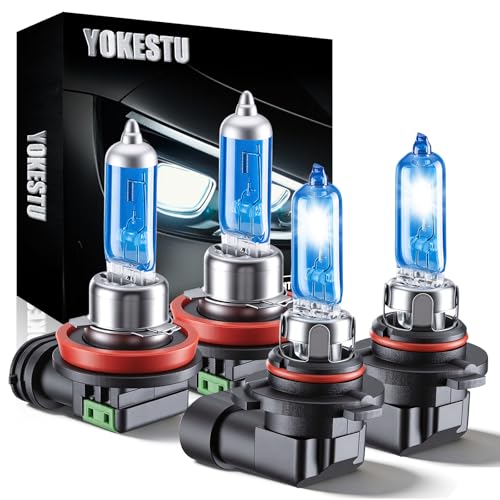
Fit For Nissan Murano 2009-2014: This set include 2×high beam and 2×low beam halogen headlight bulbs, a total of 4 white light bulbs. Please check your vehicle model before purchasing.

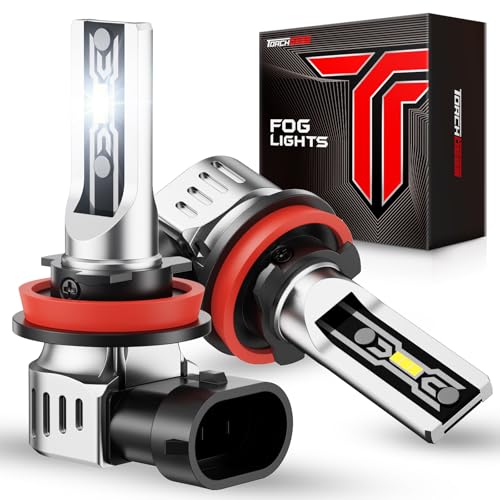
【FOR 2015-2018 Nissan Murano】AYGZRUB light bulb combo perfectly for 2015-2018 Nissan Murano.Built-in smart driver and close to the wattage of halogen bulbs, reduce the risk of error warnings, radio static or flickering.

Compatible with:Biromanle Compatible with Nissan Murano (2015-2018) High Low Beam and Fog Lights Bulbs Combo Pack;ensuring a perfect fit and easy installation,Please ensure to verify the light bulb model required for your vehicle before purchasing.
Replacing the Low Beam Bulb
The low beam bulb requires more intricate access than the high beam due to its positioning within the headlight assembly. Open your hood and locate the headlight assembly, noting that passenger side access demands removal of plastic clips obstructing the workspace. Push clips upward to detach the protective sleeve. Insert a screwdriver beneath the retaining pin to pry loose the rubberized cover over the low beam bulb. A common mistake is twisting the wiring harness connector during removal—press the retaining tab and pull straight off instead. Grasp the H11 bulb base, rotate counterclockwise, and extract carefully without touching the glass. For maintenance tips, inspect the connector socket for burnt marks before installing the new bulb. Always wear gloves for handling bulbs to protect the glass from skin oils that can cause premature failure. Avoid contact with the bulb’s glass surface, as skin oils cause damage and reduce its lifespan. Align tabs with housing slots, rotate clockwise until locked, reconnect the harness, and verify function. If upgrading to LED bulbs, ensure the LEDs are positioned to face left and right for optimal light output within the projector lens housing.

Lights Dim Over Time, Replace In Pairs: Your lights are a pair, one is never turned on without the other. If one bulb burns out, the other isn't far behind. Replace your H11 XtraVision Halogen bulbs in pairs for optimum performance.
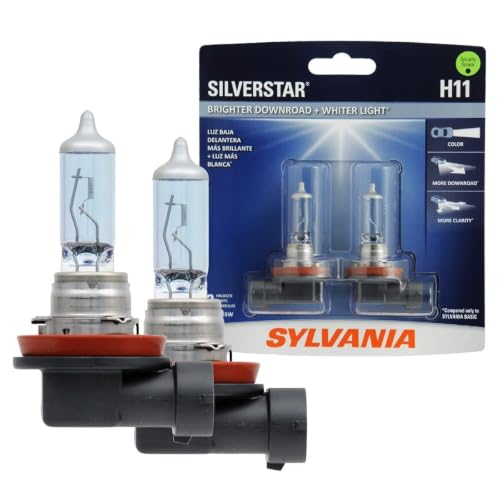
Lights Dim Over Time, Replace In Pairs: Your lights are a pair, one is never turned on without the other. If one bulb burns out, the other isn't far behind. Replace your H11 SilverStar Halogen bulbs in pairs for optimum performance.

1000% Brighter Than Origin: Top Automotive-Grade chips with 45000LM per pair, 6500K cool white. Super focused beam pattern design provides wider and farther lighting range which is 10 times brighter than your original bulb
Bulb Specifications and Part Numbers
Understanding bulb specifications guarantees you’ll purchase compatible replacements and avoid installation errors. Your Murano’s low beams use H11 bulbs rated at 55 watts and 12.8 volts for halogen configurations. High beams require 9005/HB3 bulbs, with some models accepting 9007/HB5 alternatives. When comparing halogen vs LED options, consider the SL2 LED producing 1400 lumens at 14 watts or the SL2 Pro delivering 2400 lumens at 21 watts with 6000K color temperature.
Major bulb brands like Sylvania offer halogen alternatives including SilverStar Ultra and XtraVision series. LED upgrades operate on 9-30V systems with polarity-specific installation requirements. Cross-compatibility exists between H11/H8/H9 for low beams. Remember that LED replacements work exclusively in halogen housings, not HID assemblies. Operating temperatures range from -40°F to 185°F. Both LED models feature Thermal Separation Technology for superior heat management and include internal cooling systems with top-mounted fans. Premium LED bulbs often provide improved visibility and longevity compared to standard halogen options. Selecting high-quality beam pattern quality ensures proper light distribution and maintains safe visibility on the road.

See the Road in a New Light: Get 900% the brightness of halogens with a powerful 50,000-lumen beam. The AUXITO H11 light bulbs illuminate more road ahead, giving you the clarity to spot hazards sooner.

Superior Visibility in Bad Weather: Equipped with 54 cutting-edge LED chips and enhanced top convex lens, the F1 Series H11 LED Fog Light Bulb provides 360° illumination, projecting 400% upgraded light over greater distances with precision. H11 fog light bulb led focused lights ensures safe and comfortable visibility during driving in rainy and foggy conditions
12,000 Lumens Ultra-Bright for All Weather Driving: Cut through dense fog, heavy rain, and snowy roads with 12,000LM of brilliant output—600% brighter than original fog lights. The TF2 Series H11 LED bulb deliver crystal-clear visibility for cars, trucks, and SUVs, keeping you safe in even the toughest driving conditions.
Safety Checks and Testing After Installation
After completing your bulb replacement, you’ll need to conduct systematic safety checks to verify proper installation and electrical functionality. Start by activating both high and low beams to assess headlight brightness uniformity. Inspect for dimness, flickering, or complete failures. Test turn signals and side markers simultaneously.
Next, verify electrical connections behind the assembly. Check for loose wiring, corroded terminals, or improperly seated connectors. Tighten all connections and make sure harness tabs click securely into place. Confirm bulb holders don’t wobble. Consider the color temperature options available for your replacement bulbs, as they can affect visibility and overall appearance.
Locate the fuse box and test headlight fuses: 10A for high beams, 15A blue for low beams. Use a multimeter to measure voltage supply. Examine battery terminals for corrosion and clean if necessary. If you’ve installed genuine Nissan bulbs, you can expect optimal compatibility and performance designed specifically for your Murano model. Listen for a clicking sound when you turn on the headlights, as this indicates the headlight relay is functioning properly. Finally, confirm adequate visibility in low-light conditions and perform a complete functionality test before closing the hood.