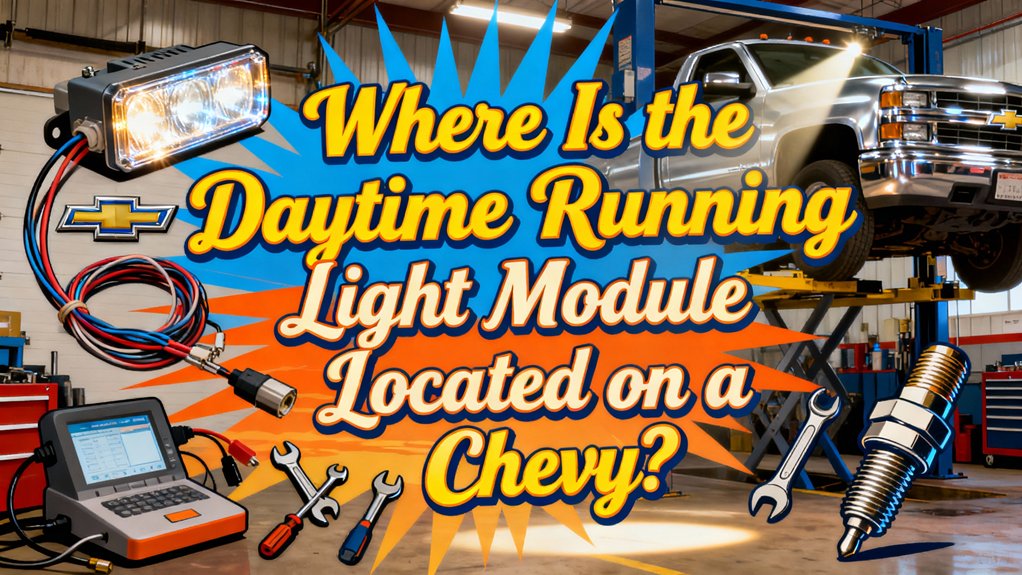
You’ll find the DRL module in one of two primary locations on your Chevy: beneath the instrument panel near the steering column, or inside the passenger-side under-hood fuse box. The module’s typically a small black box labeled “Hamsar” or similar, secured by a mounting bracket. For 2006-2013 Silverados, check fuses #31 and #33 in the passenger-side fuse box. Exact positioning varies by model year and platform, so verify connector locations and test related relays to confirm you’ve identified the correct component before proceeding with diagnostics.
Typical DRL Module Locations Across Chevy Vehicles
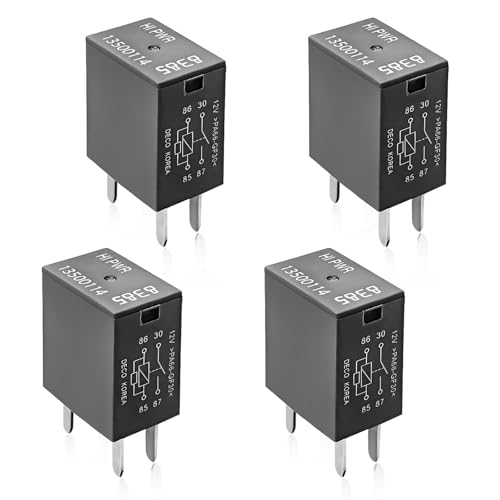
When diagnosing daytime running light issues on Chevy vehicles, you’ll find the DRL module positioned in one of several common locations depending on your model and year. The primary location is beneath the instrument panel, directly below the steering column. You’ll need to remove the lower dash cover to access this small black box, typically labeled “Hamsar.” Alternatively, check the under-hood fuse box on the driver’s side, where DRL modules integrate with relays numbered 8864, 8385, or 8430. For Silverado models (2006-2013), examine fuses #31 and #33 (15A each) first. Some configurations place the module in the passenger-side under-hood fuse box. Rather than assuming fuses are functioning correctly, always test them properly since visual inspection alone may not reveal a blown fuse. Proper DRL function guarantees driving safety through enhanced light visibility during daylight hours.
DRL Module Positioning in Popular Chevy Models
Different Chevy models position their DRL modules in distinct locations that require model-specific diagnostic approaches. In the 1999 Prizm, you’ll find the DRL module behind the glove box compartment, secured with a bracket and two Phillips-head screws. Access requires removing the glove box assembly. For 2006-2013 Silverados, the DRL fuse and relay reside in the under-hood fuse box on the passenger side near the windshield—specifically fuses 31 and 33 (both 15A). Many Chevy models integrate the DRL module beneath the steering column behind the instrument panel lower cover. It’s typically a small black box labeled with manufacturer part numbers like “Hamsar.” You’ll need to unscrew the panel covers and disconnect the electrical connector for removal, ensuring proper access to dashboard wiring harnesses. The module is responsible for activating headlights based on ambient light conditions detected by the vehicle’s sensors.
Step-by-Step Guide to Accessing the DRL Module
Before you begin accessing the DRL module, disconnect the negative battery cable to prevent electrical shorts and protect the vehicle’s electronic systems. Park on a flat surface with the ignition off. Remove the instrument panel lower cover or glove box using Phillips screwdrivers and trim removal tools—the specific location varies by model year. The module typically appears as a small black or gray box labeled “Hamsar,” secured by a bracket with two Phillips screws near the steering column or lower dash area.
Once exposed, remove retaining screws and disconnect the electrical connector by releasing the locking tab. During module maintenance, perform thorough wiring inspection for corrosion or damage. Label connectors if needed for accurate reinstallation, ensuring you don’t stress harnesses during removal. You can also test the module before removal by applying the brake with the key ON and engine off to verify whether the headlamps turn off and the brake light illuminates on the dash.

Application on: 3157 3156 4114 3357A 3457A 60-3528-SMD White Hight Power LED cab be used as DRL Daytime Running Light Bulbs.

Smart Control Functions: This DRL controller offers multiple functions including constant light, dimming, delay and automatic on/off switching, allowing customization for various driving conditions and preferences.

【Compatible Bulbs】Our Daytime Running Light Socket Replacement for 3156 3056 3456 4156 3057 3155 3357 3457 3757 4057 4114 4157 Bulbs The pigtail wire socket for daytime running lamp turn signal/brake/tail lights.|| Please Double Check The Year Make Model To Make Sure What You Need Before Ordering Thank You!
How the DRL Module Functions in Your Chevy
As soon as your Chevy’s engine starts, the DRL module activates the daytime running lights through a series of electrical signals and sensor inputs. This DRL functionality overview begins with the module communicating with ambient light sensors mounted on your dashboard to detect daylight conditions. When sensors confirm adequate ambient light, the module supplies regulated voltage to your DRLs at reduced intensity compared to headlights, minimizing alternator load and fuel consumption. The module simultaneously monitors your headlight switch position and turn signal status. If ambient light sensors detect decreasing light levels at dusk, the module deactivates DRLs and triggers headlight activation. During turn signal operation, the module dims or deactivates the corresponding DRL to prevent signal confusion. Circuit failures within the module can cause battery drain if DRLs remain illuminated with ignition off. A faulty headlamp module may require diagnostic checks to determine if the DRL system is malfunctioning.
Fuses, Relays, and Related Electrical Components
The DRL module‘s reliable operation depends on properly functioning fuses, relays, and their supporting electrical circuits throughout your Chevy’s power distribution system. DRL fuse identification starts in your engine compartment fuse box—typically fuse #31 (15A) and fuse #33 in Silverado models from 2006–2013. You’ll find these fuses grouped with other lighting circuits on the right side facing the engine. DRL relay testing requires locating relays numbered 8864, 8385, or 8430 within the fuse box or adjacent relay panel under the hood. Some models position the relay behind the glove box instead. When testing, verify proper voltage and ground paths at designated relay pins, particularly pin #12 for ground connections. Before accessing electrical components, ensure the vehicle is in park with wheels chalked and the key position turned on without starting the engine to safely test DRL activation. Disconnect your negative battery cable before accessing any electrical components to guarantee safe diagnosis and replacement.

High Quality Material: The car exterior lights is made of high quality material. They have non-heating elastic material, high quality lamp beads and super brightness. They can be waterproof, dust-proof and anti exposure. You can use this car LED strip lights for a long time.

Assembled Relay Box: The automotive 12V Relay Fuse Box has high capacity, this relay holder box package includes 2pcs 5pin 40A relays and 4pcs 4pin 40A relays, total 14pcs 10A, 15A, 20A, 25A, 30A, 40A blade fuses. They are all neatly installed in this box
Practical Function: This 4-pin relay is specifically designed for optimal power control, ensuring smooth and continuous operation of vehicle air conditioning systems or cooling fans. It guarantees a stable power supply, delivering a comfortable driving experience even under demanding conditions
Troubleshooting and Replacing a Faulty DRL Module
Diagnosing a malfunctioning DRL module requires systematic testing to distinguish between actual module failure and related circuit problems. Use a multimeter to verify voltage supply and ground connections at module pins. Inspect connectors for corrosion or physical damage that compromises driving safety. Test the DRL relay and sensor simultaneously to eliminate auxiliary component faults. If module replacement becomes necessary, disconnect the battery first. Access varies by model—remove the glove box, fender liner, or bumper trim as required. Unfasten mounting hardware and carefully disconnect the wiring harness. Install the new module, secure all fasteners, and reconnect components. Verify lighting efficiency by testing DRL activation under various ambient conditions. Clear diagnostic codes using an OBD-II scanner and perform road testing to confirm proper system operation.

【Compatible with Chevy Silverado 1500 2500 3500 1999-2006】 Designed for full-size pickup truck, these LED bulbs are optimized for Chevy Silverado 1500, 2500 and 3500 models from 1999-2006 daytime running lights, providing a smooth and straightforward upgrade.


[ADAPTATION] Running Lights fit for 2019 2020 2021 2022 Chevy Blazer (LED Model Only). A good replacement for your factory-installed light.