You can disconnect your vehicle’s daytime running lights by locating the DRL fuse in your fuse box and removing it using a fuse puller, though this method works primarily on older vehicles. For newer models with body control modules, you’ll need diagnostic software to reprogram the BCM settings. Always disconnect your battery’s negative terminal first to prevent electrical shorts, and verify that disabling DRLs complies with your local traffic regulations. The following sections detail each method’s specific procedures and safety considerations.
Understanding Daytime Running Lights and Their Purpose
When you start your vehicle’s engine, daytime running lights (DRLs) automatically illuminate at the front of your car without requiring manual activation. These low-wattage lights emit white light between 400-1,200 candela, creating visibility improvement during daylight conditions. Unlike headlights that illuminate the road ahead, DRLs increase your vehicle’s conspicuousness to other drivers, pedestrians, and cyclists.
DRL advantages include enhanced reaction time for merging and turning situations, with studies demonstrating up to 18% reduction in accidents. They’re particularly effective in dawn, dusk, overcast conditions, and shaded areas where your vehicle might otherwise blend into surroundings. DRLs have been proven to reduce daytime collisions by significant margins in multiple research studies. The system typically activates through ignition, parking brake release, or gear shift engagement, automatically dimming when you activate full headlights for ideal brightness management. Modern vehicles predominantly use LED DRL technology, which offers energy efficiency and instant illumination compared to traditional halogen systems.
Battery Disconnection and Safety Precautions
Before modifying your vehicle’s daytime running light system, you must disconnect the battery to prevent electrical shocks, short circuits, and potential damage to sensitive electronic components. Start by parking on level ground and allowing the engine to cool completely. Locate the battery and perform terminal inspection for corrosion or damage. Identify the negative terminal, marked with a minus symbol or black cover.
Using an insulated wrench, loosen the negative terminal clamp counterclockwise and disconnect it first. Secure the cable away from the terminal using electrical tape or a holder. This battery maintenance step removes electrical flow throughout the system. Wear insulated gloves and eye protection during the process. Never allow metal tools to bridge terminals, and work in a well-ventilated area to guarantee safety. Be aware that unauthorized modifications can void vehicle warranties, so consider this consequence before proceeding with any alterations to your vehicle’s electrical system.

[4 WAY BATTERY TERMINAL] Made of high-quality brass and steel material which is corrosion resistant with excellent electrical conductivity that can reduce voltage distortion and transmission loss. And it has 4 ports for multiple cable connections, wiring is easy and convenient to modify.

[4 WAY BATTERY TERMINAL] Made of high-quality brass and steel material which is corrosion resistant with excellent electrical conductivity that can reduce voltage distortion and transmission loss. And it has 4 ports for multiple cable connections, wiring is easy and convenient to modify.
Comfort & Non-Slip Grip: These electrical disconnect pliers feature ergonomic, non-slip handles designed for maximum comfort and control during prolonged use. The textured grip ensures a secure hold, even in oily or wet conditions, reducing hand fatigue and improving accuracy when working with delicate automotive connectors. Whether you're removing stubborn wire harness clips or battery terminals, the balanced design provides optimal leverage without straining your hands. The lightweight yet durable construction makes these fixion tools ideal for both professional mechanics and DIY enthusiasts, offering a firm grip for precise maneuvering in tight engine compartments
Fuse Removal Method for Older Vehicles
For older vehicles manufactured before widespread electronic integration, the fuse removal method offers the most straightforward approach to disabling daytime running lights. These older vehicle characteristics typically feature simpler electrical architectures with dedicated DRL circuits that don’t rely on complex body control modules.
Locate the fuse box—usually under the hood or dashboard—and reference the diagram on the lid to identify the DRL fuse. Despite fuse accessibility issues in cramped engine bays, use a fuse puller or needle-nose pliers to extract the correct fuse without twisting. Verify it’s blown or intact using a test light.
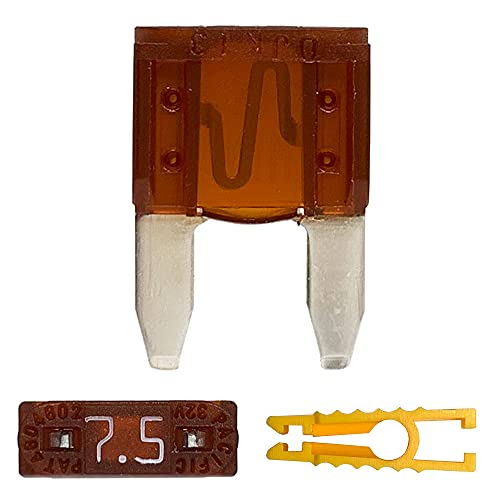
Start the vehicle to confirm DRLs are disabled while headlamps remain functional. Store the removed fuse and document the change for reversibility and future reference. The DRL fuse is typically a 7.5 amp fuse that controls only the daytime running light circuit.
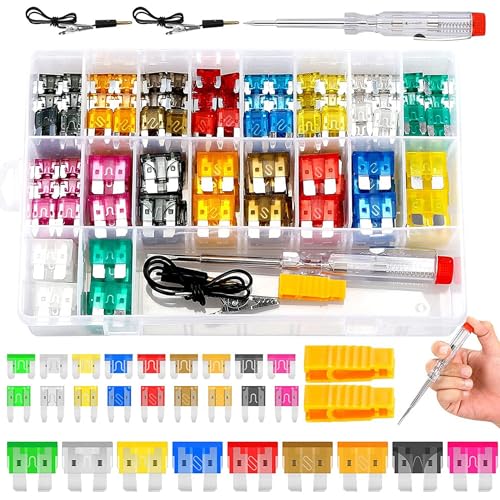
Package Include: The package is very informative. You will receive a pair of fuse pullers, 2 circuit testers, and 306 pieces of automotive fuses. Among them, the fuse sizes and models are very diverse, including 90pcs Standard: 2A/ 5A/ 7.5A/ 10A/ 15A/ 20A/ 25A/ 30A/ 35A(10PCS of each model ), 108pcs Mini: 2A/ 5A/ 7.5A/ 10A/ 15A/ 20A/25A/ 30A /35A(12PCS of each model ), 108pcs Low Profile Mini: 2A/ 5A/ 7.5A/ 10A/ 15A/ 20A/ 25A/30A/35A (12PCS of each model ).

【Meet all your needed size】-- The fuse kit includes micro size 50pcs, mini size 160pcs and standard size 90pcs. Three styles of auto fuses have 11 current specifications (2A /3A / 5A/ 7.5A/ 10A/ 15A/ 20A/ 25A / 30A/ 35A/40A), equipped with a fuse puller.(Not including micro2 fuse.)
Qty:20pcs fuses and 1 Fuse puller;
Headlight Switch Modification Technique
Modifying the headlight switch harness provides precise manual control over your DRL system without compromising other electrical functions. Start by cutting tie wraps securing the harness and locate the yellow wire at pin #15, which serves as the DRL control line. Verify 12V supply using a voltmeter before proceeding.
Route two 16 AWG wires (two feet long) from the splice point through the dash hole. Cut the center from your dash filler plate to accommodate a snap-in switch. Connect a three-foot ground wire with an eyelet connector to metal flooring, securing it with a screw.
Install the headlight switch by splicing the yellow wire using butt connectors. Add a yellow/white wire connection for pilot light integration, which activates only when DRLs operate and deactivates with the handbrake engaged. Include an inline 15 amp fuse in your wiring connections to protect against electrical damage and potential short circuits.

【YOUR VEHICLE NEEDS THIS】Perfectly match old led headlight H6054 H5054 H6054LL 6014 6052 6053 [Fused] [negative switched conversion] vehicles like Toyota, Jeep Pickup, Tacoma, Subaru, Mitsubishi, or Suzuki 7x6 5x7 led headlight harness.
![True Mods H6054 H4 LED Headlight Wiring Harness [Negative Switched Conversion] [Fused] Universal H4 Head Light Relay Harness Kit for 9003 H6024 5x7 7x6 4x6 Subaru Toyota Jeep Sealed Beam Headlamp](https://m.media-amazon.com/images/I/51+wV9S2Q4L._SL500_.jpg)
YOUR VEHICLE NEEDS THIS - Swapping out old headlights for LED conversions on negative switched vehicles like Toyota, Subaru, Mitsubishi, or Suzuki, is not a simple job. But with our plug-and-play universal dual H4 headlight relay harness kit for high/low beam it can be! The compatible sockets include: 7x6 5x7 H6024 (2D1 H6054 H5054 H6054LL 6014 6052 6053)|H6024 (2D1)|4x6 6x4 (H4651, H4652, H4656, H4666, H6545)|H5006 (2C1) sealed beam headlights and more!
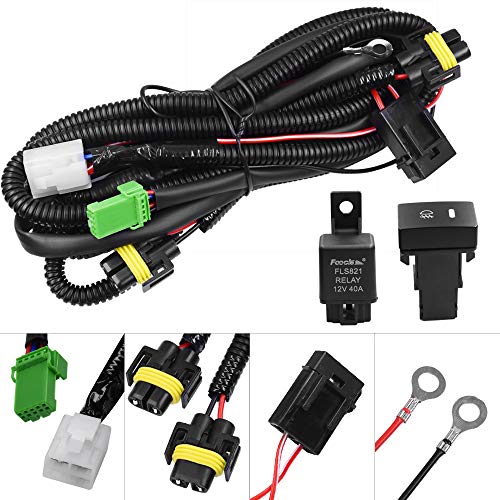
Good For Replacement fog lamps, Add-on fog lights, HID lights, LED daytime running lights, Driving lights, LED work lights, Off-road lighting kit
Parking Brake Activation Method
To execute this method, press your foot brake and pull the parking brake handle fully upward. Verify the red brake warning light illuminates on your dashboard, confirming switch activation. The DRLs will immediately extinguish. Models like the 2002 Hyundai Accent, Toyota Tacoma, and VW Golf MK7 demonstrate this functionality reliably.
The parking brake switch sends a negative control signal to the DRL relay, preventing circuit completion. This design prevents battery drain during parking while offering you complete control over exterior lighting without diagnostic reprogramming or costly modifications. This circuitry approach provides production simplicity by integrating a parking brake defeat switch rather than requiring separate DRL control modules.
Diagnostic Tool Reprogramming for Modern Vehicles
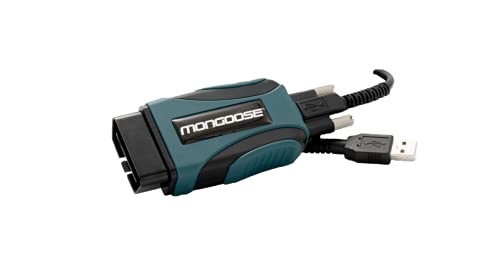
While older vehicles rely on mechanical relays and simple switches, modern vehicles store DRL behavior within programmable Body Control Modules (BCM) that require diagnostic tools and OEM software to alter. ECU programming via J2534-compliant interfaces enables access to manufacturer calibrations, but you’ll need OEM-specific software and authenticated sessions to modify lighting parameters. Select a J2534-2 device supporting your vehicle protocols—CAN, LIN, or newer high-speed networks—and verify compatibility with your model year. Follow OEM procedures precisely: connect to the OBD port, maintain stable 12–14V power using a battery charger, back up original module data before flashing, and complete all post-programming relearns. Many manufacturers restrict BCM coding to dealer tools or require digitally signed files, limiting independent access despite J2534 standards. The standardized API provides a uniform interface between PC-based applications and vehicle communication networks, originally developed for emissions-related ECU reprogramming compliance.

J2534 Pass-Thru Programmer: TOPDON RLink J2534 is an advanced diagnostic and reprogramming tool that support all J2534 protocols, as well as D-PDU, CAN-FD and DoIP, ensuring compatibility with a wide range of modern vehicles. It offers extensive versatility with support for over 18 major automotive brands, including Chrysler, Ford, GM, Nissan, Toyota, Honda, Subaru, Land Rover/Jaguar, Volvo, Wuling, Volkswagen/Audi, Mercedes-Benz, and BMW. NOTE: Not compatible with Ford IDS diagnostic software
Industry-leading J2534 Pass-Thru Technology designed for Subaru vehicles: Enabling diagnostics, reprogramming and security functions for dealerships and the independent repair facility.

【J2534 Pass-Thru Device】 This budget-friendly J2534 pass-thru device delivers OEM diagnostics and reprogramming capabilities for dealerships, repair shops and automotive DIY enthuisasts, enables you diagnose, program and repair the vehicles more efficiently and precisely. Supporting J2534, D-PDU, CAN-FD and DoIP, this J2534 passthru tool ensures wide vehicle coverage. It's compatible with OE software application, ensuring seamless integration and original performance quality
Ignition Sequence Programming Procedure
Some vehicles allow DRL deactivation through ignition-based programming sequences that reconfigure the BCM without diagnostic tools. You’ll need to execute specific ignition key programming patterns to access hidden menu settings. Begin by inserting your key and cycling between ON and OFF positions in timed intervals—typically holding ON for 10 minutes and 30 seconds, then repeating this cycle three times. This method mirrors transponder key sequences used for chip key initialization. Certain GM models require alternating between existing programmed keys and holding positions until security indicators extinguish. You must maintain precise timing between steps, as deviations reset the sequence. Never start the engine during programming cycles. After completing the pattern, your vehicle’s computer should recognize the configuration change and disable DRL functionality upon next startup. If you encounter difficulties with the procedure, consulting an online programming resource can provide vehicle-specific troubleshooting guidance.

Innovative solution - this replacement ignition lock cylinder kit comes with a programmer to save you time and money

DO IT YOURSELF——You can program your remote by yourself. Just download the APP and the steps are simple, safe and time-saving. Powerful, professional technical support enables programming keys at home and no need to make any appointment. One can set up to 8 keys for one same vehicle if your car system has no limit for single car use only

DO IT YOURSELF——Our kit can let you to skip the locksmith and then get a new key. Just download the APP and the steps are simple,safe,and time-saving. Powerful, professional technical support enables programming keys at home.
Legal Considerations and Regional Requirements
Before you disconnect your vehicle’s daytime running lights, understand that DRL regulations vary greatly across jurisdictions and removing them may violate local traffic laws. The legal implications depend on your vehicle’s manufacturing date and location. In the EU, DRLs are mandatory on cars and vans manufactured since 2011, though pre-2011 vehicles aren’t subject to retrofitting requirements. Nordic countries like Sweden and Finland have enforced DRL requirements since the 1970s. Canada mandates DRLs on all new vehicles since 1990, while the US permits but doesn’t federally require them. Regional differences considerably affect compliance—the UK exempts larger vehicles, Italy requires DRLs outside built-up areas, and Germany allows low beam as an alternative. You’ll face potential fines if disconnection violates your jurisdiction’s requirements. In Spain, DRLs are not compulsory but recommended for use in heavy traffic situations.
Warranty and Vehicle System Impact
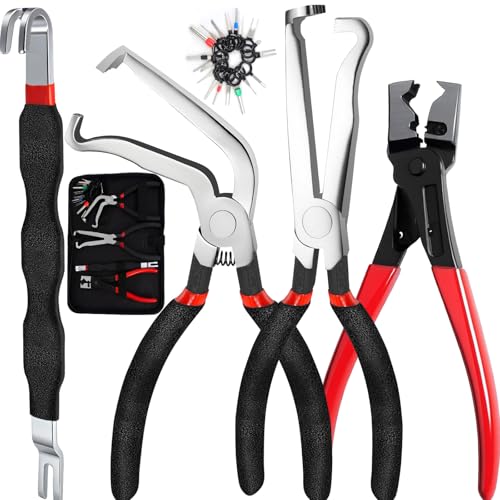
Regarding system impacts, removing the DRL fuse typically disables only the daytime running lights on most vehicles without affecting other lighting systems. Some models may experience unintended consequences affecting additional lights. Before proceeding, verify your VIN’s eligibility for any existing warranty extensions. If your DRLs fail due to design defects rather than modifications, manufacturer warranties cover replacement parts and repair procedures under standard coverage terms. When accessing electrical components, you may need proper tools like clip removal tools to safely disconnect connectors without damaging the vehicle’s wiring harness. Modifying safety features may void vehicle warranty, so consult the manufacturer before making any changes.