To replace your Kia Forte’s daytime running lights, you’ll need to jack up the vehicle and remove the front wheel well splash guard using a trim removal tool. Once you’ve accessed the DRL housing from behind the bumper, rotate the bulb socket counterclockwise to remove it. Install the new P21W or 1157 bulb without touching the glass surface, twist it clockwise to lock, then reassemble the components. Test the DRLs by starting your engine to verify proper operation. The following sections provide detailed specifications and advanced LED upgrade options.
Identifying the Correct Bulb Type for Your Kia Forte
Precision matters when selecting replacement daytime running light bulbs for your Kia Forte, as incorrect bulb types lead to fitment failures and potential electrical issues. Your 2019-present model typically requires a P21W or 1157 (BAY15D) bulb, though some trims use 7506 (single filament) or 7528 (dual filament) variants. To avoid bulb compatibility issues, remove your existing bulb and inspect the filament configuration—single filament bulbs feature one continuous wire, while dual filament bulbs contain two distinct wires for DRL and turn signal functions. Check bulb wattage specifications in your owner’s manual, which typically indicates 21 watts for P21W types. Verify the base type: P21W uses single contact bayonet, while 1157 features dual contact. The standard P21W bulb operates without a double element feature, making it distinct from combination DRL and turn signal bulbs. Different vehicle models may utilize separate bulbs for low and high beams to optimize lighting performance and ensure proper function. When upgrading your daytime running lights, consider comparing brightness and longevity across different manufacturer options to balance visibility needs with durability. Cross-reference your VIN with parts suppliers to confirm precise fitment before purchasing.

【OE Part Number Reference】: 92164M7050 92164-M7050; All products have passed the manual quality test to ensure that they can work properly
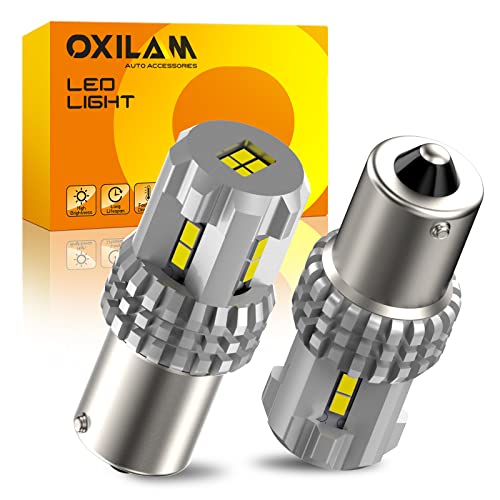
【600% Brightness Improved】(Set of 2, 6000K Xenon White) With 12 PCS high power 3020smd chipsets, OXILAM 1156 led bulbs are only 5.2W/PC but 6 times brighter than the original bulb,ultra bright & energy saving,give you a wider and clearer view at night

【700% Brightness Boost】: AUTOONE 1156 LED bulbs feature 16 high-quality SMD chips. Each pair delivers 6500K pure white light output with 700% increased illumination, significantly enhancing nighttime driving and reversing visibility for safer, more comfortable journeys.
Gathering the Necessary Tools and Safety Equipment
Setting up for a successful daytime running light replacement requires assembling the right tools before you begin work on your Kia Forte. You’ll need a ratcheting wrench with Philips screwdriver adapter, small screwdriver or pick tool, clip removal tool, jack, and jack stands. Confirm your replacement bulb specification—typically 7506 or 7528 depending on your model year.
Safety precautions include wearing gloves to avoid touching bulb glass, using safety goggles for eye protection, and placing wheel chocks to prevent vehicle rolling. Remove keys from the ignition to eliminate electrical hazards. Tool organization is critical—prepare a magnetic tray for screws and clips to prevent loss during disassembly. Following best practices for avoiding oil contamination on bulb surfaces will help ensure proper bulb performance and longevity.
Turn the steering wheel fully inward on your working side for improved access to the DRL assembly within the wheel well area. Before purchasing a replacement bulb, extract the existing bulb to verify you have the correct type, as distinguishing between single and dual filament bulbs prevents compatibility issues.
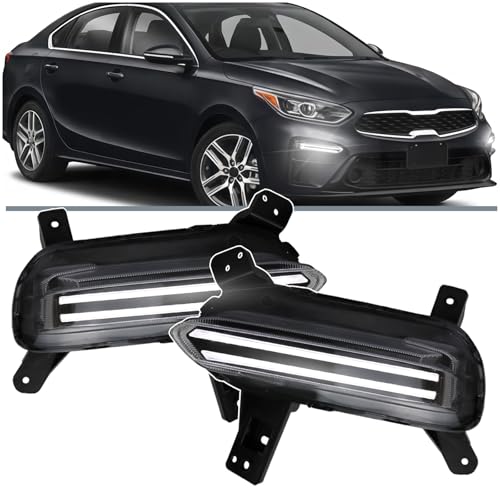
✥【OEM-Exact Fitment】Upgrade Full LED Front Bumper Fog Headlight Assembly Kit for Kia Forte 2019-2021. Full LED Conversion 6000K White DRL + Dynamic Amber Sequential Turn Signals. (NOTE: For Kia Forte GT Trim: In case the plug-and-play interface is incompatible with your GT version vehicle, please disconnect it by cutting and then manually connect the turn signal. This step is necessary. Additionally, use cable ties to fasten the resistor accessories onto the vehicle to avoid detachment caused by high temperatures.)

▶️ Easy to Install Replacement for the Stock Unit

EXACT OEM REPLACEMENT: Specifically designed for 2022-2024 Kia Forte FE, LX, and LXS trims. Replaces OE part 92101-M7500 92102-M7500 KI2502254 KI2503254
Preparing Your Vehicle for Bulb Access
Before accessing the daytime running light bulbs on your Kia Forte, you’ll establish a secure working environment that prioritizes both safety and efficiency. Park on a flat surface, engage the parking brake, and remove the ignition key. Allow hot components to cool completely before beginning work. Jack the vehicle using manufacturer-specified points and support it with jack stands—never rely solely on the jack. Place wheel chocks behind rear wheels for additional vehicle safety.
Remove the plastic splash guard beneath the front bumper using appropriate trim tools to prevent damage. Locate the DRL housing and clean any debris from the area. Disconnect the negative battery terminal to prevent electrical shorts. When selecting replacement bulbs, consider factors such as brightness, color temperature, and lifespan to ensure optimal daytime running light performance. Wear gloves during bulb maintenance to avoid transferring skin oils to replacement bulbs, which compromises longevity and performance. Refer to your Kia owner’s manual for specific replacement instructions to ensure you follow the correct procedures for your vehicle’s model year.
Accessing the Daytime Running Light Housing
With the vehicle secured and the battery disconnected, you’ll gain access to the DRL housing by removing the underbody cover or wheel well liner. Depending on your Forte model, access methods vary—some require underbody panel removal, while others necessitate partial wheel well liner detachment. Remove plastic clips, screws, or bolts securing these components, taking care to avoid damage. Clear debris around the access area for easier component handling.
The DRL housing integrates within the front headlight assembly near the bumper’s lower edge. Locate the housing by reaching up behind the bumper from underneath or through the wheel well. Remove any protective cover plate sealing the housing. Housing safety requires maintaining proper lighting and workspace organization. Unfasten 3 to 4 retaining screws or release locking tabs to free the housing. Track all fasteners for reassembly. A Phillips screwdriver will be necessary to remove the screws holding the daytime running light housing in place. Proper handling during installation, such as avoiding touching the bulb glass, helps ensure longevity and optimal performance of your replacement DRL bulbs.
Removing the Old DRL Bulb Safely
Once you’ve exposed the DRL housing and removed its protective cover, prioritize safety measures before extracting the old bulb. Confirm the vehicle is off with keys removed to prevent electrical hazards. Allow adequate cooling time if the DRL was recently operational, as hot bulbs cause burns. Use protective gloves or a clean cloth when handling to prevent oil contamination, which greatly reduces bulb lifespan. Following safety protocols, firmly grasp the bulb base, push downward gently, then twist counterclockwise to release from the socket. Avoid excessive force that risks socket damage or bulb breakage. Carefully pull the bulb straight out while keeping fingers away from the glass surface. Inspect the socket and wiring for corrosion or damage before proceeding with replacement. DRLs are typically the first bulbs to burn out because they activate automatically whenever the vehicle is in drive, resulting in significantly more usage hours than other vehicle lights. Understanding brightness levels and color temperatures can help you select a replacement DRL that matches your vehicle’s specifications and enhances visibility.
Installing the New Daytime Running Light Bulb
The new bulb’s proper installation begins with careful alignment to guarantee secure mounting and ideal electrical contact. Align the bulb with the groove inside the socket, ensuring proper orientation before proceeding. This bulb alignment prevents damage to both the bulb and housing during insertion.
Execute the seating technique by pushing the bulb gently but firmly until it’s fully seated within the socket groove. You’ll feel resistance once the bulb reaches its proper depth. Twist the bulb clockwise approximately one quarter turn to lock it securely into place.
Verify the bulb’s stability by checking for any looseness or improper positioning. Reposition the light housing if necessary, avoiding force on components. Double-check connections before proceeding to testing procedures to confirm successful installation. Ensure your replacement bulb meets legal requirements for road use in your area. When upgrading to LED bulbs, you’ll benefit from increased energy efficiency compared to traditional halogen options.

Compatible with 2019-21 Kia Forte 4-Door FE L LX LXS Trims (Not for GT EX XLS Trims with projector trims)

(Set of 2 Bulbs) 54SMD 3014 & 3SMD 3030 high brightness chips per bulb, Working Voltage: 9v-30v (fit 12V, 24V vehicles).

Exceptional 600% Brightness: h16 led fog light bulb illuminate the road with 12,000 lumens of bright white light (6500K), providing 600% more brightness than standard bulbs. Ideal for challenging weather conditions like fog, rain, and snow
Reassembling the Wheel Well and Protective Covers
After successfully installing the new daytime running light bulb, you’ll need to restore all protective components in reverse order of removal. Begin with the front splash shield beneath the bumper, aligning all mounting points systematically. Insert clips carefully by fitting the main body first, then pushing the center pin to lock. Secure screws firmly but avoid over-tightening to prevent cracking plastic components.
For wheel well maintenance, position the liner at the proper angle to engage all retaining clips. Confirm wiring harnesses face the correct orientation—typically straight down—before securing. Insert clips before tightening screws to hold edges properly. When reconnecting components, ensure all color temperature settings and lighting systems match your vehicle’s specifications for consistent daytime visibility.
Complete protective cover installation by checking for gaps between covers and body panels. Gently press various sections to verify they’re secure and won’t shift during vehicle operation. Take this opportunity to inspect your brake light functionality to ensure all safety systems are operating properly.
Testing Your New Daytime Running Lights
Before completing your installation work, two critical verification steps confirm proper daytime running light functionality and system integrity. Start the engine and shift into drive or neutral to activate the DRLs. Have an assistant visually confirm illumination while you remain in the driver’s seat. Perform a brightness comparison between left and right bulbs to detect dimness discrepancies from bulb aging or improper installation. Verify no dashboard warning lights appear after activation. Using testing methods that include multimeter voltage checks at the socket guarantees proper electrical delivery. Inspect the dedicated DRL fuse if lights fail to illuminate. Check bulb housing temperature after several minutes of operation—excessive heat indicates potential issues. When accessing the bulb housing, ensure you wear gloves to avoid oil contamination that could damage the components. Ensure the ambient light sensor remains uncovered, as obstructions can prevent DRLs from activating properly. Modern LED headlights with integrated DRL units provide improved visibility and enhanced safety compared to traditional bulbs. Confirm DRLs deactivate correctly when headlights engage, completing your installation verification.

Superior Visibility in Bad Weather: Equipped with 54 cutting-edge LED chips and enhanced top convex lens, the F1 Series H11 LED Fog Light Bulb provides 360° illumination, projecting 400% upgraded light over greater distances with precision. H11 fog light bulb led focused lights ensures safe and comfortable visibility during driving in rainy and foggy conditions

[Precisely Fit] This light socket harness fits for Kia Forte 2019 2020 2021; OE Number:92164M7050/92164-M7050/4F0-941-669
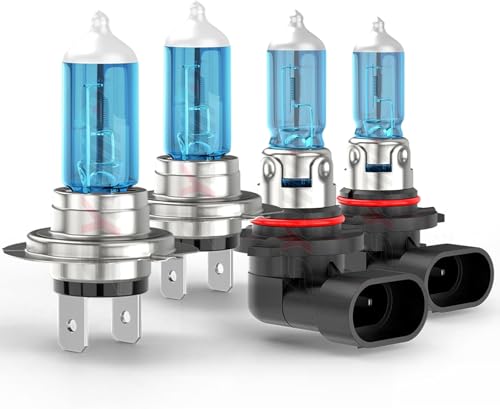
Fit for 99% of vehicles - SYJIIP Halogen headlamp are close to the wattage of the stock halogen headlamp bulb, which can reduce the occurrence of CANBUS problems, avoid erroneous and flickering. As long as your stock light bulb model is the same as ours, then SYJIIP's light bulb will be suitable for your car.
Upgrading to LED Daytime Running Lights
Upgrading your Kia Forte’s halogen daytime running lights to LED technology delivers substantial improvements in visibility, energy efficiency, and component longevity. LED benefits include 90% less power consumption, 25,000+ hour lifespans versus 1,000-2,000 for halogens, and brighter white light output for enhanced road safety.
Installation challenges require careful attention to socket compatibility—verify your vehicle uses 7506 or 7528 fittings before purchase. You’ll need to match polarity markings during installation to prevent malfunction. Most LED replacements require load resistors or integrated adapters to eliminate dashboard error warnings caused by reduced power draw. Consider the color temperature of your LED bulbs to ensure they meet legal requirements for daytime visibility. When installing new bulbs, avoid touching the glass part with your fingers to prevent oil transfer that can reduce bulb lifespan. Confirm compatibility with your specific model year, as bulb specifications vary between generations. Access typically requires removing wheel well liners using socket wrenches and pry tools. Disconnect your battery before beginning work to prevent electrical shorts. Proper wire management and grounding ensures reliable long-term operation of your new LED daytime running lights.

Non-polarity. Can be used for brake lights, tail lights, stop lights, parking light, daytime running light, etc. Some sensitive vehicles will meet canbus issue after installing, load resistors or flasher relay will be required to solve these issues, you can contact us through Amazon Buyer Message to get help and solutions

【High-power Light Source】: Equipped with a high-power LED light source, this car daytime running light features high brightness, low power consumption, long lifespan, and excellent visibility, significantly enhancing driving safety during daytime.

Fitment: Fog light compatible with forte 2019 2020, replacement for 86595M7010/86596M7010/92304M7000/92303M7000/KI1039135/KI1039135/KI2571101/KI2570101
Maintenance Tips for Long-Lasting DRL Performance
While proper installation forms the foundation of DRL functionality, consistent maintenance practices determine whether your Kia Forte’s daytime running lights deliver peak performance throughout their service life. Establish maintenance habits that include monthly inspections of DRL lenses for moisture accumulation, dirt buildup, and physical damage. Clean housing components regularly to prevent debris interference with light output. Verify electrical connector integrity by checking for corrosion or loose contacts that compromise bulb longevity. Monitor the DRL fuse condition and address dashboard warning indicators immediately. Handle bulbs with clean gloves during inspections to avoid oil transfer onto glass surfaces. Rinse DRL assemblies after winter driving to remove corrosive road salt. Replace bulbs proactively when brightness diminishes rather than waiting for complete failure, ensuring continuous superior visibility and safety compliance. Test DRL activation by engaging the parking brake with headlights off to verify the system responds correctly to vehicle settings.