To replace your Kia Optima headlight bulb, you’ll need to disconnect the negative battery terminal and allow the headlights to cool for 15-20 minutes. Pop the hood, twist off the plastic dust cap behind the assembly, and grasp the bulb retainer ring, rotating it counterclockwise to release the locking mechanism. Pull the old bulb straight out, then insert your H11 replacement bulb at a 45-degree angle without touching the glass, twisting clockwise until it locks. Model-specific variations and professional techniques can streamline this straightforward procedure.
Safety Precautions and Preparation
Before replacing your Kia Optima’s headlight bulb, you’ll need to establish a safe working environment. Position your vehicle on a flat surface, turn off the engine, and engage the parking brake. Verify the transmission’s in park position to verify vehicle stability before proceeding.
Disconnect the battery’s negative terminal first using the appropriate wrench. Loosen the terminal clamp and secure it away from the battery post to eliminate electrical shock risks.
Allow the headlights to cool for 15-20 minutes minimum, as hot halogen bulbs cause severe burns. Don safety gear including impact-resistant safety glasses to protect against potential glass shards from pressurized gas. Ensure clips and bolts are secured properly to maintain a weather-tight fit after reassembly.
When handling replacement bulbs, use clean gloves or cloth—never touch the glass directly, as skin oils create hotspots that’ll cause premature failure. Consider both halogen and LED upgrade options when selecting a replacement bulb to balance brightness, longevity, and your specific safety needs. Dim or burnt-out headlights pose serious safety risks and may violate nighttime driving regulations in your area.
Tools and Materials You’ll Need
Gathering the right components before you start prevents mid-project delays and reduces installation errors. You’ll need H11 bulbs for low beam replacement in your 2013 Kia Optima, or H7 XtraVision bulbs if specified. Halogen options remain the standard choice for most applications. Verify bulb base compatibility before purchase to prevent connector mismatches.
For protective gear, wear safety gloves to avoid transferring skin oils to the bulb glass and goggles to shield your eyes from potential debris. Basic hand tools include a screwdriver for accessing assembly components and a ratchet for removing tight brackets. Most socket disconnections require only your fingers. Consider upgrading to LED or HID conversions if you want improved visibility and longer-lasting bulbs beyond standard halogen options. Understanding brightness levels and longevity across different bulb technologies will help you select the best option for your driving conditions.
Keep the plastic dust cap accessible for reinstallation, and verify the retaining wire clips function properly to secure your new bulb. If you have a broken hood support, bring an ice scraper or similar tool to prop the hood open safely during the repair.
Accessing the Headlight Assembly
Once you’ve secured your workspace, pull the hood release lever located in the driver’s side footwell, then locate and pull the secondary safety latch positioned under the front edge of the hood. Lift the hood fully and engage the prop rod. Disconnect the negative battery terminal before proceeding with headlight access.
Your approach depends on model year and which side you’re servicing. Driver’s side typically allows direct bulb replacement—simply twist off the rear access cap counterclockwise. For passenger side or full assembly removal, you’ll need to create bumper flexibility. Remove the engine cover by releasing screw clips. Pop plastic clips along the fender edge and wheel well using a flathead screwdriver. Extract Phillips screws connecting the fender liner, then remove 10mm bolts securing the bumper to achieve necessary clearance for assembly removal. Locate and remove the bolt holding the bumper to the inner fender liner to further facilitate bumper movement.

【For KIA Optima Light Bulbs】The H11B lights are a set of Kia Optima 2006-2013,Kia Sportage 2011-2016,Kia Sorento 2007-2009,KIA Sedona 2007-2014,Kia Forte 2010-2013,Kia Rio 2012-2017,KIA Amanti 2007-2009,Kia Rondo 2007-2017,Ford Fiesta 2011-2013,this light kit perfectly addresses the compatibility issues we face when replacing their lights.NOTE:Please check whether the model matches before purchasing.

【Fitment】This Optima light bulbs combo fit for Kia Optima 2014 2015 (With Factory Halogen Version), including high beam ,low beam.(Customers are need to verify their vehicle model year before purchasing. If they have any questions about the light bulb, We are happy to serve you.)
Removing the Old Bulb
Grasp the bulb retainer ring at the rear of the headlight assembly and rotate it counterclockwise approximately 45 degrees until you feel the locking mechanism release. The bulb assembly will pop out, exposing the H11B halogen bulb. Pull the bulb straight out from the socket using your fingers—no tools required. If you’ve accessed the driver’s side, limited space may necessitate removing the battery for better reach, though small hands can manage without disassembly.
Inspect the removed bulb for burn marks or darkened glass, which indicates the end of its bulb lifespan. For maintenance tips, avoid touching the replacement bulb’s glass with bare fingers, as oil transfers reduce longevity. Consider your preferences regarding brightness levels and color temperature when evaluating replacement options. If the retainer ring proves difficult to turn, partially loosen it first for easier manipulation. Understanding the differences between halogen, LED, and HID upgrade options can help you select the best replacement bulb for your needs. Before beginning any work on the headlight system, turn off the electricity to ensure safe handling of all electrical components.

AUTOONE H11B LED bulbs adopt upgraded high-power LED chips, outputting 70000LM ultra-bright light with 6000K cool white that is 14 times brighter than stock halogen bulbs. The focused beam pattern provides wider and farther visibility on dark roads, reduces glare to oncoming traffic, and delivers crystal-clear daylight-like illumination to dramatically improve driving safety at night, in fog, rain, or other low-light conditions.

Clean Beam, No Glare – AUTOONE h11b led bulbs are engineered for a sharp, even beam pattern with zero dark spots, shadows, or blinding glare. You get the road visibility you need without annoying oncomingdrivers

Excellent Brightness: Equiped with filament from Austria, high purity quartz , and 28% more xenon , which lead to 20% more light output than original bulbs. The brightness even higher than Internation Standard.
Installing the New Bulb
Before inserting the replacement bulb, verify it matches the factory H11B specification (or your model’s equivalent) and handle it exclusively with lint-free gloves or clean cloth to prevent oil transfer from skin contact. Apply bulb alignment techniques by positioning the halogen bulb at a 45-degree angle, pushing firmly until seated, then twisting clockwise to lock. For LED installations, orient the heatsink upward and cooling fan downward before insertion. Secure the retaining wire by snapping it into the bulb’s groove, ensuring complete bracket closure without gaps. LED orientation adjustments require loosening the set screw with an Allen wrench to rotate beam patterns correctly. Install the driver module below or beside the socket, verify polarity alignment with factory harness, then reconnect all electrical connections securely before testing functionality. When selecting between halogen, LED, and HID options, consider the brightness levels and longevity differences to ensure optimal nighttime visibility for your vehicle. Inspect the socket area to check for any debris that could interfere with proper bulb seating or electrical contact. Always refer to model-specific instructions for your particular Kia model to ensure compatibility with halogen, LED, or HID headlight types.

Powerful brightness: Wideep H11B halogen car headlight lamps offers powerful illumination that will enable you to see the road clearly and improve your visibility, ensuring safer driving in all conditions.

REPLACEMENT HEADLIGHT BULB: A powerful and convenient single automotive light bulb, suitable for headlight replacement and restoration of your motorized vehicle
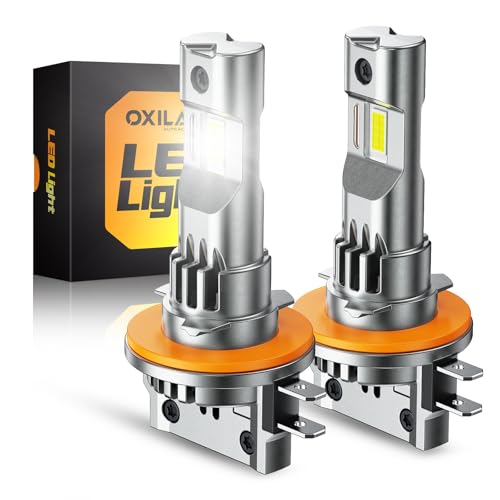
Enhanced Visibility - The OXILAM H11B LED Bulb features dual-sided chips and 6500K cool white light, providing a brightness increase of up to 10X. This ensures superior nighttime visibility, allowing drivers to see further and wider on the road
Model-Specific Tips for Kia Optima Years
Each Kia Optima generation presents distinct bulb access configurations that demand model-specific approaches. For 2011-2013 models, you’ll encounter H11B bulbs requiring counterclockwise removal; address passenger side challenges by removing the coolant reservoir using two 10mm bolts. The 2014-2015 LX/EX/SX trims demand pulling the hidden hood latch in the driver footwell before accessing tight driver-side spaces—small hands provide advantage here. On 2015-2020 models, troubleshooting tips include pressing the bracket on the bulb holder and sliding down for release; passenger side caps twist off easily, while driver side access may necessitate battery removal for adequate clearance. Model differences primarily affect obstruction locations: coolant reservoirs block 2011-2013 passenger sides, whereas electric motors restrict driver-side high beams across generations. Consulting legal considerations regarding bulb brightness ensures your replacement bulbs comply with safety standards across all model years.