To replace your Chevy Malibu headlight bulb, you’ll need to remove the entire headlight assembly. Start by disconnecting the battery and using a 10mm socket wrench to remove the mounting bolts. Carefully extract plastic clips with trim removal tools, then disconnect the wiring harness by pressing its release tab. Twist off the dust cover, remove the old bulb using the twist-lock or spring clip mechanism, and install the new bulb without touching its glass. Reconnect everything, test both beam settings, and adjust alignment as needed for complete headlight restoration details.
Gather Your Tools and Safety Equipment
Before replacing your Chevy Malibu’s headlight bulb, assemble the necessary tools to complete the job efficiently. Your tool selection should include a flathead screwdriver for prying clips, a ratchet with 10 mm socket for securing bolts, needle nose pliers for tight spaces, and extension bars for deep-set bolts. Include plastic trim remover tools to prevent scratching delicate components.
Follow essential safety protocols by wearing gloves to avoid transferring oils onto bulb glass and safety glasses to protect against debris. Confirm you’ve removed the ignition keys and the engine is completely off. Disconnect the battery before beginning any work on the headlight assembly. Set up a portable work light for adequate visibility inside the engine compartment. Wear protective clothing with long sleeves to guard against sharp edges. When selecting replacement bulbs, ensure they meet DOT compliance standards for safe operation. These preparations establish a safe, organized workspace for successful headlight replacement.

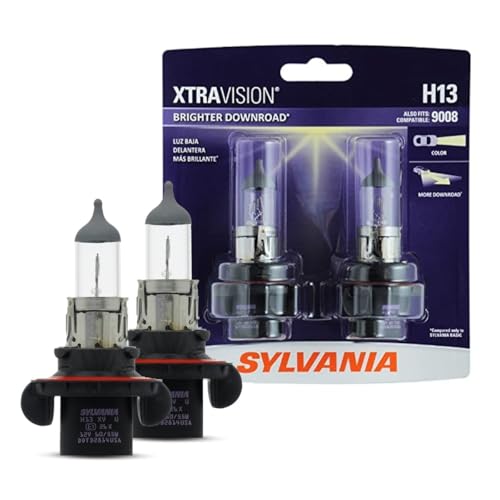
Part Number: 15930264, 645-539, 645539.

Head light socket wiring harness,Compatible with Chevrolet МаІіbu 2008 2009 2010 2011 2012, for your GM vehicle’s original factory component GM OE 15930264

RLB-HILON Headlamp Adjuster Kits including 4pcs screws and 4pcs nuts and 2pcs springs
Access the Headlight Assembly
To access the Chevy Malibu’s headlight assembly, you’ll work from the front end of the vehicle with the hood fully opened and propped. Locate the 10 mm bolts securing the assembly at the top edge—typically two to three per side. Remove these using a socket wrench with appropriate extensions for confined spaces. Next, identify plastic clips and retainers holding the assembly housing. Use plastic trim removal tools to prevent damage to these assembly materials, as they’re often brittle. The headlight design integrates tightly with the bumper and fender, requiring careful maneuvering. For 2016-2022 models, you may need to remove the passenger-side engine air filter box first. Before fully extracting the assembly, disconnect electrical connectors by pressing release tabs, ensuring you don’t damage wiring. After removing the bolts and clips, pull the bumper away from the headlight area to fully expose the assembly for bulb replacement. Once the assembly is accessible, you can evaluate the bulb type installed—whether standard halogen, LED, or HID—to ensure you select the correct replacement. Apply dielectric grease on connections to protect the electrical contacts from corrosion and ensure reliable performance.
Remove the Headlight Assembly
Start by removing the two 10 mm bolts securing the top edge of the headlight assembly, using your socket wrench with the appropriate extension to reach into the confined engine bay. Locate additional 10 mm bolts around the bumper area and wheel well that secure the assembly. Use your flathead screwdriver or plastic trim remover to carefully pry out push clips and retainers connecting the bumper to the headlight. Pull the bumper outward gently to create clearance. Once all fasteners are removed, lift the headlight assembly upward and away from its mounting points. Wiggle it gently if needed to free stubborn plastic tabs. Disconnect the wiring harness by pressing the release tab. To prevent moisture from entering the assembly after bulb replacement, ensure sealing components are intact before reassembling. Ensure your replacement bulb is compatible with the electrical system before installation. The entire removal process should take approximately 5-10 minutes per side with basic tools. Following proper headlight maintenance procedures and these assembly tips guarantees damage-free removal for successful bulb replacement.
Disconnect and Remove the Old Bulb
With the headlight assembly removed or accessible, locate the electrical connector plugged into the back of the bulb socket. Press the locking tab and pull the connector straight back using safe disconnection methods—never yank the wiring. Twist the dust cover counterclockwise to remove it, exposing the bulb base. Identify the retention mechanism: twist-lock or spring clip. Rotate the bulb counterclockwise or release the clip, then pull it straight out. Avoid touching the glass portion to prevent oil contamination. Inspect the old bulb for discoloration or damage. For bulb disposal tips, remember halogen bulbs require proper recycling—don’t toss them in regular trash. Place the old bulb in a protective container immediately to prevent breakage and potential injury. When selecting a replacement bulb, consider your vehicle’s specifications, as different models like the 2015 Chevy Traverse use H11 bulbs for low beams and other vehicles may have different requirements. If you’re considering upgrading to LED headlight technology, you’ll enjoy improved visibility and reduced power consumption compared to traditional halogen bulbs.

Fit for 99% of vehicles - SYJIIP Halogen headlamp are close to the wattage of the stock halogen headlamp bulb, which can reduce the occurrence of CANBUS problems, avoid erroneous and flickering. As long as your stock light bulb model is the same as ours, then SYJIIP's light bulb will be suitable for your car.

⭐【Super Bright H11 Bulbs】Our H11 headlight bulbs deliver over 1000LM brightness and a 3800K color temperature, ensuring optimal visibility in foggy and rainy conditions. Upgrade your automotive headlight bulbs for safer nighttime driving.

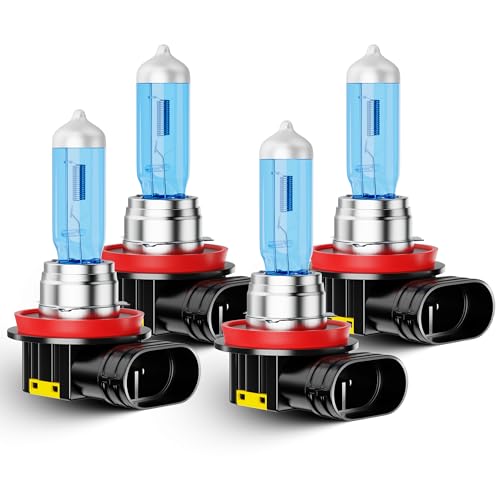
🚗【Compatibility Check Before Purchase】: Halogen Headlight Bulbs compatible with Chevrolet Chevy Malibu Sedan 4-Door (2016 2017 2018). The Halogen headlight bulb combo includes 9005 high beam and 9005 low beam bulbs headlights totaling 4 in the package.
Install the New Headlight Bulb
Grasp the new headlight bulb by its base—never the glass envelope—and orient it so the alignment tabs or notches match the corresponding slots in the headlight housing. Insert the bulb straight without forcing, then rotate clockwise a quarter to half turn until it locks with an audible click. Different bulb types (H11, 9005, 9006) have unique keying to prevent incorrect installation. Push the wiring harness connector onto the bulb base until fully seated—a loose connection causes flickering. Replace the protective dust cap by twisting or snapping it securely to prevent moisture ingress. To ensure proper fit and avoid potential issues, wearing gloves when handling the new bulb prevents contamination that can shorten its lifespan. Follow these installation tips: avoid touching the glass, verify the seal’s integrity, and test both low and high beams immediately to confirm proper operation before final reassembly.

Lights Dim Over Time, Replace In Pairs: Your lights are a pair, one is never turned on without the other. If one bulb burns out, the other isn't far behind. Replace your H11 XtraVision Halogen bulbs in pairs for optimum performance.

Easy Installation: 1:1 design, no external driver or connector required, plug and play

【Visual Enhancement】: The OKOENIEO H11 headlight bulb are 200% brighter than other halogen bulbs, providing drivers with a wider and farther field of vision. Offering a greater visibility, they allow drivers to spot deer, wildlife, falling rocks, or obstacles ahead of time, ensuring safer nighttime driving.
Reinstall the Headlight Assembly
Slide the headlight assembly back into the mounting cavity, aligning the metal tabs or locating pins with their corresponding slots on the vehicle frame. Confirm the lower pins seat properly in their mounting holes. Verify the rubber gasket sits flush against the body panel to prevent moisture intrusion.
Reconnect the electrical components by firmly plugging the wiring harness connector into the headlight assembly’s socket. Engage the locking tabs or securing clips to prevent disconnection. Test the connection by turning on your headlights briefly.
Insert the 10 mm mounting bolts and hand-thread them before tightening with a socket and ratchet. Don’t overtighten to avoid stripping plastic threads. Reinstall any push pins or clips removed during disassembly, ensuring they lock securely in place. Hook the blinkers back in place after ensuring the headlight assembly is properly aligned. Consider upgrading to LED or HID bulbs for improved visibility and longer lifespan compared to standard halogen options.
Secure All Bolts and Fasteners
Begin by inspecting all mounting points to guarantee you’ve accounted for every bolt, clip, and fastener removed during disassembly. Identify fastener types—most are 10 mm hex bolts, though Phillips head screws appear near air filter boxes. Insert bolts following reverse removal order to guarantee proper bolt alignment with the headlight assembly and bumper cover.
Use your 10 mm ratchet socket to tighten each bolt firmly, avoiding overtightening that strips threads or cracks plastic housings. Snap clips completely into place until you hear a definitive click, confirming they’re fully seated. Pay special attention to side bolts securing the bumper, as they directly affect headlight assembly fit and seal integrity. Verify bulb socket tabs align correctly and weather-tight gaskets seat properly before final closure.
Test the New Headlight Bulb
Before reconnecting the battery or closing the hood, verify the new bulb’s physical integrity through a careful visual inspection. Check the filament for breaks, examine the glass for cracks or moisture, and confirm no fingerprints or oils contaminate the surface. Confirm bulb compatibility by matching voltage and wattage specifications to your Malibu’s requirements. Consider the color temperature preferences that best suit your driving conditions and visibility needs. Use testing methods including multimeter continuity checks—probe the terminals to confirm circuit integrity with an audible beep. Measure resistance; near-zero indicates a functional filament while infinite resistance signals failure. Always ensure vehicle is off before performing any electrical testing with the multimeter. Once installed, turn the ignition to accessory mode and cycle through low and high beam settings. Observe consistent illumination without flickering. If the bulb doesn’t light, verify fuse integrity and connector cleanliness before concluding bulb defect.
Lights Dim Over Time, Replace In Pairs: Your lights are a pair, one is never turned on without the other. If one bulb burns out, the other isn't far behind. Replace your H11 XtraVision Halogen bulbs in pairs for optimum performance.

Lights Dim Over Time, Replace In Pairs: Your lights are a pair, one is never turned on without the other. If one bulb burns out, the other isn't far behind
【Package Include】: This product includes a pair of H11 High halogen light bulbs and a pair of H8/H9 low halogen light bulbs. If you have any questions? TXBILMOO customer support team is at your service
Check Beam Alignment and Function
After confirming the new bulb illuminates correctly, you’ll need to verify proper beam alignment to guarantee safe nighttime visibility without blinding oncoming traffic. Park on level ground 25 feet from a wall and mark the headlight center height with tape. The low beam cutoff should fall approximately 2 inches below this mark for ideal light accuracy. If beam adjustment is necessary, locate the vertical adjustment screw near the headlight assembly—typically requiring a 6mm Allen wrench or long Phillips screwdriver for Chevy Malibu models. Turn the screw clockwise to lower or counterclockwise to raise the beam. Note that most Malibu years only offer vertical adjustment. Verify the cutoff line remains sharp and properly positioned, preventing upward light spill while maintaining adequate road illumination. After achieving proper alignment, apply a protective coating or wax to your headlight lenses to maintain clarity and prevent yellowing over time. Consider upgrading to LED or HID bulbs for improved brightness levels and beam patterns compared to standard halogen options. When you’ve completed the adjustment, conduct a test drive to assess actual road visibility and confirm you’re not creating glare for oncoming drivers.

RLB-HILON Headlight Adjuster Kits including 8pcs Screws and 8pcs nuts and 4pcs Springs

✅ 【SUITABLE MODELS】Headlights Assembly Compatible with 2008 2009 2010 2011 2012 Chevy Malibu. ONLY Compatible with Factory Halogen Headlight Models. NOT Compatible with Classic Headlight Models. High Beam: H9; Low Beam: H11; signal light: 4157NA; Parking Light: 4157NA.

【FITMENT】Headlights Assembly Compatible with 2008 2009 2010 2011 2012 Chevy Malibu. NOT Compatible with Factory Xenon HID Headlight Models. ONLY Compatible with Factory Halogen Headlight Models. High Beam: H9; Low Beam: H11; signal light: 4157NA,Parking Light: 4157NA; Side Marker Light: 194. OEM Part Number: 25984637, 25984638,22897127, 22897126. Partslink Number: GM2502307, GM2503307
Perform Final Inspection and Cleanup
With the headlight beam properly aligned and functioning, you’ll need to complete three critical inspection steps to guarantee long-term reliability and safety. First, reinstall all protective covers and rubber gaskets, ensuring O-rings remain properly seated to maintain environmental sealing against moisture and dirt ingress. Second, perform a final functionality check by testing both high and low beams with the engine running, confirming electrical stability under load conditions. Inspect wiring harness connectors for secure connections without looseness. Third, clean surrounding surfaces to remove fingerprints and oil, then inspect the headlight housing for cracks or fogging. When handling the bulb assembly, avoid touching the glass with bare hands as oils from your skin can reduce bulb life. Tighten any loosened mounting hardware and securely refasten engine bay covers. Use a ratchet and Phillips screwdriver to ensure all fasteners are properly tightened and secure. Dispose of old bulbs in protective containers following local regulations, and clean your work area of debris.