To replace your Kia’s headlight, first disconnect the battery and allow bulbs to cool. Open the hood, locate the headlight assembly, and remove the protective cover by rotating counterclockwise. Disconnect the electrical connector, release the retaining clip, and extract the old bulb without touching the glass. Insert the compatible replacement bulb, secure it with the clip, reconnect the wiring until it clicks, and reinstall the cover. Test both low and high beams for proper function. This complete procedure explores bulb technologies, alignment techniques, and troubleshooting methods.
Gathering Tools and Safety Preparation
Before attempting any headlight replacement on your Kia, you’ll need to assemble the correct tools and establish a safe working environment. Proper tool selection includes a Phillips or flathead screwdriver, ratchet with 10mm and 12mm sockets, compatible replacement bulb, and safety gloves. Begin by parking on level ground with the engine off. Disconnect battery terminals to prevent electrical shorts during the procedure. If headlights were recently used, allow bulbs to cool completely before handling to avoid burns. Secure the hood using its support rod to prevent accidental closure. Work in a well-lit, dry area to maintain visibility and protect electrical components from moisture. Organize all tools and parts within reach, and store small fasteners in a container to prevent loss during disassembly. Use both hands when opening and propping up the hood to ensure it is securely positioned. For certain model years, you may need to remove obstructing components like the coolant reservoir or battery to access the headlight assembly more easily. Verify that your replacement bulb matches the factory bulb sizes specified for your vehicle model to ensure proper fit and performance. These safety measures guarantee efficient, hazard-free replacement.

▶️ Easy to Install Replacement for the Stock Unit
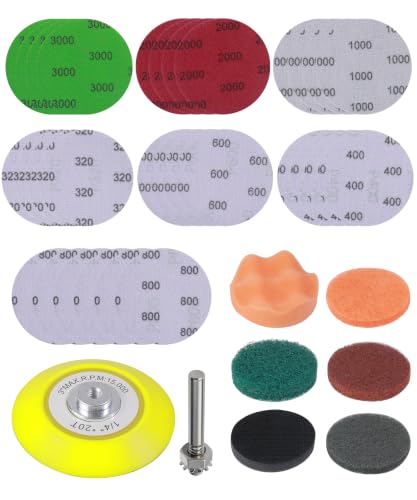
[Premium Materials]: This car headlight repair kit is made of high-quality alumina, silicon carbide, and ceramic materials, making it sturdy, durable, wear-resistant, and suitable for long-term use.

Packaging Details: You will receive two H7 female headlight connector harnesses. Suitable for daytime running lights/fog lights/halogen bulbs/high and low beam headlights, LEDs, SMD bulbs, etc., meeting various automotive lighting needs. We recommend checking the bulb model before ordering to ensure compatibility.
Identifying Your Headlight Bulb Type
Determining which headlight bulb your Kia requires prevents purchasing incompatible replacements and guarantees proper illumination performance. Consult your vehicle’s owner manual for exact bulb specifications, including type codes like H11B, H7, or D3S for HID systems. Newer Kia models may feature integrated LED assemblies rather than replaceable bulbs.
Inspect your current bulb by accessing the headlight assembly and examining markings on the bulb base. Common low beam types include H18, H19L, and H11B, while high beams often use H7 or LED variants. Check bulb compatibility charts on automotive parts websites, entering your Kia’s year, model, and trim level. Models like Sportage or Seltos may have multiple headlight configurations (Type A, Type B), affecting bulb requirements. Understanding halogen and LED technologies will help you recognize which bulb type your headlight assembly uses. Verify wattage specifications—typically 55W to 60W for halogens—to ascertain electrical system compatibility. Consider upgrade options such as HID or LED fog light bulbs for enhanced visibility in adverse weather conditions. Proper beam pattern ensures you maintain safe and effective nighttime visibility without blinding oncoming drivers.

[Ultra Bright White Light]: H11B Halogen headlight bulb, filled with 25% xenon which lead to 80% more light output than standard bulbs. 4300K warm white light provides perfect light pattern and excellent performance.

Halogen Assembly Upgrade: Engineered exclusively for halogen headlight housings. Not compatible with HID/Xenon or LED projector systems.

REPLACEMENT HEADLIGHT BULB: A powerful and convenient single automotive light bulb, suitable for headlight replacement and restoration of your motorized vehicle
Opening the Hood and Locating the Headlight Assembly
To access your Kia’s headlight assembly for bulb replacement, you’ll first need to release the hood mechanism located inside the vehicle’s cabin. Pull the hood release lever in the driver’s side footwell, then move to the vehicle’s front to disengage the secondary safety catch. Secure the hood with the support rod to guarantee stable working conditions.
Once open, identify the headlight housing positioned behind the front bumper within the engine bay. Note the assembly alignment and visible fasteners securing the unit—typically 10mm or 12mm bolts accessible from above. Locate the electrical connector and wiring harness at the rear of the assembly. Some models may require partial bumper removal for complete access to mounting hardware and bulb covers. For the 2010 Kia Sportage, the headlight assembly must be completely removed before accessing the bulb for replacement. To ensure consistent results across your vehicle, remember to replace bulbs in pairs so both headlights maintain equal brightness and performance. Before beginning the replacement process, confirm the compatibility of the bulb model with your specific vehicle to ensure proper installation and functionality.
Removing Protective Covers and Securing Components
With the headlight housing now visible in the engine bay, you’ll need to remove the protective cover at the rear of the assembly to access the bulb socket. Locate the cover’s securing clips or tabs and squeeze them gently while rotating counterclockwise. Clean any accumulated dirt around the cover before removal to prevent debris from entering the assembly.
Once the protective cover is detached, identify the main electrical connector at the bulb’s base. Press the release tab firmly and pull the connector straight back, avoiding lateral stress on the wiring. For protective cover removal on wheel well shields, remove screws with a 10 mm socket and carefully pry clips using plastic trim tools. If the harness clip is difficult to detach, use a flathead screwdriver to gently raise the clip and push down for disconnection. Understanding beam pattern quality ensures your replacement bulb maintains proper visibility and legal compliance once installed.
During reinstallation, verify all connectors click audibly when securing connectors, confirming proper electrical contact and weather sealing. Selecting bulbs with superior brightness output measured in lumens will significantly enhance your vehicle’s nighttime visibility and safety performance.

Non-Scratch Pry Tools: Made from durable nylon, this auto trim removal tool kit protects your car’s surfaces from scratches while offering strong leverage for trims, panels, and dashboards

COMPATIBILITY: Universal socket removal tool designed for H8, H9, H10, H11, H12, H13, 9005, 9006, and 9012 headlight and fog light bulbs

Easily remove trim clips and door clips without causing damage.for automotive repairs and installations.
Extracting the Old Headlight Bulb
Locate the headlight bulb inside the housing once you’ve removed the protective cover and disconnected the electrical connector from the previous steps. Identify the bulb securing mechanism—either a retaining clip, spring, or twist-lock socket. For clip retention, press the clip gently to release. If using a twist-lock socket, rotate counterclockwise approximately one-quarter turn to release. Grasp the bulb housing firmly without touching the glass, then wiggle gently and pull straight out from the socket. Verify all retaining mechanisms are released before applying force to prevent breakage. Compare the removed bulb with your replacement to verify bulb compatibility regarding type, size, and base configuration. Popular bulb options include halogen, LED, and HID conversion bulbs that offer varying levels of brightness and longevity. Handle halogen bulbs carefully, avoiding glass contact to prevent contamination. If needed, use pre-moistened alcohol wipes to clean any accidental fingerprints from the glass surface. Most headlight bulb replacements can be completed in approximately 15-20 minutes with basic tools and careful handling. Follow local guidelines for bulb disposal, especially if broken, to guarantee safe handling of glass shards.
Installing the Replacement Bulb
Before installing the replacement bulb, verify that it matches the removed component in type, wattage, and base configuration. This bulb compatibility check prevents electrical issues and guarantees proper fit. Handle the bulb by its plastic or metal base only—oils from skin contact can reduce halogen bulb lifespan. If you’ve touched the glass, clean it with an alcohol wipe before proceeding.
Align the bulb’s orientation tabs with the socket notches, then insert it straight without forcing. Once seated, secure it with the retaining clip or bracket. Reconnect the electrical connector firmly until it clicks, making certain the locking tab engages completely. Ensure the notches are positioned behind the metal part before tightening the cover. Consider replacing both bulbs in pairs to maintain consistent lighting performance across your vehicle’s headlights. After installation, perform electrical checks to confirm the headlight functions properly at both low and high-beam settings.
These installation tips assure stability: wiggle-test the secured bulb, replace dust covers, and verify operation by switching on your headlights before closing the hood.

Lights Dim Over Time, Replace In Pairs: Your lights are a pair, one is never turned on without the other. If one bulb burns out, the other isn't far behind. Replace your H7 XtraVision Halogen bulbs in pairs for optimum performance.

Lights Dim Over Time, Replace In Pairs: Your lights are a pair, one is never turned on without the other. If one bulb burns out, the other isn't far behind. Replace your 9003 XtraVision Halogen bulbs in pairs for optimum performance.

【Visual Enhancement】: The OKOENIEO H7 halogen bulbs are 200% brighter than other halogen bulbs, providing drivers with a wider and farther field of vision. Offering a greater visibility, they allow drivers to spot deer, wildlife, falling rocks, or obstacles ahead of time, ensuring safer nighttime driving.
Reassembling the Headlight Assembly
After securing the replacement bulb, properly reassembling the headlight assembly guarantees long-term functionality and prevents moisture damage. Begin by inspecting the assembly for defects or debris before installation. Align mounting tabs with their corresponding slots on the vehicle frame, inserting bottom tabs first to anchor the assembly. Don’t force components—slight adjustments guarantee flush alignment with adjacent body panels.
Hand-start all mounting bolts to prevent cross-threading, then tighten progressively using manufacturer-specified torque values. Reinstall plastic retainers securing the assembly perimeter. Restore each electrical connection by fully seating connectors until they click, applying dielectric grease if specified. Route wiring harnesses away from hot or moving parts, securing them with wire routing clips. Consider the beam pattern quality when verifying proper alignment to ensure optimal nighttime visibility and safety performance.
Verify headlight alignment appears correct before reinstalling gravel guards and bumper fasteners. Perform a final inspection confirming all fasteners are secure. Test all lights including the turn signal and side marker to ensure proper functionality after installation.
Testing and Adjusting Your New Headlights
Why invest time replacing your Kia’s headlight if misaligned beams compromise visibility and create hazards for other drivers? After installation, park on a level surface with properly inflated tires and position your vehicle 15 feet from a flat vertical reference plane. Mark the headlight center height using masking tape on the wall. Locate vertical and horizontal adjustment screws on each headlight assembly—typically requiring a Phillips head screwdriver, T60 Torx bit, or 13mm socket. Cover one headlight while adjusting the other to isolate beams. Employ proper aiming techniques: align the brightest part just below the horizontal reference line. Adjust screws for ideal beam symmetry, ensuring both headlights project evenly. Turn the adjustment screw clockwise to lower headlights if they’re sitting too high and causing annoyance to oncoming drivers. Test low and high beams in darkness, verifying illumination without creating glare for oncoming traffic. For optimal results, verify that both bulbs maintain consistent lighting output to ensure uniform brightness across your field of vision.
Understanding Different Bulb Technologies
Selecting the right headlight bulb technology for your Kia requires understanding the distinct characteristics of halogen, HID, and LED systems. Halogen advantages include low cost, simple replacement procedures, and direct socket compatibility with most Kia models using H7, 9005, 9006, or H11 sizes. However, bulb lifespan considerations reveal halogens last only 450–1,000 hours compared to HID’s 2,000 hours and LED’s 10,000+ hours. HID systems produce brighter, white light at 4,300K–6,500K but require ballasts and proper beam alignment to prevent glare. LED technology offers superior energy efficiency, minimal heat output, and extended longevity, though you’ll need CANbus adapters or anti-flicker modules for certain Kia vehicles. When consulting bulb size charts for Kia Forte models, verify that you’re referencing original factory OEM specifications rather than aftermarket alternatives that may differ. Top-rated replacement bulbs from manufacturers like Sylvania, Philips, and GE offer varying performance characteristics and price points to suit different budgets and preferences. Color temperature ranges from halogen’s warm 3,200K to LED’s cooler 6,500K, directly affecting visibility and appearance.

[1000% Increased Brightness Output] The AUXITO H7 bulb boasts an impressive 10 times the brightness of standard units, delivering a stunning 6000K cool white spectrum with an astounding 60,000 lumens for superior road visibility and hazard detection

AUTOONE H7 LED bulbs adopt premium high-power LED chips, providing 1200% brightness enhancement and 60000LM high-lumen output. 6000K cool white light brings crystal-clear road illumination, effectively improves visibility in low-light conditions. The focused beam pattern offers wider and farther view without glare, greatly enhancing driving safety at night.

Worry-Free Fanless Cooling: Fanless H7 LED design means no fan failure—stable light output, safer long-term use