To replace your 2012 Ram 1500’s headlight bulb, you’ll need to disconnect the battery, remove six plastic rivets from the radiator cover, then extract four grille bolts with an 8mm socket. Pull the grille forward, unbolt the headlight assembly with a 10mm socket, and disconnect the power connectors. Access the bulb by removing the dust cover, replace it with an H11 (low beam) or 9005 (high beam) without touching the glass, then reassemble everything. The sections below provide detailed specifications and alignment procedures to guarantee peak performance.
Tools and Materials Needed
Replacing a headlight bulb on your Ram 1500 requires three categories of tools: wrenches and sockets for removing fasteners, pry tools for accessing the assembly, and protective equipment to handle the bulb safely.
For fastener removal, you’ll need a 10mm socket with ratchet for lower bolts, an 8mm socket for grille components, and socket extensions reaching approximately 12 inches for tight areas. Essential materials include a trim tool set for plastic rivets, a flathead screwdriver for wire connectors, and a fork tool for mudguard fasteners. A magnet for bolt retrieval can make the job easier when working in tight spaces.
Handle replacement bulbs—H11 for low beam, 9005 for high beam—wearing gloves to prevent skin oils from contaminating the glass. Tool organization guarantees efficient workflow. Include safety glasses, wheel chocks, rubbing alcohol with clean cloth, and a rubber gasket for reassembly.

Durable CR-V with Reinforced Walls:Our CR-V sockets deliver unparalleled reliability and safety by fundamentally eliminating the bursting risk common in thin-walled carbon steel models. This is achieved through the powerful synergy of superior chrome-vanadium steel and a robust, thickened inner wall design.

SMALL BUT ENOUGH FOR YOU - Mini socket set Includes 10 Cr-V 1/4" Metric Sockets 4mm, 5mm, 6mm, 7mm, 8mm, 9mm, 10mm, 11mm, 12mm, 13mm on 10 collecting holders, each socket is labeled with the size which makes organizing easy. 1pcs 1/4" 24-teeth ratchet handle; 1pcs 4'' Extension bars.

DURABLE CR-V STEEL: Made of forged and heat-treated chrome vanadium steel for lasting strength and extra service life. Polished and chrome plated finish provides strong corrosion resistance, grease or stain can easily cleaned on it. Lettering marks are convenient for you to identify 10mm wrench quickly.
Safety Precautions and Preparation
Before beginning any work on your Ram 1500’s headlight assembly, verify the vehicle is parked on level ground with the parking brake fully engaged and wheel chocks positioned behind the rear tires. Disconnect the negative battery terminal to prevent electrical shorts and accidental activation. Ascertain the engine and headlight components have cooled completely to avoid burns from hot surfaces or HID ballasts.
Wear safety glasses and insulated gloves as essential safety gear to protect against debris, shattered glass, and electrical shock. Establish proper workspace organization by working in a well-lit, ventilated area with tools arranged on a clean, flat surface. Avoid touching halogen bulb glass with bare hands; skin oils create hot spots that cause premature failure. A weak battery or failing alternator can lead to inconsistent power delivery affecting your vehicle’s electrical systems. Proper installation techniques are critical for preventing lighting failures and ensuring long-term bulb performance. Keep replacement bulbs in original packaging until installation, and gather basic tools like a 10mm socket wrench before you begin working on the headlight assembly.
Understanding Bulb Types and Specifications
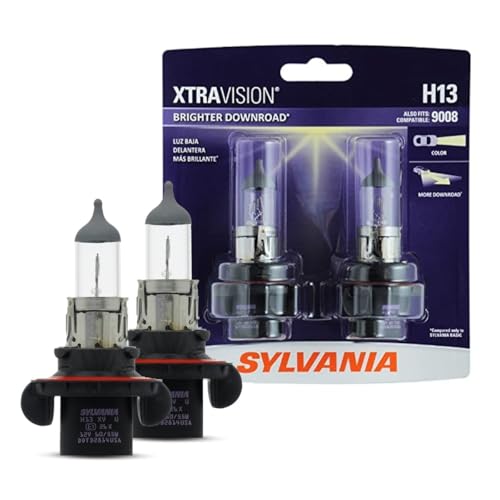
Why does your Ram 1500’s headlight configuration matter when selecting replacement bulbs? You’ll need to identify whether you have a 2-lamp or 4-lamp system first. Count your headlights: two lamps indicate a dual reflector setup using H13/9008 bulbs that handle both high and low beams. Four lamps mean you’ve got a quad reflector configuration with separate H11 low beams and 9005/HB3 high beams.
Understanding bulb types prevents costly errors. H13 bulbs operate at 55W-65W combined, while the quad setup uses 55W H11s for low beams. Check your dust cap markings or owner’s manual to confirm exact specifications. Specification differences between halogen and LED replacements matter too—LED upgrades require compact designs for proper dust cap clearance, especially in 4-lamp configurations. Modern LED replacement bulbs feature upgraded independent drivers that significantly extend operational lifespan compared to traditional halogen options. When evaluating aftermarket alternatives, consider how color temperature and brightness levels impact your overall driving visibility and safety on the road. Replacement bulbs must also comply with DOT regulations to ensure safe nighttime driving on your Ram 1500.
Lights Dim Over Time, Replace In Pairs: Your lights are a pair, one is never turned on without the other. If one bulb burns out, the other isn't far behind. Replace your H11 XtraVision Halogen bulbs in pairs for optimum performance.

【1000% Brighter Than Halogen】Engineered with 32 high-power LED chips, the AUXITO H13 bulb delivers 50,000 lumens per set – 1000% brighter than stock halogens. Drive with daytime clarity, even in total darkness
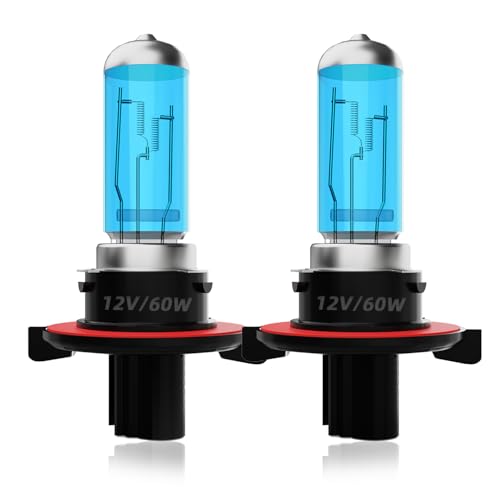
Fit For Dodge Ram: DMEPUGI high performance halogen light bulbs are perfectly fit for Dodge Ram 2006 2007 2008 2009 2010 2011 2012 Headlight Bulbs.Provide brighter and clearer lighting effects.The package includes 2 pcs halogen bulbs, suitable for high low beam light bulbs.
Removing the Headlight Assembly
Removing the headlight assembly requires methodical disassembly of several front-end components. Begin by turning off your engine and setting the parking brake. Pull the hood release and remove the plastic radiator cover by extracting six plastic rivets. Using an 8mm socket, remove four grille bolts, then pull the grille forward and pop out the upper pins. Remove the radiator cover bolts before sliding off the grille completely.
Next, use a 10mm socket to remove two upper headlight bolts and one lower bolt with an extension. Access the rear retaining clip by removing a plastic rivet from the wheel well liner with a trim tool. Push the rear tab upward to release the assembly. Swing the headlight open like a door, disconnect both power connectors, and extract the assembly. Before reassembling, apply dielectric grease on connections to protect the electrical components from corrosion and ensure optimal performance. To prevent shortened bulb life, avoid touching the glass of any halogen bulbs you may be handling during the process. The new headlight assembly includes all bulbs, eliminating the need to transfer or purchase bulbs separately. This provides full access for assembly cleaning and headlight adjustment procedures.

Vehicle Compatibility - Headlights assembly compatible with Dodge Ram 1500 2009-2010, Dodge Ram 2500 3500 2010, NOTE: Does NOT fit models with factory projector LED style headlights, Only fits new body style models for 2009.

【Return Reason Clarification】The "Frequently Returned" label is mainly due to customers accidentally ordering incompatible headlights for their vehicle model, not because of product defects. Before purchasing headlights, please confirm your vehicle model and ensure the main product image matches your existing headlights.

【Perfect OE Fitment】OEM#68001484AE,68001484AG.Partslink#CH2518135/CH2519135.Headlights assembly 100% perfect fitment for OE type 2009-2018 Dodge Ram 1500, 2010-2018 Dodge Ram 2500 3500, 2019-2022 Dodge Ram 1500 Classic. Only fit factory QUAD style halogen headlights.Does NOT fit 2010-2018 Dodge Ram modles with factory projector LED-style headlights; 2010-2012 Dodge Ram Laramie Longhorn; 2012 Dodge Ram SLT 、Laramie; 2013-2018 Dodge Ram SLT、Big Horn、Express、Lone Star、Laramie、Laramie Longhorn、Limited、Rebel; Low/High Beam: H11/HB3 9005(bulbs included), Turn Signal Light:3157 (bulbs not included)
Accessing and Removing the Old Bulb
With the headlight assembly now fully exposed, you’ll find the bulb access points at the rear of the housing. Disconnect the first power connector by pressing the tab and pulling firmly. For the second connector, push the red tab before pulling to release. Remove the turn signal bulb socket by turning it counterclockwise. To access the H11 low beam, unscrew the plastic cover counterclockwise. Before removing the bulb, spread or lift the retaining tabs on the electrical connector. Troubleshooting tips: If connectors resist, gently wiggle while pulling—never force them. Check bulb compatibility by matching your replacement to the H11 specification, ensuring DOT compliance for safe operation. Inspect the old bulb’s base for damage or corrosion, which indicates electrical issues requiring attention. Considering color temperature can also help you select a replacement that balances visibility with your vehicle’s aesthetics. Clean any touched glass surfaces with paper towels if necessary to remove oils and prevent premature bulb failure.

Wider Visibility: The fog lights emit white light at the same point as the bulb, replacing the dim bulb.

Crisp 6500K Cool White Light: Experience enhanced nighttime visibility with the pure 6500K cool white beam of the H11/H9 bulbs. This daylight-like color temperature improves contrast and clarity, helping H11 H9 light bulb users identify road signs, lane markings, and potential hazards more easily in various driving conditions

[Enhanced Visibility]forenner H11/H8/H9/H16 light bulb features a dual-sided CSP chip, 6500K color temperature for brighter, clearer illumination. This enhances visibility, allowing you to see further and wider while driving at night, ensuring safer travels after dark.
Installing the New Headlight Bulb
Proper bulb handling determines installation success and longevity. Never touch the glass surface with bare fingers—oil transfer shortens bulb life. Handle bulbs by their base or plastic coating only, using gloves or cloth. Clean any fingerprints with alcohol wipes before installation.
For H11 low beams, insert the bulb without touching glass, turn clockwise to lock, and reconnect the electrical connector until it clicks. With 9005 high beams, insert into the socket, turn clockwise, and firmly reattach the connector. For 3157A turn signals, slide the socket assembly into housing and rotate clockwise.
Verify bulb compatibility issues before installation to prevent electrical problems. To access bulbs more easily on your Ram 1500, consider turning the steering wheel to the appropriate side, similar to the adjustment techniques used on other vehicle models. LED headlight upgrades can offer improved nighttime visibility and longer lifespan if you decide to enhance your vehicle’s lighting system in the future. Secure all plastic covers by screwing clockwise. Test both beams for proper function. Dispose of old bulbs through proper disposal channels per local regulations.

Lights Dim Over Time, Replace In Pairs: Your lights are a pair, one is never turned on without the other. If one bulb burns out, the other isn't far behind. Replace your H11 XtraVision Halogen bulbs in pairs for optimum performance.

⭐【Super Bright H11 Bulbs】Our H11 headlight bulbs deliver over 1000LM brightness and a 3800K color temperature, ensuring optimal visibility in foggy and rainy conditions. Upgrade your automotive headlight bulbs for safer nighttime driving.
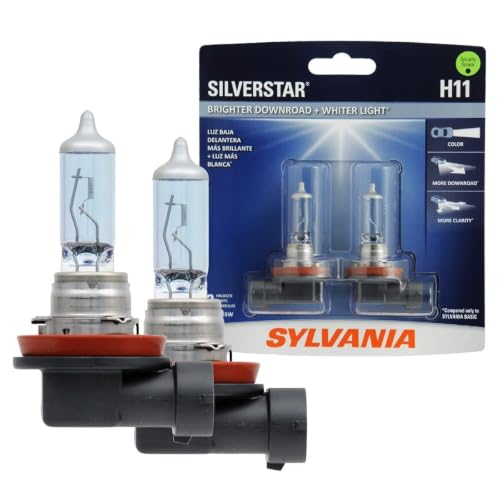
Lights Dim Over Time, Replace In Pairs: Your lights are a pair, one is never turned on without the other. If one bulb burns out, the other isn't far behind. Replace your H11 SilverStar Halogen bulbs in pairs for optimum performance.
Reinstalling the Headlight Assembly
Position the headlight assembly in its mounting pocket and align the locating tabs with their corresponding slots in the frame. Push the assembly firmly until the retaining tabs click into place. Before securing fasteners, reconnect the electrical connectors—align and push each until the retention tab clicks, then engage the secondary red lock if present. Gently pull each connector to verify engagement. Route the wiring harness without sharp bends and secure clips to factory mounting points.
Start and hand-thread the two 10 mm headlight retaining bolts, then tighten to a firm feel using your ratchet. When tightening fasteners, avoid over-torquing to prevent damage to plastic threads and ensure proper fit and function. Reinstall the grille and tighten the four 8 mm grille bolts. Understanding fastener types prevents damage—avoid over-torquing plastic threads. Verify connector engagement and check panel gaps for even fitment before final tightening. Once complete, refit the plastic cover and secure it with the 6 rivets to finish the operation.
Testing Your New Headlight
After securing the headlight assembly, you’ll need to verify the new bulb functions correctly before closing the hood. Start by activating your headlights to confirm immediate illumination in both low and high beam modes. Cycle the lights on and off several times to check for intermittent failures or flickering.
For thorough verification, perform voltage testing at the connector with your multimeter set to DC volts—you should see 11-14 volts with headlights on. If issues arise, conduct measuring resistance across the bulb terminals using ohms mode; a good halogen bulb reads 1-3 ohms, while an open circuit indicates failure. To prevent premature burnout, avoid touching the bulb glass with your bare fingers during installation or testing. When disconnecting the electrical connector, handle it carefully to avoid damage to the wiring harness.
Position your Ram 25 feet from a wall to assess beam pattern distribution and alignment. Confirm no dashboard warning lights activate, completing your installation verification. Use the lever in the driver-side footwell to close the hood securely once testing is complete.