To replace your Toyota Sienna’s headlight bulb, you’ll first need to identify your model year and trim level, as 2004-2010 and 2011-2020 generations use different bulb types (9006/9005 vs. H11). Access the assembly by removing 10mm bolts or push clips, then twist the bulb housing counterclockwise to release it. Disconnect the electrical connector, install the new bulb without touching the glass, and reverse the process. Always replace bulbs in pairs and test operation before reassembling—there’s more you should know about troubleshooting common issues.
Compatible Models and Bulb Specifications
Verify your production date and trim level—Limited/Premium editions use different front turn signals (7444NA). There’s a 1% chance of variation between production months.
LED upgrades deliver 300-400% improved light brightness compared to halogens, with 25000LM output per pair enhancing visibility. Operating within 9-13V specifications with fan dissipation guarantees ideal bulb longevity. Always replace headlight bulbs in pairs to maintain consistent illumination patterns. Understanding beam pattern quality ensures optimal performance and reduces common issues like glare. The plug-and-play installation features CAN-bus error-free design for seamless integration with your vehicle’s electrical system.
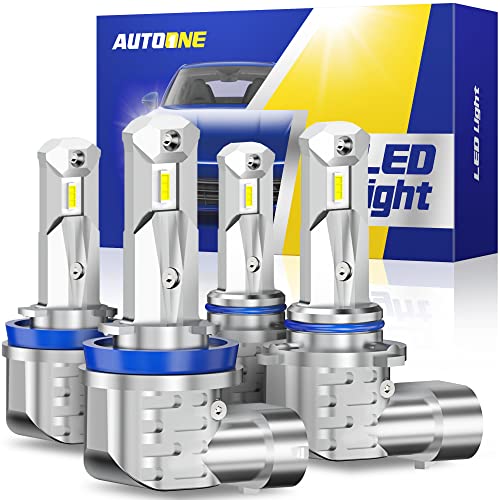
Huge Improvement in Visibility: AUTOONE H11 9005 led bulbs combo are equipped with high luminous efficacy csp chips. And 1:1 halogen bulbs’ beam pattern, spread out the light more to help in the side and front vision but no endangering others

900% Luminosity Enhancement - OXILAM 9005 9006 bulb delivers 9X the brightness of conventional halogens with 6500K pure white spectrum, dramatically improving road illumination and nighttime driving safety

【Compatible with Toyota Sienna 2011-2020】9005 is suitable for high beams,H11 for low beams,and H11 for fog lights. Fit for 2011 2012 2013 2014 2015 2016 2017 2018 2019 2020 Toyota Sienna car lights, totally pack of 6.
Tools and Materials You’ll Need
Successful Toyota Sienna headlight bulb replacement requires assembling the right combination of hand tools, electrical supplies, and safety equipment before you begin. Your tool selection should include a ratchet with 1/4″ or 3/8″ drive, socket set (8mm–10mm), Phillips and flathead screwdrivers, and plastic trim removal tools. You’ll need replacement bulbs matching OEM specifications (9006/9005/H11 depending on year), dielectric grease, and a multimeter for electrical diagnosis. Essential safety equipment includes mechanic gloves to prevent skin oils from contaminating halogen bulbs, safety glasses for eye protection, and a portable work light for illuminating tight spaces. Keep a small parts tray for fastener organization and guarantee your workspace has proper lighting. For corroded connections, have replacement pigtail connectors, heat-shrink tubing, and electrical tape on hand. Understanding beam pattern differences between bulb options can help you select a replacement that maintains proper lighting geometry for safe night driving. When handling new bulbs, avoid touching the glass surface with bare fingers to prevent oil contamination that can reduce bulb lifespan. Consider comparing different bulb types such as halogen, LED, and HID options to evaluate which offers the best brightness levels and longevity for your driving conditions.

Fit for 99% of vehicles - SYJIIP Halogen headlamp are close to the wattage of the stock halogen headlamp bulb, which can reduce the occurrence of CANBUS problems, avoid erroneous and flickering. As long as your stock light bulb model is the same as ours, then SYJIIP's light bulb will be suitable for your car.

[Enhanced Visibility] forenner H11/H8/H9/H16 9005/HB3 light bulb feature a dual-sided CSP chip with a 6500K color temperature, delivering brighter, clearer light. Whether you're driving down a dark country road or navigating late-night city streets, this enhanced visibility helps you see farther and wider—so you can feel more confident and secure behind the wheel after dark.
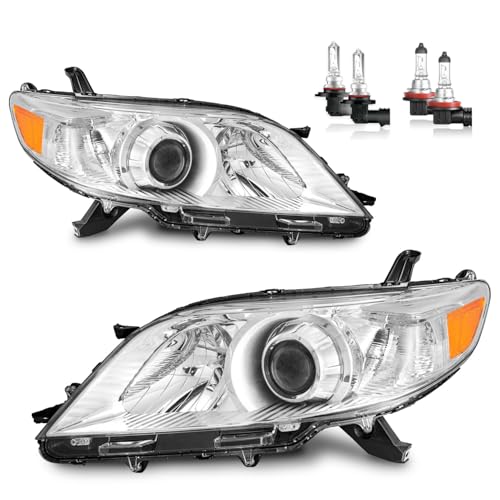
**OEM-Quality Assurance**: 𝐎𝐄𝐌# 8111008032 8115008032 𝐏𝐚𝐫𝐭𝐬𝐥𝐢𝐧𝐤# TO2503199 TO2502199. Meticulously tested for 100% compatibility, precisely modeled to fit your original car model: Compatible with 2011-2020 Toyota Sienna 4-Door 5-Door Van withFactory Halogen Headlights ONLY, 2011-2014 Sienna (submodel: Base, LE, Limited, XLE), 2013-2014 Sienna L, 2015-2020 Sienna (submodel: L, LE, Limited, XLE), 2018-2020 Sienna (submodel: Limited Premium, XLE Premium), 2019 Sienna CE, 2015-2018, 2020 Sienna Base *** NOT Compatible with Models w/ Factory HID/Xenon/LEDDRL Headlights ***. Kindly note, Only include Low/High beam bulbs.
Accessing the Headlight Assembly
Accessing your Sienna’s headlight assembly varies markedly between generation models, with 2004-2010 versions requiring a different approach than 2011-2020 models.
For 2004-2010 headlight access, you’ll locate two visible 10mm bolts from the top. Remove these using a 10mm socket, extension, and ratchet. The third bolt requires wheel well access—yank the plastic fender liner out and pop the friction-fit clips with a flathead screwdriver. The fourth hidden bolt sits behind the front bumper cover, requiring you to pull the cover back. Once all four fasteners are removed, pull the assembly forward.
For 2011-2020 models, begin assembly removal by removing push clips along the trim panel‘s back side using a trim tool, then remove the Phillips head screw. Tug the panel away to access wheel well mounting screws.
Removing the Old Bulb
With the headlight assembly now exposed, you’ll need to work from behind the housing to extract the bulb. Twist the bulb housing counterclockwise 1/8 turn until the tabs align with slots. Pull the bulb assembly straight out from the housing. Press the plastic tab on the electrical connector and pull it off the bulb firmly but carefully.
Critical safety precautions apply during headlight maintenance: never touch the bulb glass with bare hands, as skin oils create hot spots that shorten bulb life. If contact occurs, clean the glass with rubbing alcohol immediately. To ensure even illumination and maximize the lifespan of your headlights, consider replacing both bulbs simultaneously. Different bulb technologies such as halogen, LED, and HID offer varying levels of durability and performance for your vehicle.
For driver-side access, you may need to remove the fuse-box housing first by pressing the front tab and pulling upward. This extra step provides necessary clearance for proper bulb extraction. To begin the entire process, pop the hood to access the back of the headlight assembly.
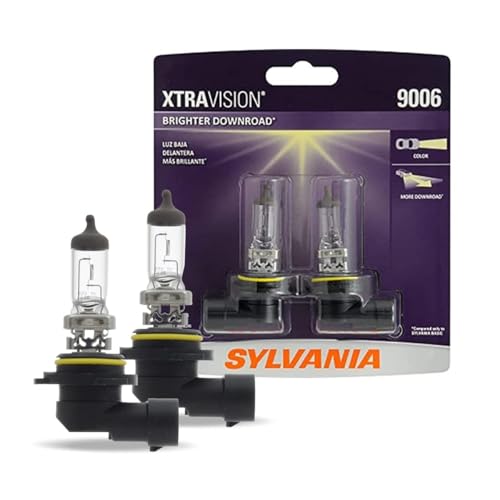
Lights Dim Over Time, Replace In Pairs: Your lights are a pair, one is never turned on without the other. If one bulb burns out, the other isn't far behind. Replace your 9006 XtraVision Halogen bulbs in pairs for optimum performance

⭐【Super Bright H11 Bulbs】Our H11 headlight bulbs deliver over 1000LM brightness and a 3800K color temperature, ensuring optimal visibility in foggy and rainy conditions. Upgrade your automotive headlight bulbs for safer nighttime driving.

Easy Installation: 1:1 design, no external driver or connector required, plug and play
Installing the New Bulb
Grasp the new bulb by its plastic base—never the glass—and validate it matches the OEM specification (typically H11 for 2011–2020 Sienna low beams). Align the bulb’s locating tabs with the housing cutouts; the wider tab must seat in the larger slot for proper bulb alignment. Insert the assembly at the same angle you removed the old one, pushing straight until tabs are fully seated. Rotate the housing clockwise approximately 1/8 turn until it locks. Align the electrical connector with the bulb base and push straight until the retaining tab clicks. Confirm secondary locking clips are fully engaged. Installation tips: verify the rubber dust boot seals completely around the bulb base to prevent moisture ingress, and validate retention springs or clips are re-engaged securely to maintain position. Ensure the bulb sits flush before completing the final twist to the right. Always check the beam pattern quality after installation to verify proper headlight alignment and optimal illumination for safe night driving. Confirm that your replacement bulb meets DOT regulations to ensure legal compliance and safe operation on public roads.

Lights Dim Over Time, Replace In Pairs: Your lights are a pair, one is never turned on without the other. If one bulb burns out, the other isn't far behind. Replace your H11 SilverStar Halogen bulbs in pairs for optimum performance.

【Visual Enhancement】: The OKOENIEO H11 headlight bulb are 200% brighter than other halogen bulbs, providing drivers with a wider and farther field of vision. Offering a greater visibility, they allow drivers to spot deer, wildlife, falling rocks, or obstacles ahead of time, ensuring safer nighttime driving.

Smooth Installation Design: Our H11/H9/H8 bulbs feature a slimmer profile thanks to a separate compact driver, making them as small as your original bulbs and allowing trouble-free installation even behind tight dust covers.
Testing and Final Checks
After securing the new bulb in its housing, you must verify proper installation through systematic checks before returning the vehicle to service. Enter the vehicle with the parking brake engaged and turn on the headlights. Test low beam (9006) and high beam (9005) separately, cycling them on/off multiple times to confirm consistent operation without flicker. Both driver and passenger sides should activate simultaneously with even illumination accuracy. Observe the beam pattern for proper distribution and focus, ensuring the high beam provides distinctly brighter output. Perform final adjustments by checking all electrical connections remain secure after initial testing. Verify the connector tab clicked properly and wire harness sits firmly on the bulb base. Close the hood only after confirming no loose wires or exposed connections exist. Test the installation in low-light conditions to validate adequate road illumination. When selecting replacement bulbs, consider LED versus halogen options for differences in brightness levels and longevity that may affect your long-term maintenance schedule. Ensure your bulbs meet DOT regulations to maintain legal compliance with vehicle safety standards. Consider replacing bulbs in pairs to maintain consistent lighting output on both sides of the vehicle.
Common Issues and Solutions
Even properly installed headlight bulbs sometimes fail to illuminate, requiring systematic troubleshooting to identify the root cause. Start by checking fuses 20, 21, and 25 in your interior fuse box, plus fuses 1, 4, 8, 9, 31, 32, and 35 in the engine compartment. Blown fuses show broken metal strips and must match original amperage ratings. If both headlights fail simultaneously, suspect fuse or relay issues before bulbs. Test the headlight relay in your fuse box—it’s frequently overlooked during DIY repairs. Inspect wiring connectors for corrosion or looseness, as damaged connections mimic bulb failures. Eight out of ten common failures trace to burned-out bulbs in Sienna models. When basic checks don’t resolve the problem, suspect headlight switch malfunction requiring professional diagnosis. Use a multimeter to check voltage at the headlight socket to confirm power is reaching the bulb. Understanding color temperature and brightness specifications can also help identify whether an incompatible aftermarket bulb is causing illumination issues. For most Sienna owners, selecting bulbs from reputable manufacturers with appropriate halogen or LED technology ensures compatibility and reliable performance.

Package Includes: A pair of high light bulbs, and a pair of low light bulbs. With our 6500K white light, creating a super-focused beam with no shadows, ensuring a wider and farther view at night for safe driving

Fit for 99% of vehicles - SYJIIP Halogen headlamp are close to the wattage of the stock halogen headlamp bulb, which can reduce the occurrence of CANBUS problems, avoid erroneous and flickering. As long as your stock light bulb model is the same as ours, then SYJIIP's light bulb will be suitable for your car.

🚗【Upgrade your Toyota Sienna 2011-2020 with this 4-pack of 24000 Lumens Bulbs combo】 The 9005 bulbs are compatible with high beams and h11 bulbs compatible with low beams compatible with Toyota Sienna 2011 2012 2013 2014 2015 2016 2017 2018 2019 2020 . These Bulbs combo are incredibly bright, but not excessively blinding to oncoming drivers.