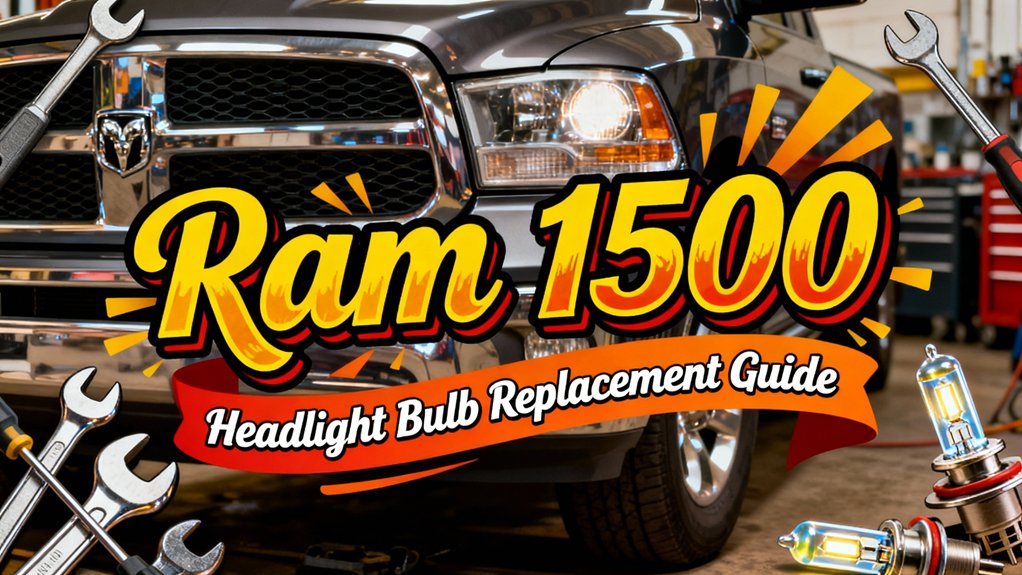
To replace your Ram 1500’s headlight bulb, you’ll need to remove the grille assembly using a 10mm socket wrench, then extract the headlight housing by disconnecting electrical connectors and removing retaining bolts. Access the bulb holder from the rear, rotate it counterclockwise, and carefully remove the old bulb without touching the glass. Install the new bulb by its base only, twist clockwise to secure, and reconnect all wiring. Test functionality before final reassembly, and our thorough guide below covers detailed troubleshooting procedures and alignment adjustments.
Gather Your Tools and Safety Preparations
A successful Ram 1500 headlight bulb replacement begins with assembling the correct tools and establishing a safe work environment. You’ll need a 10mm socket wrench for primary fasteners, an 8mm socket for grille components, and socket extensions for recessed bolts. Include a flathead screwdriver for electrical connectors and securing clips. Proper tool organization guarantees efficiency throughout the procedure.
Safety equipment is critical before starting work. Engage the parking brake and turn off the engine completely. Allow headlight components to cool to prevent burns. Wear nitrile gloves to avoid oil contamination on bulb glass and safety glasses for eye protection. Work on a flat, well-lit surface with wheel chocks if necessary. Keep rubbing alcohol and clean cloth available for removing accidental fingerprints from new bulbs. When handling bulbs, avoid touching the glass directly to prevent oils from damaging the bulb surface. If the rubber gasket appears compromised, apply vaseline to restore flexibility and ensure a proper seal.
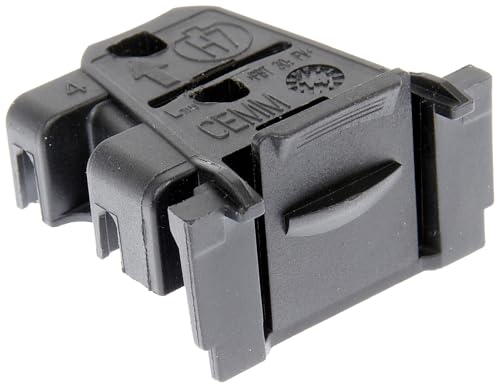
Improved design - this headlight socket has a reinforced locking tab that solidly secures the bulb, simplifies future replacements and helps ensure safer driving conditions

Halogen Assembly Upgrade: Engineered exclusively for halogen headlight housings. Not compatible with HID/Xenon or LED projector systems.
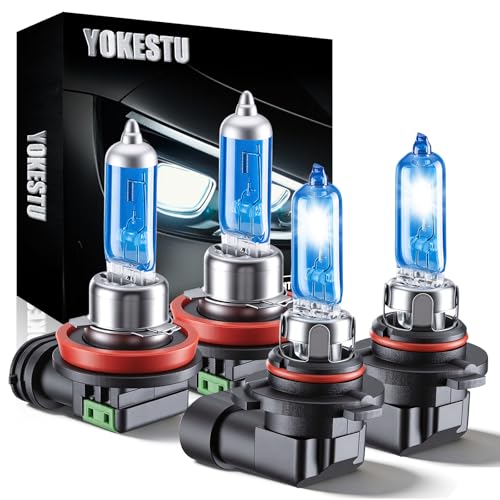
Fit For Ram 1500 2500 3500 (Without Projector) 2013-2018: This set include 2×high beam and 2×low beam halogen headlight bulbs, a total of 4 white light bulbs. Please check your vehicle model before purchasing.
Access and Remove the Headlight Assembly
Before replacing your Ram 1500’s headlight bulb, you’ll need to remove the headlight assembly to gain proper access to the bulb housing. Different headlight types and assembly layouts require specific removal procedures.
Start by releasing the hood latch and securing the hood open. Remove the grille assembly by extracting 4-8 bolts with a 10mm socket, then disconnect any wiring connectors. Locate the headlight retaining bolts—typically two 10mm bolts on top and sides of the housing. Remove plastic rivets near the fender area using a trim tool.
Press the release tab on electrical connectors at the assembly’s rear before disconnecting. Carefully pull the headlight assembly away from the vehicle body using gentle rocking motions to disengage remaining clips. Place it on a soft surface for bulb replacement. To prevent shortened bulb life, avoid touching the glass of halogen bulbs during installation. After removing the old bulb, twist the new one counterclockwise to secure it firmly in the housing. When installing the new assembly, verify that all connections are tight to prevent any electrical issues or rattling during operation.

【REPLACES PARTS】: The 2 pcs car headlamp mounting spacers replacement 42204,68222836AA,68222835AA
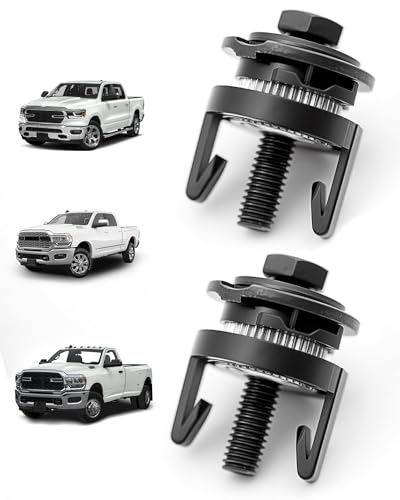
【Compatibility】Fits for 2013-2018 Ram 1500/2500/3500/4500/5500 pickup trucks.

Fitment: Compatible with 2002 2003 2004 2005 Dodge Ram 1500, 2003-2005 Dodge Ram 2500 3500
Extract the Old Headlight Bulb
With the headlight assembly removed and positioned on your work surface, you can now access the bulb holder at the rear of the housing. Rotate the outer ring counterclockwise to disengage and release the holder from the socket. Locate the electrical connector and press the locking tab, then pull straight off to prevent wire damage. Once disconnected, twist the bulb counterclockwise within the holder or release any retaining clips. Pull the bulb straight out by its base, avoiding glass contact—skin oils cause premature failure. For removal tips, use gloves or a clean cloth when handling. Different bulb types (commonly H11 for low beam) may have varying retention mechanisms. If resistance occurs, check for hidden clips before applying force. To maintain even lighting performance, consider replacing bulb pairs rather than replacing a single bulb. Clean the bulb glass with paper towels if you accidentally touch it during removal. If you need extra workspace to access the bulb holder, try turning the front wheels outward to create additional clearance.

【Visual Enhancement】: The OKOENIEO H11 headlight bulb are 200% brighter than other halogen bulbs, providing drivers with a wider and farther field of vision. Offering a greater visibility, they allow drivers to spot deer, wildlife, falling rocks, or obstacles ahead of time, ensuring safer nighttime driving.

⭐【Super Bright H11 Bulbs】Our H11 headlight bulbs deliver over 1000LM brightness and a 3800K color temperature, ensuring optimal visibility in foggy and rainy conditions. Upgrade your automotive headlight bulbs for safer nighttime driving.

Lights Dim Over Time, Replace In Pairs: Be sure to replace both H11 headlights at the same time for optimum performance. If one bulb burns out, the other isn't far behind. Replacing in pairs allows for premium visibility
Install the New Headlight Bulb
Handle the new bulb exclusively by its base to prevent skin oils from contaminating the glass envelope, which will cause premature failure and hot spots during operation. Align the bulb with the socket, ensuring proper orientation for different bulb types (H11, H1, 9005). Insert carefully without forcing, then twist clockwise until it locks securely in the housing. Verify the bulb doesn’t wiggle or move after installation. Firmly push the electrical connector onto the bulb base until you hear or feel it click into place. Check that retaining tabs engage completely. Position the protective cover over the assembly and twist clockwise to seal against moisture. To prevent moisture intrusion and ensure proper sealing, ensure sealing components remain intact after reassembly. Installation tips include using clean gloves throughout and confirming all connections are secure before testing operation. Consider the brightness levels measured in lumens when selecting your replacement bulb to ensure optimal visibility performance.

Lights Dim Over Time, Replace In Pairs: Your lights are a pair, one is never turned on without the other. If one bulb burns out, the other isn't far behind. Replace your 9007 XtraVision Halogen bulbs in pairs for optimum performance.

Fit for 99% of vehicles - SYJIIP Halogen headlamp are close to the wattage of the stock halogen headlamp bulb, which can reduce the occurrence of CANBUS problems, avoid erroneous and flickering. As long as your stock light bulb model is the same as ours, then SYJIIP's light bulb will be suitable for your car.

【900% Brighter - Newly Enhanced】SEALIGHT 9007/HB5 LED bulbs feature 24 high-performance chips, delivering up to 9 times the brightness of standard halogen bulbs. Upgrade your nighttime driving experience by replacing dim, yellow stock bulbs with SEALIGHT 9007/HB5 LED Bulbs fog lights, offering superior illumination and enhanced visibility with a crisp 6500K cool white light for optimal light transmission
Reassemble and Secure the Headlight Assembly
Once the new bulb is installed and the protective cover is secured, you’ll need to reposition the headlight assembly into its mounting location. Align the housing with the frame and slide it into place, guaranteeing retaining tabs engage correctly. Push the assembly flush against adjacent body panels to maintain proper headlight alignment and factory gaps. Reconnect the wiring harness by pressing each connector firmly onto its socket until you hear an audible click, confirming the lock engages. Ensure wiring protection by routing harnesses away from heat sources and moving components. Secure the assembly using a 10 mm socket wrench to tighten the three main hex-head mounting screws. After tightening the mounting screws, push the retaining tab to lock the headlight assembly in place. Reinstall grille bolts with an 8 mm socket, then fasten plastic rivets and retainers. Verify all mounting points are properly secured.

Durable CR-V with Reinforced Walls:Our CR-V sockets deliver unparalleled reliability and safety by fundamentally eliminating the bursting risk common in thin-walled carbon steel models. This is achieved through the powerful synergy of superior chrome-vanadium steel and a robust, thickened inner wall design.

SMALL BUT ENOUGH FOR YOU - Mini socket set Includes 10 Cr-V 1/4" Metric Sockets 4mm, 5mm, 6mm, 7mm, 8mm, 9mm, 10mm, 11mm, 12mm, 13mm on 10 collecting holders, each socket is labeled with the size which makes organizing easy. 1pcs 1/4" 24-teeth ratchet handle; 1pcs 4'' Extension bars.

DURABLE CR-V STEEL: Made of forged and heat-treated chrome vanadium steel for lasting strength and extra service life. Polished and chrome plated finish provides strong corrosion resistance, grease or stain can easily cleaned on it. Lettering marks are convenient for you to identify 10mm wrench quickly.
Test Your New Headlight Bulbs
After reassembling the headlight assembly, verify proper bulb operation through systematic electrical and visual testing. Turn on your headlights with the vehicle stationary and confirm both bulbs illuminate correctly. Use a multimeter in voltage mode to check that approximately 12V reaches the bulb socket, confirming adequate power supply. If voltage reads low or absent, inspect your fuses, relays, and wiring harness connections rather than replacing the bulb. Test electrical continuity by setting your multimeter to continuity mode—a beep indicates proper filament integrity. Avoid touching bulb glass with bare hands during handling, as oil contamination negatively impacts bulb lifespan. Consider testing different bulb types and brightness levels to ensure optimal visibility and performance for your specific driving conditions. For thorough verification, combine in-car observation with bench testing using a compatible power source to examine filament response under controlled conditions. Always wear protective gloves when handling electrical components to prevent injury and maintain safe working conditions.
Troubleshooting Tips and Best Practices
Even when bulbs illuminate during initial testing, specific issues may emerge during or after installation that require targeted troubleshooting. If headlights flicker or dim, inspect wiring harnesses for corrosion or loose connections indicating electrical issues. Verify you’ve installed manufacturer-recommended bulb types—using incorrect specifications causes premature failure. When bulbs repeatedly burn out, check for oil contamination from fingerprints; clean immediately with rubbing alcohol and lint-free cloth.
If assemblies won’t release, locate hidden bolts in fender wells or behind grilles. Check connector seating and vehicle fuses when bulbs don’t illuminate. Misaligned beam patterns require adjustment using manufacturer screws. Handle assemblies gently to prevent breaking clips or connectors. Always disconnect the battery before beginning work to prevent short circuits and electrical shock. Keep a magnet handy during disassembly to prevent dropped bolts from becoming lost in hard-to-reach areas of the engine bay. To maximize bulb lifespan and prevent premature wear, avoid touching the bulb glass directly when handling replacement bulbs. LED technology offers longer lifespan and lower energy consumption compared to traditional halogen bulbs, making it a worthwhile consideration for long-term reliability and performance.