To replace your headlight switch, first disconnect the negative battery cable and wear safety glasses. Remove the driver’s side trim panel using a plastic trim tool, then locate and release the switch’s retaining tabs with a screwdriver. Disconnect the electrical connector by pressing its locking tab. Test the new switch with a multimeter before installation, then secure it in place and reconnect all wiring using proper crimp connectors. The following sections provide detailed diagnostic procedures and professional-grade techniques for ensuring a successful repair.
Recognizing When Your Headlight Switch Needs Replacement
How do you know when a faulty headlight switch threatens your vehicle’s safety? Common symptoms include complete headlight failure when activating the switch, flickering or dimming lights from corroded contacts, and difficulty switching between low and high beam modes. You’ll notice headlights shutting off randomly during operation, often from degrading internal contacts causing circuit breaker trips. Physical inspection reveals burned, melted, or loose components from electrical overload.
These issues pose serious safety hazards during night driving or adverse weather conditions. Flickering progresses to total failure if left unaddressed. If you’re experiencing unstable electrical connections, uneven brightness between headlights, or the switch only functions in certain positions, immediate replacement is necessary. The headlight switch controls not only your headlights but also various other lights throughout your vehicle, making its proper function essential for comprehensive visibility. Possible solutions require confirming the switch malfunction through proper diagnosis before proceeding with replacement procedures.
Gathering the Necessary Tools and Safety Equipment
Before beginning your headlight switch replacement, assemble the required tools and safety equipment to guarantee efficient, hazard-free work. Essential tool types include flathead and Phillips-head screwdrivers, Torx driver set, and trim removal tools for accessing the steering column. You’ll need a digital multimeter for electrical diagnostics, plus sandpaper and Brasso for cleaning corroded contacts. Apply dielectric grease to protect connectors from future corrosion.
Critical safety precautions include wearing safety glasses and latex gloves throughout the procedure. Always disconnect the negative battery cable to disable the Supplemental Inflatable Restraint (SIR) system, then wait 10 minutes before proceeding. Verify your replacement switch’s compatibility through your vehicle’s owner’s manual, as specifications vary between models. When selecting a replacement switch, consider factors similar to those that affect headlight bulb performance, such as brightness output quality and durability specifications. Certain vehicles require specialized wrenches for switch mounting nuts. Most headlight switch replacements are straightforward tasks that require minimal tools or cost, making them accessible to DIY vehicle owners. Clear your workspace around the steering column for accessibility to ensure you have adequate room to maneuver during the replacement process.

Direct replacement - this headlight switch knob is designed to match the fit and function of the original control knob on specified vehicles

Wide Compatibility & Effortless Control: This Relay tester kit is designed for seamless compatibility with a wide range of vehicles, including Audi, BMW, Volkswagen, GM, Chrysler, and more. Our relay bypass kit also replaces multiple relay models (9038, 9036, 9037) and provides direct control over fuel pumps, window motors, headlights, and other components
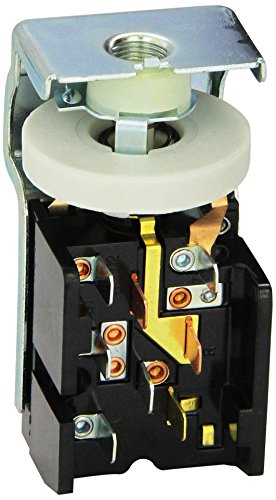
Standard Motor DS148T T-Series Headlight Switch (DS148T)
Removing the Old Headlight Switch
With your tools assembled and safety protocols in place, you’re ready to extract the failed headlight switch from your vehicle’s dashboard. Begin by disconnecting the battery ground cable, then adjust the steering column to its lowest position for maximum clearance. Remove the driver’s side trim panel by sliding it rearward with a plastic trim tool to prevent damage.
Locate the retaining tabs—typically one on top and two on bottom—and release them using a pocket screwdriver or small pick. Before full extraction, identify the electrical connector on the switch’s back side. Press down on the rectangular locking tab and slide the connector straight out. Pull the knob and stem while pressing the release button. Turn the ignition key to the “on” position and place your foot on the brake before shifting the gear to first, which will provide additional clearance for switch removal. Understanding switch durability and common issues helps diagnose whether replacement is truly necessary.

【YOUR VEHICLE NEEDS THIS】Perfectly match old led headlight H6054 H5054 H6054LL 6014 6052 6053 [Fused] [negative switched conversion] vehicles like Toyota, Jeep Pickup, Tacoma, Subaru, Mitsubishi, or Suzuki 7x6 5x7 led headlight harness.

Compatibility: 9038 replaces 9036 9037, suitable for most domestic, Japanese, Korean and German fuel pumps, window motors, headlight switches and other devices using automotive relays
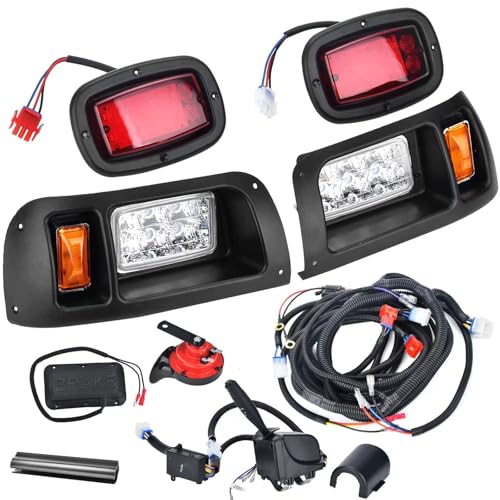
12V Headlight Taillight Kit with Turn Signal Wiring Compatible with Club Car DS Golf Carts 1993-up.For gas and electric models
Testing and Diagnosing the Electrical System
Proper electrical diagnosis prevents unnecessary part replacement and identifies the true failure point in your headlight circuit.
Begin with continuity testing by disconnecting the switch and setting your multimeter to continuity mode. Test between terminals in both positions—you’ll hear a beep when the circuit closes in the “on” position and infinite resistance when “off.”
Next, perform voltage testing with the switch installed. Measure voltage drop across the switch while activated; readings near supply voltage confirm proper function. Low or zero voltage indicates malfunction.
Inspect fuses for blown elements and test with your multimeter. Check relay coil resistance (50-120 ohms) on terminals 85/86. Verify 12V power at both fuse sides and relay terminals to isolate the fault location. Always check wiring integrity downstream from the switch to identify any frays or damage that could cause circuit failure.
Installing and Securing the New Headlight Switch
Once you’ve confirmed the headlight circuit fault lies with the switch itself, you can proceed with installation. Position the switch in the dash opening and secure it using provided hardware, guaranteeing proper alignment to prevent knob seating issues. Install wires into terminals per diagram specifications—connect battery input to terminal 1, terminal 2 to dash lights, terminals 4 and 5 to park and tail lights, and terminal 6 for dome light grounding. Use ring-style crimp connectors with 14-gauge minimum wire for secure connections. Following these mounting tips guarantees reliable operation. Perform connection checks with a multimeter to verify circuit integrity before reconnecting the battery ground cable. Install inline fuses on all circuits for protection, then test full switch rotation functions. Before finalizing the installation, inspect the wiring harness insulators to ensure they show no signs of melting or heat damage.

VIABRICO Wire : 14 gauge Copper Clad Aluminium wire, 100ft/30.5m each spool. 6 different colors (red, black, white, blue, green, yellow) totaling 600 feet. high mechanical strengthfeatures, flame retardant, anti-aging, acid and alkali resistance and dampproof.

Low Voltage Wire : 14/2 gauge black and red speaker wire is ideal for low voltage applications such as 12V/24V DC circuit connections, home or car speakers, home appliances, single color LED light strip, lamps, automotive, boat etc

Good Quality: Energeaster electrical wire is made of 14 AWG 100FT with red and black 2 conductors and high quality PVC jacket, good conductivity, high mechanical strengthfeatures, flame retardant, anti-aging, acid and alkali resistance and dampproof