To install halo headlights, first disconnect your battery and remove the factory headlight assembly by detaching retaining hardware and wiring harnesses. Preheat your oven to 215-240°F to soften the housing adhesive, then carefully separate the lens from the housing. Secure the halo rings inside using automotive-grade epoxy, then wire them to your preferred power source—typically the ignition or parking light circuit. Reassemble with fresh silicone sealer, reconnect everything, and test all functions. The sections below provide detailed guidance for each critical step.
Gathering Your Tools and Preparing Your Workspace
Installing halo headlights requires specific tools and careful workspace preparation to secure a safe, efficient modification process. You’ll need a Phillips-head screwdriver, flat-head pry tool, diagonal cutters, ratchet with sockets, and protective gloves. An oven is essential for softening headlight assembly adhesives during disassembly. Establish your workspace on a clean, well-lit, flat surface with adequate ventilation. Lay soft towels down to protect removed components from scratches. Tool organization is critical—arrange your implements systematically to prevent losing small parts during the multi-step installation. Workspace safety demands disconnecting your vehicle’s battery before beginning electrical work. Keep electrical tape, painter’s tape, and lint-free cleaning materials accessible. Have a fire extinguisher nearby when using heating equipment. Unlike traditional halogen bulbs, halo headlights provide enhanced visibility through integrated LED rings that improve nighttime driving safety. Proper headlight alignment ensures your new halo headlights illuminate the road effectively without creating glare for oncoming drivers. Ensure your work area is clean to maintain organization throughout the installation process. Proper preparation secures successful halo headlight installation.
[Compatible With]: Halogen to LED Headlight Adapter Conversion Wiring Harness Kit Compatible with Ford F-250 F-350 Super Duty Truck 2023 2024 6.7L 6.8L 7.3L V8. Note: Please refer to the details page below for detailed adaptation models and years.

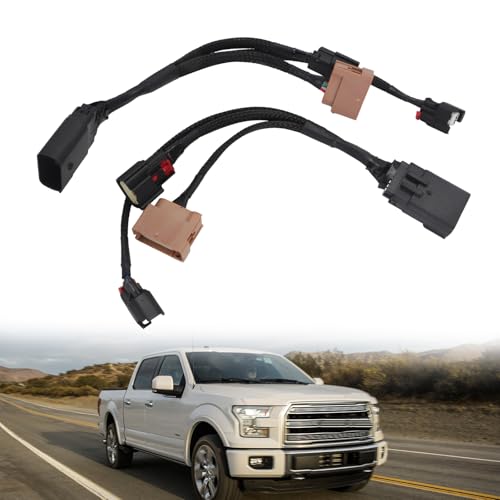
Package Include : A pair of high light bulbs, a pair of low light bulbs, and a pair of fog light bulbs. Fits for the 2015-2023 Ford F-150, ensuring a perfect fit and easy installation. (Please check your F150 models before purchasing)
![Auto Dynasty [Halogen Model] Factory Style Headlights Assembly and Tool Kits Compatible with Rio Rio5 06-08, Driver and Passenger Side, Black Housing Clear Corner](https://m.media-amazon.com/images/I/51qfvLWA5kL._SL500_.jpg)
Vehicle Compatibility - These headlights are compatible with Rio 2006-2008, Rio5 2006-2008, fits halogen headlights model Only.
Removing the Headlight Assembly
Removing the headlight assembly begins with locating all retaining hardware that secures the unit to your vehicle’s frame. Different headlight types and assembly variations require specific approaches, so consult your service manual first. Disconnect your battery before starting to prevent electrical hazards.
Use appropriate tools—socket wrenches, Torx drivers, or screwdrivers—to remove all bolts and screws from the top, sides, and behind the bumper. You may need to remove grills or splash shields for access. Once hardware’s removed, disconnect electrical connectors by pressing release tabs carefully. Twist and pull bulbs gently from their sockets. After installation, you’ll want to ensure your LED bulbs match the factory type to maintain proper reflector function and beam pattern. To maintain optimal light output over time, consider applying protective clear coat to prevent oxidation of the lens.
Support the assembly with one hand while detaching mounting clips with trim tools. Work slowly to avoid damaging paint or breaking plastic tabs. Place the removed assembly on a clean, stable surface. Inspect the surrounding components for damage before proceeding with the halo headlight installation.
Installing Halo Rings Inside the Housing
With the headlight assembly removed from your vehicle, you’ll now prepare the housing to accept the halo rings. Heat the housing in an oven at 215-240°F for 12-20 minutes to soften the factory adhesive. Using heat-resistant gloves, carefully pry the lens from the housing with flat blade screwdrivers, starting at the bottom corner. Remove residual sealant partially to aid resealing. After opening the housing, apply protective coating or wax to any exposed plastic surfaces to prevent oxidation and yellowing during the installation process.
For halo ring placement, test-fit inside the housing away from heat sources. Mark three equally spaced mounting points and drill pilot holes for picture wire securing. Thread 3-4 inch wire lengths through holes, wrapping tightly around the halo’s perimeter. Before proceeding with installation, check halos for functionality to ensure they operate correctly. Proper wiring harness connections will ensure your halo rings integrate seamlessly with your vehicle’s electrical system.
Alternatively, adhesive selection matters—use high-quality two-part epoxy or automotive-grade adhesive for permanent bonding. Combine methods for heavier rings requiring extra security.

【Excellent materials】The piston ring compressor tool set made of high quality manganese steel and durable iron, plier handles constructed with forged steel.
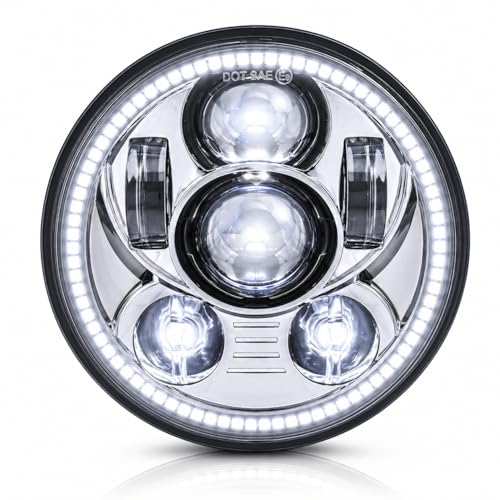
EAGLE LIGHTS PERFORMANCE - The Eagle Lights 8900 Series headlight provides 6X more light than the stock headlight unit. With many wide angle projection lenses, it illuminates the sides of the road by casting light where you need it, when you need it. The low beam stays on with the high beam, allowing you to see and be seen at all times.

Super unique H1 Bi-xenon xenon projector lens w/ DTM style square LED halo rings daytime running lights
Wiring the Halo Lights to Your Vehicle’s Electrical System
Once you’ve secured the halo rings inside the housing, you’ll need to connect them to your vehicle’s electrical system to complete the installation. Identify the halo harness wires: red (power), yellow (turn signal), and black (ground). Select your preferred power source—ignition for DRL operation or parking light circuit for legal compliance. Use proper wiring techniques by splicing into factory wires with T-taps or butt connectors, protecting connections with heat shrink tubing. Connect the ground wire to a clean, unpainted metal surface on the chassis for reliable operation. Install an inline fuse for circuit protection. Ensure your installation maintains DOT compliance to keep your vehicle street-legal and safe for all driving conditions. When upgrading to LED components, consider whether LED resistors may be necessary to prevent error codes and flickering issues. Secure all wiring with zip ties to prevent vibration damage. If you’re installing ColorSHIFT halos, connect them directly to the ColorSHIFT controller rather than to individual power sources. Test each function before final reassembly to guarantee proper operation.

【YOUR VEHICLE NEEDS THIS】Perfectly match old led headlight H6054 H5054 H6054LL 6014 6052 6053 [Fused] [negative switched conversion] vehicles like Toyota, Jeep Pickup, Tacoma, Subaru, Mitsubishi, or Suzuki 7x6 5x7 led headlight harness.
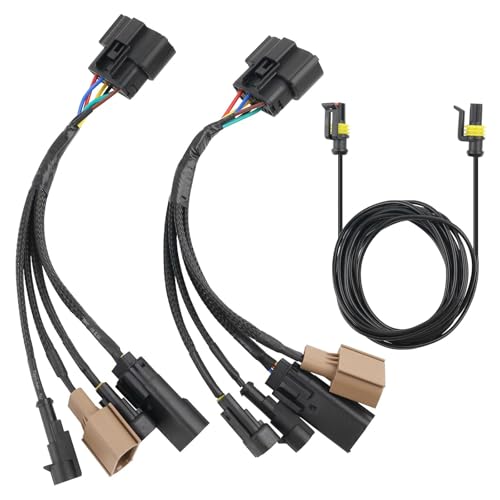
Item Type: 2 Pcs Headlight HID to Halogen adatper Wiring Harness Connector Pigtail Plug
Fitment:Specifically designed for Ford F-150 models 2015, 2016, and 2017.Convert your factory LED-equipped to use factory halogen headlights or aftermarket headlights with halogen-style plugs
Reassembling and Testing Your New Halo Headlights
After completing the electrical connections, preparing the headlight assembly for reassembly requires meticulous attention to cleanliness and sealing integrity. Wipe all internal surfaces with a lint-free cloth to prevent debris trapping. Reheat the adhesive using a heat gun until tacky, then apply silicone sealer around edges for enhanced water resistance—critical sealing techniques that prevent moisture ingress. Before final closure, inspect halo rings and bulbs for secure attachment.
Press the lens and housing together firmly, using tape or clips to maintain pressure during curing. Route wires through designated grommets to preserve seal integrity. Once cured, reinstall the assembly, securing mounting hardware per manufacturer specifications while avoiding excessive torque. When reinstalling the headlight, ensure the wire harness connector is properly plugged in, as the connector is designed to fit only one way.
Testing components before finalizing installation is essential. Connect the wiring and cycle all lighting functions, verifying halo ring illumination, beam pattern quality, and electrical stability. Check that your installation is compatible with your specific Civic model year to ensure optimal performance and prevent potential error codes or flickering issues.