
To replace your Kubota tractor’s headlight bulb, first disconnect the battery’s negative terminal and park on level ground. Use a flathead screwdriver to carefully pry back the rubber weather seal from the headlight assembly. Twist the spring-loaded plug counterclockwise to remove it, then pull out the old bulb. Grip the replacement bulb by its plastic base, align the tab with the socket groove, push in, and twist clockwise until locked. Reconnect the electrical plug and reseal the boot. The complete guide below covers model-specific bulb specifications and LED upgrade options.
Tools and Materials You’ll Need
Replacing a Kubota tractor headlight bulb requires minimal equipment, with a single flathead screwdriver serving as your primary tool. You won’t need screwdriver types beyond this basic implement to access the bulb retention mechanism behind the weather seal.
For replacement bulbs, you’ll need model-specific components. The L175, L185DT, and L1500 models require Kubota part 34150-3462 (12V 35W halogen). F/FZ/GF series mowers use part 76611-55190, while 108 models need part 38450-33870. B2150 and B5100 tractors utilize 15/15 watt bulbs. The 76611-55190 bulb is available for $15.21 and typically ships within 2-5 business days.
Aftermarket options from bulb brands like Prime Line offer cost-effective alternatives, available in 12V 25W or 35W configurations. LED light bars provide long-term upgrade paths. Verify your replacement matches the original bulb’s terminal configuration—either 2-pin or #8-32 screw connections.

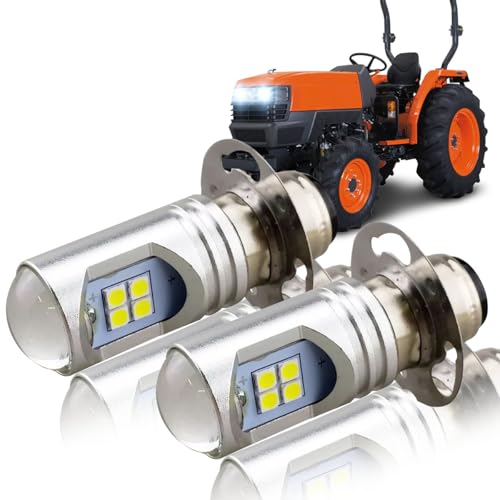
Compatible with Kubota/Deere Gator Lights: 881/886/894 Headlight bulbs used for ATV/UTV/Motorcycle/Tractor light bulbs Daytime Running Lights,Fog Lights,Turn Signal Lights for some vehicle.Please check whether the model matches before purchasing.


Safety Precautions and Preparation
Before you begin any headlight bulb replacement on your Kubota tractor, disconnect the battery’s negative terminal to eliminate electrical shock risks and prevent accidental short circuits. This critical step protects you throughout the entire procedure.
Prepare your work environment by parking the tractor on level, stable ground. Clean debris from around the headlight assembly to prevent contamination during disassembly. Photograph the wiring connections before disconnecting components—this reference simplifies reassembly.
Wear appropriate safety gear, including safety glasses and gloves. The glasses protect against debris, while gloves shield your hands from sharp edges and residual heat from recently used bulbs. Keep your work area clear and organized to prevent losing small components like screws or wire connectors during the repair process.
When handling Kubota-specific components, roll the rubber boot back carefully to avoid tearing. Note the bulb tab orientation—the dimple must align with the housing groove for proper installation.
Locating the Headlight Assembly
The headlight assembly on your Kubota tractor mounts to the right-hand side of the hood, secured by two screws that attach directly to a metal mounting bracket. You’ll find the assembly positioned for convenient access without removing the entire hood. Models like the L3240 and B7100 HST-D feature headlights on the front grille area’s hood sides.
Identify the assembly by locating the metal contacts where the housing meets the hood surface—these four contact points provide electrical grounding. You’ll notice the bulb features a nipple or dimple on top that matches housing grooves for proper assembly alignment. The rear of the housing includes a slot for bulb access, with the wiring harness connecting via a spring-loaded plug and factory disconnect option. The headlight uses a 12V/35/35 valve bulb that provides both high and low beam functions.


Part Number: 34150-34620 22112-40171 341503462 2211240171

Headlight Bulb Compatible with John Deere CH15208, Compatible with Yanmar 194262-53080, Compatible with Ford SBA385100690 SBA385120430 SBA485120100
Removing the Weather Seal
Once you’ve located the headlight assembly, you’ll need to access the weather seal that protects the bulb socket from moisture and debris. Insert a flathead screwdriver into the slot positioned at the seal’s perimeter and apply gentle prying pressure to pull the seal back from the housing. This seal maintenance technique prevents damage to the seal edges while exposing the bulb socket. Note the dimple or nipple on the bulb’s top—it must align with the socket groove for proper installation. Pull the seal back along the housing groove, then twist the spring-loaded plug counterclockwise. For weather resistance tips, avoid over-prying that could tear the seal and compromise its watertight fit. This method works across multiple Kubota models without requiring full headlight assembly removal. After removing the factory bulb, you can install the LED replacement bulb to achieve significantly improved brightness for evening operations.
Taking Out the Old Bulb
After exposing the bulb socket through the weather seal, you’ll disconnect the electrical connector by pulling back the spring-loaded tab and twisting counterclockwise to separate the wiring harness. Push down on the retaining tab mechanism and twist the bulb holder counterclockwise, aligning the nipple or dimple until it pops free. Pull the bulb straight out from the socket by gripping its base—avoid touching the glass with bare hands, as oils compromise bulb longevity.
Inspect the socket for burn marks or corrosion, essential bulb maintenance tips for preventing future failures. Dark deposits indicate overheating issues. When troubleshooting dimness, examine socket contacts for oxidation that reduces current flow. Adequate lighting helps you see these small details more clearly during inspection. Confirm the replacement bulb matches Kubota’s specifications before proceeding. Dispose of the burnt bulb according to local regulations.

Compatible with Kubota/Deere Gator Lights: 881/886/894 Headlight bulbs used for ATV/UTV/Motorcycle/Tractor light bulbs Daytime Running Lights,Fog Lights,Turn Signal Lights for some vehicle.Please check whether the model matches before purchasing.


3X brightness up 894/896/881 led bulbs upgrade for Kubota Tractor UTV head lights
Installing the New Bulb
With your old bulb removed and socket inspected, grip the replacement by its plastic base—never the glass—to prevent skin oils from creating hot spots that shorten halogen bulb life. Identify the bulb’s locating dimple or tab and align it with the socket’s groove to guarantee proper bulb orientation for correct beam pattern. Push the bulb straight in, then rotate clockwise until the bayonet pins lock into place with an audible click. For LED retrofits, verify the module’s flat side indexes with the socket tabs. Press the electrical connection firmly onto the bulb base until the retaining clip engages. Switch on both low and high beams to confirm function, then reinstall the rubber boot completely around the socket to seal out moisture. LED bulbs provide a bright white color that contrasts sharply with the yellow tinge of traditional incandescent bulbs.
Securing the Weather Seal
The weather seal serves as your headlight assembly’s primary defense against moisture intrusion, and proper reseating requires attention to both the seal’s orientation and the bulb’s alignment features. After inserting the new bulb with its dimple aligned to the housing groove, push the bulb firmly inward while simultaneously pulling the spring-loaded weather seal back. Once the bulb seats completely, tuck the weather seal down into its designated position around the bulb base. Verify the seal sits flush against the housing without gaps or raised sections that could compromise watertight integrity. These installation tips eliminate the need for complete headlight assembly removal while maintaining factory-grade protection. Check the gasket for sealing integrity before finalizing the installation to ensure long-term protection. Regular inspection of the weather seal’s condition prevents moisture-related failures across various Kubota tractor models.
Understanding Bulb Specifications and Options
Selecting the correct replacement bulb for your Kubota tractor requires matching three critical specifications: voltage, wattage, and base configuration. Most Kubota models operate on 12V systems with multiple wattage options available. BX series tractors typically use K7571-54340, a 50W halogen bulb, while L series models like L175 and L185DT require 34150-3462 at 35W. You’ll find bulb types ranging from standard halogen to xenon variants that produce brighter white light. Dual filament options at 35/35W provide both low and high beam functionality. Some models like B3200 use 1073 bulbs at 23W. LED upgrades offer direct replacement compatibility—1156 LED replaces 1073, while 8000K ice blue LEDs fit K7571-54340 bases in BX series tractors. The E-K7571-54340 halogen headlight bulb is available at a competitive price point of $6.80 for genuine Kubota replacement parts.

Part Number:H3400-99060, H 3400-99060


Part number 38450-33870:1 pair (2 bulbs) of new SUPER bright quality LED bulbs for a M-Series and some L-Series tractors.
LED Upgrade Benefits and Recommendations
Converting from halogen to LED bulbs reduces electrical draw by 40–85% depending on your tractor’s lighting configuration. Typical LED units consume 3–25 W versus 20–55 W for halogen equivalents, decreasing alternator strain and extending battery life. LED advantages include 25,000–50,000 hour lifespans and superior vibration resistance for Kubota’s operating conditions.
Select LEDs with beam patterns matched to your original housing—flood for close implement work, spot for distant field visibility. Verify IP67 or IP68 environmental ratings for moisture protection. Choose color temperatures between 4000–6500 K; cooler temperatures increase perceived brightness while 4000 K reduces eye fatigue during extended night operations. LEDs that mimic natural light help decrease fatigue and improve visibility during prolonged nighttime tasks. Superior brightness levels measured in lumens ensure optimal illumination for various field conditions and implement operations.
Ensure proper alignment after installation to prevent glare. Confirm polarity-correct connections and verify the driver circuitry includes voltage spike protection for reliable performance on Kubota electrical systems. LED headlights must comply with DOT regulations to ensure road and field safety standards are met.


Direct Fit for Kubota RTV & BX Series Tractors – Specifically compatible with Kubota RTV 400/500/900/1100/1140 and BX Series models including BX1850D, BX1860, BX1870-1, BX1880, BX23S, BX2350D, BX2380, BX2680 . Replaces OEM headlight bulb part number K7571-54340. Direct plug-and-play replacement with no modifications required.
Part number 38450-33870:1 pair (2 bulbs) of new SUPER bright quality LED bulbs for a M-Series and some L-Series tractors.


