To replace your Toyota Camry headlight bulb, first identify your model year’s specific bulb type (9006/HB4 or H11 for most models). Disconnect the battery‘s negative terminal, then access the headlight assembly from under the hood. Depress the connector’s locking tab, rotate the bulb counterclockwise to remove it, and install the new bulb by aligning the tabs and rotating clockwise until it clicks. Reconnect the harness and test functionality before closing the hood. Proper alignment and maintenance techniques guarantee peak performance and compliance with safety standards.
Gather Your Tools and Supplies
Before beginning any headlight bulb replacement on your Toyota Camry, you’ll need to assemble the correct tools and supplies to guarantee a successful installation. First, verify bulb compatibility by consulting your owner’s manual or referencing genuine Toyota part #90981-13085 for OEM specifications. Purchase replacement bulbs in pairs to assure even illumination across both headlamps. When selecting your replacement bulbs, consider brightness levels measured in lumens to ensure optimal nighttime visibility. Essential items include clean gloves to prevent oil contamination on halogen glass, a flashlight for visibility in tight engine bay spaces, and clean rags for housing preparation. Different bulb technologies such as halogen, LED, and HID options offer varying performance characteristics and longevity for your replacement choice. Tool organization streamlines the 5-10 minute procedure: position your flashlight, stage both bulbs, and keep gloves accessible. Optional supplies include electrical tape for connector security and a battery disconnect tool to prevent electrical shorts during installation. Safety glasses provide eye protection when working under the hood and accessing the headlight assembly.
Identify the Correct Bulb Type for Your Camry
Your Toyota Camry’s model year determines the exact bulb specification required for replacement. For 2000-2006 models, you’ll need 9006/HB4 bulbs for low beams and 9005/HB3 for high beams. The 2007-2014 range varies: 2012-2014 halogen models use H11 low beams, while HID-equipped versions require D4S capsules. High beams remain 9005/HB3. Models from 2015-2018 utilize H11 low beams and 9005 high beams, with LED options available. However, 2019-2022 Camrys feature factory-installed non-replaceable LED headlight types, eliminating owner serviceability. Verify bulb compatibility by consulting your owner’s manual or checking existing bulb markings. DOT-compliant replacements guarantee legal operation. Halogen slots accept LED upgrade bulbs, but factory LED assemblies mandate professional dealer service for headlight types replacement. Understanding lumens ratings helps you select bulbs that balance brightness with compatibility across different upgrade options. The H11/H8/H9 bulbs are interchangeable options for models from 2010-2018 Camry headlights. When comparing replacement options, consider factors like color temperature and longevity to ensure your chosen bulbs meet both your visibility needs and legal requirements.

⭐【Super Bright H11 Bulbs】Our H11 headlight bulbs deliver over 1000LM brightness and a 3800K color temperature, ensuring optimal visibility in foggy and rainy conditions. Upgrade your automotive headlight bulbs for safer nighttime driving.

【10X Brighter - Newly Enhanced】The Termitor H11/H9 Bulbs feature 24 high-performance chips, delivering up to 10 times the brightness of standard halogen bulbs. Upgrade your nighttime driving experience by replacing dim, yellow stock bulbs with Termitor H11/H9 fog lights, offering superior illumination and enhanced visibility with a crisp 6500K cool white light for optimal light transmission.

Easy Installation: 1:1 design, no external driver or connector required, plug and play
Access the Headlight Assembly
Although accessing the Camry’s headlight assembly varies by model year, all generations require systematic disassembly beginning with electrical safety protocols. Disconnect your battery before commencing work. For 2007-2011 models, remove three 10mm bolts without grille disassembly. 2012-2014 variants utilize four 10mm screws with top-mounted tabs. 2011-2017 generations necessitate complete grille and bumper removal: extract plastic rivets, unscrew bolts with 10mm socket, and pop retaining clips. Locate the three mounting bolts per assembly—two top, one side—using a 10mm ratchet. After bolt removal, lift plastic stays and pull the assembly forward. This exposure enables headlight alignment verification and fixture cleaning. Models with fog lights require wheel well clips rotated 90 degrees. Extract assemblies carefully to prevent bracket damage. Ensure the engine is turned off and set the parking brake before beginning any work under the hood.

10mm Toyota Head Bolt Wrench

RUGGED AND DURABLE - SG TZH Flat Head Hex Socket Cap Screws Bolts made of high-quality 18-8(304)Stainless Steel,which has higher corrosion resistance and anti-rust effect than ordinary bolt, longer service life, not easy to damage, more solid.

【Package Includes】2pcs Socket Head Cap Bolts.
Remove the Old Headlight Bulb
Once you’ve accessed the headlight assembly, verify the correct bulb type before proceeding with removal. Check the stamped part number on the existing bulb base—common Camry types include 9006 (low beam) and 9005 (high beam). Following safety guidelines, confirm the ignition is off and the key is removed to prevent live circuits.
Locate the connector locking tab on the bulb harness and depress it before pulling straight out—avoid yanking wires. For socket-mounted bulbs, rotate the assembly counterclockwise approximately one-quarter turn to release from the housing. During bulb extraction, wear clean gloves to prevent skin oils from contaminating halogen glass. Pull the bulb straight out, releasing any retaining clips or tabs. Inspect the connector for corrosion or damage before proceeding with replacement. When selecting a replacement bulb, consider LED conversion kits as an upgrade option that offers brighter, whiter light with longer lifespans compared to standard halogen bulbs. Ensuring the replacement bulb matches your vehicle’s electrical requirements will prevent potential damage to the headlight system and maintain proper lighting performance.
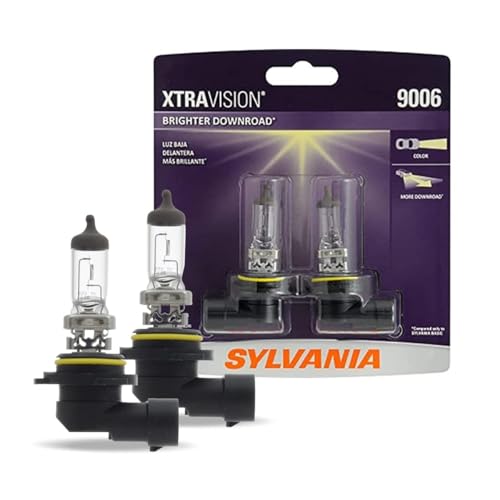
Lights Dim Over Time, Replace In Pairs: Your lights are a pair, one is never turned on without the other. If one bulb burns out, the other isn't far behind. Replace your 9006 XtraVision Halogen bulbs in pairs for optimum performance

Lights Dim Over Time, Replace In Pairs: Your lights are a pair, one is never turned on without the other. If one bulb burns out, the other isn't far behind. Replace your 9006 XtraVision Halogen bulbs in pairs for optimum performance.

【Ultra Bright】AUTOONE 9005 9006 Bulbs Combo uses an upgraded CSP chip. It also has 6500K cool white light, providing farther and brighter light for night driving. Wide visibility to ensure the front is fully illuminated.
Install the New Bulb Properly
Before handling the replacement bulb, inspect it for cracks or defects and make certain you’re wearing clean latex or cotton gloves—finger oils on halogen glass create hot spots that’ll cause premature burnout. Identify the alignment tabs on your new bulb and match them to the corresponding slots in the headlight assembly. You may need to insert the bulb at an angle if it’s positioned near the battery or reservoir. Once the tabs align, the bulb’ll drop into place naturally—never force it. Rotate the bulb clockwise until you hear a click, confirming it’s locked. Press the wiring harness connector onto the bulb base until it snaps securely. Tug gently to verify proper alignment and securing components are firmly seated. Consider the beam pattern quality of your replacement bulb to ensure optimal visibility and safety on the road. Changing bulbs in pairs ensures balanced light output and prevents the inconvenience of replacing the second bulb shortly after the first. Popular aftermarket options from manufacturers like Sylvania, Philips, and GE offer improved visibility without causing glare for oncoming drivers.

Fit for 99% of vehicles - SYJIIP Halogen headlamp are close to the wattage of the stock halogen headlamp bulb, which can reduce the occurrence of CANBUS problems, avoid erroneous and flickering. As long as your stock light bulb model is the same as ours, then SYJIIP's light bulb will be suitable for your car.
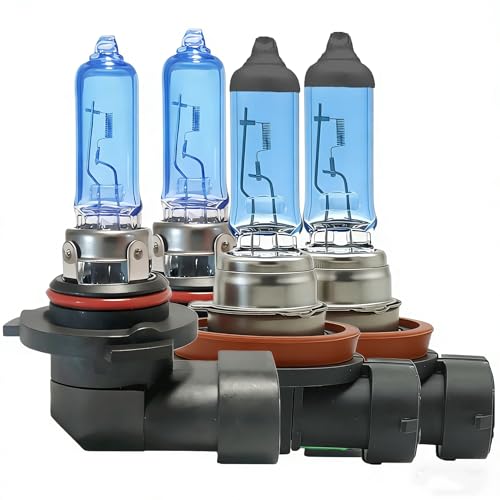
Fit TOYOTA CAMRY 2007 2008 2009 2010 2011 2012 2013 2014 2015 2016 2017 2018, 9005 for High beam,H11 for low beam.

【Compatible with Toyota Camry 2007-2018 Headlight Bulbs】QUAYUB Halogen headlights are perfectly compatible with Toyota Camry 2007 2008 2009 2010 2011 2012 2013 2014 2015 2016 2017 2018.The Halogen headlights combo includes 2pcs 9005/HB3 high beam,2pcs H11 low beam headlight bulbs,totally 4 Halogen bulbs in the package.
Reconnect and Secure All Components
With the new bulb locked in position, verify the wiring harness connector’s seated correctly by giving it a firm tug—it shouldn’t budge if properly attached. Inspect wiring integrity by checking for exposed conductors or compromised insulation around the connection point. Confirm bulb alignment by ensuring the gasket sits flush against the housing back—any gaps indicate improper seating. Rotate the socket clockwise until you feel positive engagement with the retaining mechanism. Test socket stability by attempting lateral movement; properly installed components won’t wiggle. Reposition dust caps or access covers, securing them with their respective clips or twist-lock mechanisms. If you removed the wheel well liner or hood support components, reinstall them now. For optimal performance, consider the color temperature and brightness characteristics of your replacement bulb to ensure compliance with your vehicle’s specifications and to verify beam pattern compatibility with your headlight assembly. Before completing the installation, clean the bulb glass with a paper towel if you accidentally touched it during handling. Conduct a final visual sweep of the assembly, confirming all fasteners engage properly and no loose parts remain.
Test Your Headlights Before Finishing
After securing all components, you must verify the headlight operates correctly before closing the hood and returning the vehicle to service. Turn the ignition to accessory mode and cycle through low and high beams to confirm both illuminate properly. Position the Camry approximately 25 feet from a flat vertical surface and inspect beam alignment—the cutoff should be level and consistent between left and right housings. Check for proper light intensity across the entire pattern, ensuring no dim spots or uneven distribution. Verify the absence of flicker or intermittent dimming at idle and higher RPMs, which indicates poor grounding or connection issues. For a more thorough evaluation, use a multimeter in continuity mode to test the electrical connection at the bulb socket. If headlights appear foggy or yellowed over time, you can restore their clarity and brightness with lemon and baking soda before replacing the bulb entirely. Confirm color temperature matches the opposite headlight, as consistent color temperature preferences between both headlights ensures uniform illumination quality. If discrepancies appear, reseat the bulb and recheck connector engagement before proceeding.
Troubleshoot Common Installation Issues
Even when you’ve followed all installation steps correctly, several common issues may prevent your new Camry headlight from functioning as intended. Connector problems rank among the most frequent culprits—inspect for corroded terminals, loose harness plugs, or bent pins that prevent proper electrical contact. Clean corrosion with electrical contact cleaner and guarantee the locking tab clicks firmly into place. Verify you’ve matched the correct bulb model to your socket; wrong types won’t seat properly. Check installation orientation by aligning the bulb’s notch with the reflector housing tabs—improper rotation creates beam pattern errors. Test grounding continuity if the bulb appears dim or flickers. A blown fuse in the headlight circuit can also prevent your newly installed bulb from illuminating. Finally, confirm your dust cap seals completely to prevent moisture ingress that causes premature failure.

ONE-STEP ELECTRICAL CONTACT CLEANER: High-performance contact cleaner removes oil, dirt, flux residue, and condensation for reliable electrical connections.

Fits Toyota Camry CE 2007, Toyota Camry CE 2008, and Toyota Camry LE/XLE 2007, 2008, 2009 — Use Amazon Part Finder to verify your exact trim.
Maintain Your Headlights for Longevity
Successfully installing your Camry’s headlight bulb represents only half the equation—proper maintenance determines whether it reaches its full service life or fails prematurely. Implement headlight maintenance protocols every few weeks by inspecting lenses for debris accumulation. Use cleaning techniques involving soft microfiber cloths to preserve polycarbonate surfaces without scratching. Execute biannual reflector cleaning to maintain best light output efficiency.
Monitor for wear indicators: flickering suggests filament degradation or compromised battery connections, while dimming brightness signals aging components. Yellowish tinting indicates lens contamination requiring immediate attention. Regularly inspect for condensation inside the headlight housings to prevent moisture-related issues. Consider LED conversion to extend operational hours from 450 to 30,000 while reducing power consumption from 55W to 18W. Enable automatic shut-off features preventing unnecessary battery drain. These preventive measures guarantee your halogen bulbs achieve their five-year service expectancy, while LED alternatives maintain performance throughout continuous nightly operation cycles.
Safety Precautions and Legal Considerations
Before initiating any headlight replacement procedure, you’ll protect yourself and your vehicle by disconnecting the battery’s negative terminal—this critical first step prevents electrical shorts, accidental system activation, and potential shock hazards during component handling. Always wear protective gloves when handling bulbs, as finger oils on glass surfaces cause premature failure and reduced lifespan. Safety glasses shield your eyes during bolt and plastic component removal, while wheel chocks prevent vehicle rolling during elevated work.
Legal requirements mandate replacing both bulbs when one fails to maintain even illumination and comply with state visibility regulations. You must adjust headlight alignment post-installation to guarantee proper beam patterns. When selecting replacement bulbs, consider brightness levels measured in lumens to ensure your vehicle meets visibility standards. Modern Toyota headlights often use advanced lighting technologies like LED systems that require special handling during replacement. Following these safety guidelines protects you from cuts caused by sharp plastic edges and injuries from improper lifting procedures, while guaranteeing your Camry meets road safety standards. Gather the necessary tools beforehand, including a number two Phillips head screwdriver, 10 mm wrench, and trim removal tool to ensure efficient completion of the replacement procedure.