To replace your Nissan Altima‘s headlight bulb, you’ll first identify the correct specification (H11 for most low beams, 9005/HB3 for high beams) based on your model year. Access the assembly by turning the steering wheel and reaching through the fender well opening. Disconnect the wiring harness by pulling the tab, then rotate the bulb socket counterclockwise to release it. Install the new DOT-approved bulb using nitrile gloves to avoid oil contamination, rotate clockwise until locked, and reconnect the harness until you hear a click. The following sections provide detailed troubleshooting and upgrade options.
Tools and Materials You’ll Need
Before beginning any headlight replacement on your Nissan Altima, you’ll need to assemble the proper tools and materials to complete the job efficiently. Proper tool organization guarantees streamlined workflow and prevents mid-procedure delays. Essential items include a Phillips head screwdriver for fender liner screws, flathead screwdriver for clip removal, and a 10mm socket with ratchet for bumper fasteners. A thorough trim tool set protects plastic components during disassembly. Material preparation requires DOT-approved replacement bulbs, nitrile gloves to prevent oil contamination, and safety glasses for eye protection. You’ll also need cleaning supplies including alcohol wipes and shop rags for bulb contact maintenance. For the low beam, you’ll need an H11 bulb, while the high beam requires an H9 bulb and the marker light uses a 194 bulb. Consider comparing halogen, LED, and HID technologies to determine which bulb type best suits your visibility needs and budget. Different bulb options vary significantly in brightness levels and color temperature, affecting both your driving safety and vehicle aesthetics. If wheel well access proves necessary, have a hydraulic jack and jack stands available. This complete toolkit facilitates professional-grade headlight bulb replacement without complications.

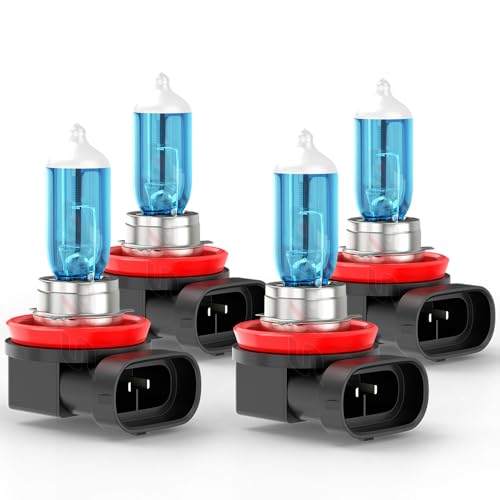
⭐【Super Bright H11 Bulbs】Our H11 headlight bulbs deliver over 1000LM brightness and a 3800K color temperature, ensuring optimal visibility in foggy and rainy conditions. Upgrade your automotive headlight bulbs for safer nighttime driving.

See the Road in a New Light: Get 900% the brightness of halogens with a powerful 50,000-lumen beam. The AUXITO H11 light bulbs illuminate more road ahead, giving you the clarity to spot hazards sooner.
Identifying Your Altima’s Bulb Type
Which bulb type matches your specific Altima model year? You’ll need to cross-reference your vehicle years against the correct bulb types before purchasing replacements.
For 2013-2018 models, low beams utilize H11 halogen bulbs, while 2008-2012 high beams require 9005/HB3. If you’re running HID headlights, 2010-2013 models use D2S low beams, and 2007-2008 models specify D2R. The 2019-2020 vehicle years feature H11/H8/H9 low beams and 9005/HB3 high beams.
Verify your setup before ordering—halogen capsule configurations differ from standard reflector housings. HID systems demand ballast compatibility verification with D2S, D2R, D3S, or D3R bulb types. LED replacements fit H11/H8/H9 sockets directly, offering plug-and-play installation for compatible vehicle years. When selecting your replacement bulbs, consider important factors like color temperature and brightness measured in lumens to ensure optimal visibility and legal compliance. Understanding beam pattern quality will help you avoid common issues like glare or reduced visibility on the road. Check your owner’s manual for OEM specifications. Always verify original factory fittings to ensure accurate fit, as aftermarket bulb sizes may vary from manufacturer specifications.
Fit for 99% of vehicles - SYJIIP Halogen headlamp are close to the wattage of the stock halogen headlamp bulb, which can reduce the occurrence of CANBUS problems, avoid erroneous and flickering. As long as your stock light bulb model is the same as ours, then SYJIIP's light bulb will be suitable for your car.

Fit Altima 2007 2008 2009 2010 2011 2012 2013 2014 2015 2016 2017 2018, H9 for High beam,H11 for low beam.
Accessing the Headlight Assembly
Once you’ve confirmed the correct bulb specification for your Altima, you’ll need to gain physical access to the headlight assembly housing. Begin by opening the hood and removing the upper radiator support cover using a trim tool to release the plastic push clips. Turn the steering wheel fully to access the wheelwell, then remove fender liner fasteners with a Phillips driver and trim fork. Extract the three primary mounting bolts—top, side, and lower—using a 10mm socket and ratchet. Before withdrawing the assembly, disconnect all harness connectors by depressing the release tangs. This creates clearance for bulb replacement and wiring inspection. Note the headlight adjustment screws for realignment after reinstallation, and keep all fasteners organized by location. When handling replacement bulbs, avoid touching them with bare fingers to prevent damage to halogen and LED bulbs. Pull back the mudguard to access the engine splash shield beneath the bumper assembly. For most Altima models, the bulb type is typically an H11 or 194 bulb, which you can verify in your owner’s manual before beginning the replacement process.

【Huge Improvement in Visibility】-AUTOONE H11 led bulbs are equipped with high luminous efficacy CSP chips. And 1:1 halogen h11 bulbs’ beam pattern, spread out the light more to help in the side and front vision but no endangering other drivers. Safer and bright upgrade for fog lights or drl

【800% BRIGHTER, PURE WHITE LIGHT】 – Our advanced TK7 chips generate an intense 32,000 lumens at 6500K cool white—8 times brighter than halogen bulbs. Experience wider, farther, and crisper visibility, so you can spot road hazards earlier and drive with confidence
Removing the Old Bulb
With the headlight assembly exposed, locate the bulb socket at the rear of the housing by reaching through the fender well opening. Identify whether you’re replacing the low beam (H11) or high beam (H9) bulb type. Pull the tab on the wiring connector to release the harness from the bulb base, avoiding contact with the glass to prevent oil contamination. Next, disengage the retention mechanism by rotating the socket a quarter turn counterclockwise until you feel a click. For low beam assemblies, you may need to pry a securing tab. Extract the bulb straight out from the housing and inspect the socket area for dirt accumulation. Clean if necessary before proceeding with installation. Before handling the bulb, check the wiring for any corroded ground wires that could disrupt electrical flow and cause dim lights. When selecting your replacement bulb, consider the color temperature for optimal visibility to ensure you’re upgrading to a bulb that provides better performance than your original halogen option. Popular aftermarket brands like Sylvania, Philips, and Hikari offer superior brightness and longevity compared to stock options. Handle the old bulb with gloves during bulb disposal to maintain cleanliness throughout this ten-minute procedure.

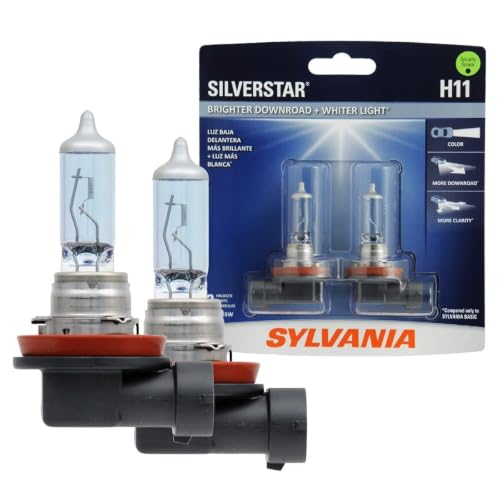
Lights Dim Over Time, Replace In Pairs: Your lights are a pair, one is never turned on without the other. If one bulb burns out, the other isn't far behind. Replace your H11 XtraVision Halogen bulbs in pairs for optimum performance.

Wider Visibility: The fog lights emit white light at the same point as the bulb, replacing the dim bulb.
Installing the New Bulb
After removing the old bulb and cleaning the socket area, you’re ready to install the replacement. Follow these bulb alignment tips: for H11 low beams, align three tabs with the socket before sliding past the fender liner. H9 high beams require deeper reach into the assembly. Turn either bulb clockwise until it locks completely. For 194 marker lights, insert into the edge socket near the fender and twist clockwise.
This connector installation guide guarantees proper function: slide the electrical connector onto the bulb base until you hear a distinct click. Never touch the glass surface—wear gloves or use paper towels to prevent oil contamination, as oils can cause premature bulb holder failure. Consider LED conversion kits if you want brighter illumination and longer lifespan compared to standard halogen replacements. Test all lights before final reassembly to confirm operation and secure fit.
Lights Dim Over Time, Replace In Pairs: Your lights are a pair, one is never turned on without the other. If one bulb burns out, the other isn't far behind. Replace your H11...
Testing and Reassembly
Before closing the wheel well assembly, verify bulb functionality by activating your Altima’s lighting controls. Test both high-beam and low-beam functions to confirm immediate illumination without flickering. Check that brightness matches the opposite side and meets OEM standards. Once verified, begin reassembly by inserting the new bulb with tabs aligned, rotating clockwise until locked. Snap the wiring harness into the base until you hear a distinct click confirming secure connection. These reassembly tips guarantee proper component integration: tuck the fender liner behind the bumper cover, reinstall three Phillips screws without stripping plastic threads, and secure the 10mm bolt with push clips. When selecting replacement bulbs, consider LED and HID options for improved brightness and energy efficiency compared to standard halogen bulbs. Different headlight technologies vary significantly in their lumens output and color temperature, affecting both visibility and driving safety. Avoid excess torque during fastener installation to prevent damage to mounting points. The entire process typically takes around 10 minutes to complete for both headlights.
Troubleshooting Common Problems
Even when bulb replacement follows proper procedure, headlight malfunctions can persist due to underlying electrical, mechanical, or environmental factors. Start by inspecting connectors for corrosion, loose terminals, or frayed wiring—common electrical issues that cause dimming or intermittent operation. Verify bulb compatibility with your Altima’s year and trim; incompatible aftermarket LED conversions often produce fitment or thermal problems. Test fuses and relays in the headlight circuit, then measure ground resistance at chassis points. The headlight relay is typically located in either the instrument panel fuse block or the under-hood fuse box, and testing it involves listening for a clicking sound when headlights are turned on or swapping it with an identical relay to diagnose failure. Check system voltage; weak batteries or failing alternators cause unstable output. Examine the housing for moisture ingress, which degrades reflectors and corrodes sockets. Clouded lenses reduce effective output, mimicking bulb failure. If one section of a projector module fails, suspect internal driver circuit damage requiring module-level repair. For persistent issues that remain unresolved after these checks, professional assistance may be required to diagnose complex electrical problems that go beyond standard troubleshooting.
Safety and Legal Compliance
When replacing headlight bulbs on your Nissan Altima, handle all components with nitrile or cotton gloves to prevent oil transfer from bare skin onto the glass envelope. Oil contamination creates hot spots that cause premature bulb failure. If you’ve touched the glass, clean it immediately with a microfiber cloth before installation.
Verify that replacement bulbs carry DOT approval for U.S. road use and meet SAE standards for glare prevention. Check local regulations regarding headlight brightness and bulb color restrictions, as many jurisdictions prohibit excessively bright or colored aftermarket lights. All Sylvania H11, 9006, and H7 replacement bulbs maintain DOT and SAE compliance. E-mark certification applies for EU markets. Both halogen and LED upgrade options offer different advantages in terms of brightness and longevity for your vehicle. Upgrading to higher quality bulbs can significantly improve nighttime visibility and overall driving safety. Test bulb function before final reassembly by activating headlights with the splash guard temporarily removed. Local O’Reilly Auto Parts stores can provide the necessary supplies and replacement bulbs for your headlight repair job.
Maintenance Best Practices
To maximize headlight bulb longevity and maintain peak illumination on your Nissan Altima, select replacement bulbs that match your specific model year and trim specifications. 2013–2018 models typically require H11 (low beam) and H9 (high beam) variants. Always replace both headlight bulbs simultaneously to guarantee balanced headlight brightness and minimize repeat labor. Avoid touching bulb glass or LED chips—skin oils create hot spots that drastically reduce bulb lifespan. Use gloves or clean with alcohol if contact occurs. During installation, verify housing seals are properly seated to prevent moisture ingress and corrosion. Inspect wiring harnesses, connectors, and grounding points for degradation. Test new bulbs immediately with engine running to confirm operation. Perform beam alignment checks to prevent glare and guarantee peak output. Consider comparing halogen, LED, and HID options to select the bulb technology that best suits your driving needs and budget. Understanding color temperature and brightness levels will help you choose bulbs that provide optimal visibility while maintaining compliance with road safety regulations. Establish a routine schedule to clean headlights and check for moisture buildup to ensure optimal performance and extend the service life of your lighting system.