To replace your truck’s headlights, first turn off the engine and let it cool completely. Open the hood and locate the bulb housing behind the headlight assembly. Disconnect the electrical connector by pressing the retaining tab, then remove the dust cap and release the securing clips. Pull out the old bulb using its plastic base—never touch the glass. Insert the new bulb, ensuring proper alignment with the socket tabs, then reconnect the electrical connector and test functionality. For thorough guidance on beam adjustment and maintenance best practices, explore the complete process below.
Gather Your Tools and Materials
Before you begin the headlight replacement process, assemble all necessary tools and materials to avoid mid-project delays. Proper tool organization guarantees you’ll have needlenose pliers, Phillips and flathead screwdrivers, an 11mm socket with 6-inch extension, and a ratchet with 8mm and 10mm sockets within reach. Material selection depends on your truck’s headlight type—choose replacement bulbs matching sealed beam or composite housings. You’ll need rubber gloves to prevent skin oils from contaminating new bulbs, cleaning cloths for corrosion removal, and a tiny dab of dielectric grease for electrical connectors. Gather retainer clips, plastic rivets, and appropriate bolts for reassembly. The HM85 85 Piece Ratchet and Socket Set provides a comprehensive toolbox option that includes the necessary ratchet, 8mm socket, 10mm socket, and fork required for this job. Don’t forget safety glasses, a magnetic light for visibility, electric contact cleaner, wire brush, and penetrating solvent for stubborn fasteners. Before purchasing replacement bulbs, verify the correct bulb size and type for your specific truck model to ensure proper fit and electrical compatibility. Understanding headlight control locations on your vehicle will help you identify which headlights need replacement and confirm the new bulbs are functioning properly once installed.


1 unit of front headlight adjustment screw driver tool ONLY for 2018-2022 JL.
Prepare Your Vehicle and Workspace
With your tools assembled, you’re ready to create a safe working environment for the headlight replacement. Start by turning off your truck completely and removing the keys from the ignition to prevent accidental starts—this is fundamental vehicle safety. Allow the engine to cool if recently driven, as the headlight area retains significant heat.
Pop the hood and secure it with the prop rod for stable access. Protect painted surfaces by applying masking tape around the headlight assembly to prevent scratches or damage. Clean the headlight lens and surrounding areas with plastic degreaser like URKI-SOL 94, removing all oils and dirt. Inspect wiring connections for corrosion and clean with contact cleaner. Understanding proper beam pattern alignment ensures optimal visibility after installation. Note that some vehicles may require removing the bumper to access headlight components more easily.
Ensure workspace organization by working in a well-ventilated area with adequate lighting. Wear rubber gloves to handle components without transferring oils. Gather a screwdriver for removing the headlight assembly if necessary for your specific Dodge model.

Delivers Sharp Paint Lines: Adhesive Resists Lifting And Curling, Prevents Bleed Through, Helping To Maintain Sharp Paint Lines

TOUGH: Durable crepe paper backing helps resist solvents and moisture while minimizing bleed through

KIT INCLUDES: 1 - Disc Pad Holder, 3.25 in (8,2 cm) 6 - 3M Gold Sanding Discs 500 Grit, 3 in (7,6 cm) each 4 - 3M White Finishing Discs 800 Grit, 3 in (7,6 cm) each 1 - 3M Trizact Refining Disc 3000 Grit, 3 in (7,6 cm) 2 - 3M Quick Headlight Clear Co
Access the Headlight Assembly
Once you’ve established a safe workspace, accessing the headlight assembly requires methodical disassembly of protective covers and locating all fasteners. Open your truck’s hood and apply painter’s tape around the assembly to protect surrounding paint. Different headlight types demand specific assembly techniques—locate mounting bolts, typically 10mm or T30 Torx, behind the grille or fender. Remove any obstructing covers using a flat screwdriver to pop push fasteners from the radiator support. You may need to detach the fender-hood seal or inner fender panels for complete bolt access. Check for hidden fasteners along the assembly’s top, sides, and bottom—some require accessing from underneath the vehicle. In some truck models, you’ll need to remove the bumper cover to gain access to the headlight assembly mounting points. Free any wiring harness clips before proceeding with removal to prevent damage.

KIT INCLUDES: 1 - 3M Trizact Refining Disc 1000 grit, 3 in/7.6 cm 1 - 3M Trizact Refining Disc 3000 grit, 3 in/7.6 cm 2 - 3M Quick Headlight Clear Coat Wipes 1 - Foam Pad with 3M Hookit Attachment, 3 in/7.6 cm 1- Disposable Glove
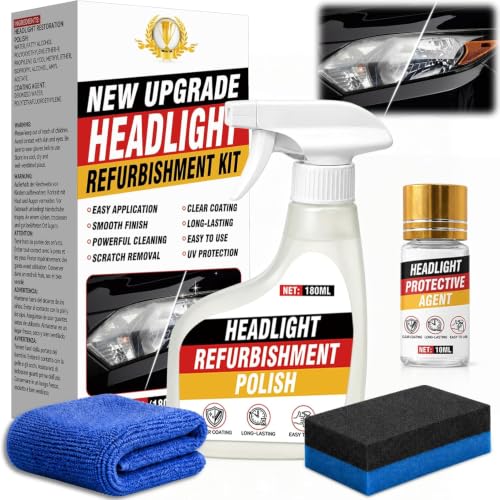
Headlight Renewal: Headlight Renewal: This car headlight restoration kit helps improve yellowed, oxidized, foggy, and dull headlights. The included polishing fluid helps remove surface stains and haze, making the headlight lenses look clearer and brighter. It helps refresh the appearance of aged headlights without replacing the entire headlight assembly, making it suitable for regular headlight care.

Instructions for Use: The first yellow drill attachment installed on the drill, cushion pad white surface and drill attachment black surface paste, use the first in the lamps on the spray water and then use the cleaning pad to dry in a circle, and then according to the grain size from small to large in order to use the waterproof abrasive disc on the lamps for polishing, and finally use the sponge polishing pad for polishing
Remove the Old Bulb
After exposing the headlight assembly, locate the bulb access point at the rear of the housing—consult your owner’s manual if uncertain about the entry method for your specific truck model. Remove dust caps or rubber covers by twisting counter-clockwise. Depress the retaining tab on the electrical connector and pull straight back, noting its orientation. Release metal spring clips or plastic retainers securing the bulb by carefully lifting or unhooking them.
Grip the bulb’s plastic base—never the glass—and twist counter-clockwise or pull straight back depending on bulb types. If resistance occurs, apply controlled wiggling rather than excessive force to prevent breakage. Some trucks have separate bulbs for high and low beams, so verify which bulb you’re removing before proceeding. The H11 bulb is one of the most common headlight bulb types found in modern trucks across various manufacturers. For safety tips: wear gloves, avoid touching halogen glass with bare fingers, and place removed bulbs immediately into padded containers to prevent rolling or breakage.

【1:1 Mini Size & 3 MINS Plug and Play】Sealight H11/H9/H16 bulbs or Fog Light Bulbs feature a near-identical 1:1 mini design as original bulbs, requiring no external drivers or wires for a true plug-and-play experience. 3 MINS quick installation

【Visual Enhancement】: The OKOENIEO H11 headlight bulb are 200% brighter than other halogen bulbs, providing drivers with a wider and farther field of vision. Offering a greater visibility, they allow drivers to spot deer, wildlife, falling rocks, or obstacles ahead of time, ensuring safer nighttime driving.

⭐【Super Bright H11 Bulbs】Our H11 headlight bulbs deliver over 1000LM brightness and a 3800K color temperature, ensuring optimal visibility in foggy and rainy conditions. Upgrade your automotive headlight bulbs for safer nighttime driving.
Install the New Bulb
Before handling the replacement bulb, wipe its glass surface with an alcohol wipe and soft cloth to remove manufacturing residues, then don rubber gloves to prevent skin oils from contaminating the halogen or LED glass. Verify the bulb types match your truck’s high-beam and low-beam specifications. Align the tabs on the bulb base precisely with the socket slots, following these alignment tips: hold only the base while pushing straight into the housing without twisting. For upper bulbs, insert before connecting wiring. Twist clockwise a quarter-turn until you hear an audible click confirming the tabs have locked. Reattach any retainer clips or dust caps, ensuring correct orientation. Push the wiring connector firmly onto the bulb prongs, then tug gently to verify secure seating before proceeding. Consider upgrading to LED bulbs with superior brightness to significantly enhance your visibility and driving safety compared to standard halogen options. After installation, test the headlamps by turning on your truck’s lights to confirm the new bulb functions properly. Once confirmed working, you can proceed with beam alignment adjustments if needed to ensure optimal visibility and safety during night driving.

150,000LM Unmatched Brightness: Upgrade your truck's lighting with Termitor's 2026 latest H13 H10 LED bulb combo. The upgraded H13/9008 fog light bulbs feature 32PCS advanced CSP chips, while the H10 LED fog lights utilize 6.0 upgraded 16PCS chips, together delivering a massive 100,000 Lumens of 6500K cool white light. This high-output design provides crystal-clear visibility and dramatically extends your nighttime view, ensuring an ultra-safe driving experience.

【1200% Brighter Output】 Enhance your drive with our advanced H4/HB2/9003 bulbs, equipped with 16 state-of-the-art per unit and producing an exceptional 60,000 lumens per pair. Leveraging innovative ZC01 tech, these H4/HB2/9003 lights provide outstanding, energy-efficient brightness for improved visibility and safety on anywhere

900% Luminosity Enhancement - OXILAM 9005 9006 bulb delivers 9X the brightness of conventional halogens with 6500K pure white spectrum, dramatically improving road illumination and nighttime driving safety
Test the New Headlight
With the new bulb securely installed, you’ll need to verify proper operation before reassembling the headlight housing. Turn on your ignition and activate the headlights to confirm illumination. Check headlight brightness against the opposite side—both should emit equal intensity. If brightness appears dim, disconnect the bulb and inspect for proper seating in the socket. Next, test both low and high beam settings to ascertain full functionality. A functioning bulb will respond immediately to beam changes without flickering. Turn off the headlights and examine the connection one final time for security. Proper installation directly affects bulb lifespan and prevents premature failure. For additional verification, you can use a multimeter to test the bulb’s electrical continuity and resistance values. LED bulbs offer improved visibility during nighttime driving conditions compared to traditional halogen options. Consider checking your vehicle’s legal requirements to ensure your upgraded bulb meets local regulations. Once you’ve confirmed consistent performance, proceed with reassembling the headlight assembly and securing all protective covers.
Reassemble and Adjust Beam Alignment
Once you’ve confirmed the headlight functions correctly, secure all protective covers and housing components in reverse order of removal. Following proper reassembly tips guarantees water-tight seals and prevents electrical issues. Now address beam adjustment for prime visibility and safety.
Park your truck on level ground 25 feet from a flat wall. Mark a horizontal line at headlight center height, then subtract 2-3 inches and mark with tape. Draw vertical lines directly in front of each headlight center. Locate the adjustment screws under the hood—typically positioned at 12, 6, and 9 o’clock. High-quality adjustment screws made from durable materials like stainless steel or hardened plastic will resist corrosion and maintain proper alignment over time. Turn clockwise or counterclockwise to raise, lower, or shift the beam. Position the most intense part just below the horizontal tape line, guaranteeing you don’t blind oncoming drivers while maximizing road illumination. If you installed LED bulbs, ensure the chips are oriented toward the reflectors for optimal beam patterns and efficiency. For consistent lighting performance, consider replacing bulbs in pairs to maintain uniform brightness across both headlights.