
To replace your Ford F150’s headlight, you’ll need model-specific tools—ranging from a 1/4″ ratchet for 2021-2023 models to an 11mm deep socket for 1992-1996 trucks. Start by parking on level ground, disconnecting the negative battery cable, and opening the hood. For bulb-only replacement, disconnect the electrical connector, twist the socket counterclockwise, and install the new bulb without touching the glass. Complete assembly removal requires extracting the plastic shroud, removing upper holding screws with a 10mm socket, and disengaging locating pins. This guide covers the essential procedures for all generations.
Gathering Your Tools and Materials
Before you begin replacing your Ford F150 headlights, you’ll need to gather the appropriate tools and materials for your specific model year. Proper tool selection guarantees efficient removal and installation without damaging components.
For 2021-2023 models, you’ll need a 1/4 ratchet with extension and flat screwdriver. Models from 2015-2020 require a 5.5mm socket with ratchet and fork tool for mudguard access. The 2009-2014 F150 needs a 10mm socket and Phillips screwdriver for plastic rivets. Earlier 2004-2008 models use a 10mm socket for three assembly bolts, while 1992-1996 trucks require an 11mm deep socket with 6-inch extension.
Socket sizes vary greatly across generations, so verify your model year before starting. Consider whether you want to upgrade to LED or HID options for improved nighttime visibility beyond factory halogen bulbs. When handling new bulbs, avoid touching the glass as oils from your skin can damage the bulb and reduce its lifespan. Include safety glasses, gloves, and paper towels for proper bulb handling.

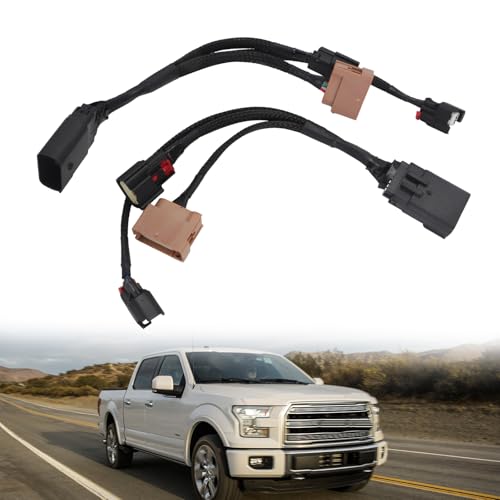
Compatible With: This H13 / 9008 headlight connector pigtail wire harness fits Ford F-150 / F150 models from 2004 to 2019, designed to restore proper headlamp connectivity and eliminate issues caused by worn or corroded connectors.

Ideal replacement - this headlight socket matches the fit and terminal count of the original equipment socket

FITMENT: Compatible with Ford Crown Victoria 2004-2011, Escape 2004-2012, Explorer Sport Trac 2007-2010, F150 2004-2017, F250 Super Duty / F350 Super Duty 2003-2016, F450 Super Duty 2003-2016, Fiesta 2011-2013, Five Hundred /Freestyle /Taurus 2005-2007, Flex 2009-2012, Focus 2005-2010, Fusion 2006-2012, Ranger 2004-2011, Taurus X 2008-2009, Transit-150/Transit-250/Transit-350/350HD 2015-2020, Mercury Grand Marquis, Mariner, Milan 2007-2011
Preparing Your Ford F150 for Headlight Work
With your tools assembled, you’re ready to prepare the vehicle for safe headlight removal. Park your F150 on a level surface, engage the parking brake, and turn off the engine. Allow it to cool completely before beginning work. Headlight safety requires disconnecting the negative battery cable first to prevent electrical shorts. Open the hood using the release mechanism and secure it with the support rod.
Clear debris from the engine bay to guarantee proper engine access. Locate the headlight assembly and identify the 10mm mounting bolts and retaining clips. For this upgrade, you can access through the fender well without needing to jack up the truck. Inspect the wiring harness for damage and check the rubber gasket for deterioration. Some vehicles may have daytime running lights that remain on during certain procedures, so be aware of your F150’s lighting behavior during this work. Wear gloves and eye protection throughout the procedure. Position your tools within reach and add supplemental lighting if needed for best visibility.
Replacing Individual Headlight Bulbs
Replacing individual headlight bulbs requires precision and proper technique to avoid damaging sensitive components or contaminating the new bulb. First, identify your bulb types: 2015-2020 models use 9005 for high beams, while 2021-2024 XL/XLT configurations require H11 for low beams. Disconnect the electrical connector by spreading retaining tabs, then twist the bulb socket counterclockwise a quarter turn and pull out. Press the tab on the socket to release the old bulb without touching glass surfaces. For installation tips, align new bulb tabs with the socket until you hear a click. Twist the socket clockwise to lock it into the housing, reconnect the wiring harness, and replace any dust caps. Apply dielectric grease on connectors to prevent corrosion, especially in wet climates. Modern LED technology offers improved brightness and durability compared to traditional halogen bulbs. Proper headlight aiming adjustments ensure optimal beam pattern and visibility after installation. Test headlights before final reassembly to verify proper operation.

Fit for 99% of vehicles - SYJIIP Halogen headlamp are close to the wattage of the stock halogen headlamp bulb, which can reduce the occurrence of CANBUS problems, avoid erroneous and flickering. As long as your stock light bulb model is the same as ours, then SYJIIP's light bulb will be suitable for your car.

Lights Dim Over Time, Replace In Pairs: Your lights are a pair, one is never turned on without the other. If one bulb burns out, the other isn't far behind. Replace your 9007 XtraVision Halogen bulbs in pairs for optimum performance.

Unmatched Brightness & Clarity: Upgrade your lighting with the H13 H10 LED Bulb Combo—delivering 68,000 Lumens (6500K) of pure white light. 10X brighter than halogen bulbs, these h10/9145 led fog light bulbs use dual-row 7035 CSP chips for superior brightness and durability
Removing the Complete Headlight Assembly
Removing the complete headlight assembly demands systematic disassembly of multiple access panels and fasteners before you can extract the unit from your F150. Begin by removing the plastic shroud using proper headlight disassembly techniques—release front clips and disconnect the intake snorkel. Use a 10mm socket to extract upper holding screws, then remove the rubber cover’s plastic rivet to access the third screw. Continue with 7mm and 8mm fasteners securing the bumper and underside components. Pull the headlight forward to disengage locating pins from the fender housing, wiggling gently if resistance occurs. Wiring harness management is critical—disconnect all connectors for high/low beam, parking light, and turn signal before completely removing the assembly. For older models, lift retaining tabs before separating harnesses. Before beginning this process, ensure the engine is turned off to prevent electrical hazards and allow components to cool safely. Understanding bulb compatibility requirements will help you select the correct replacement bulb type for your specific F150 model year once the assembly is removed.
Fitment:Specifically designed for Ford F-150 models 2015, 2016, and 2017.Convert your factory LED-equipped to use factory halogen headlights or aftermarket headlights with halogen-style plugs

Compatibility: Compatible with 2004 2005 2006 2007 2008 Ford F-150 06 07 08 Lincoln Mark LT headlight;NOT Compatible with 2004 F150 Heritage;NOT Compatible with Flareside Beds Models; high/low beam:H13; Halogen bulbs are not included

OEM# 3L3Z13008CA, 3L3Z13008DA, F75Z13201AC, F75Z13200AC: Get a 100% match for your vehicle: This replacement is ideal for 1997-2002 Expedition (submodel: Eddie Bauer, XLT), 2000 F-150 Harley-Davidson Edition, 1999-2000 F-150 Lightning, 2001-2003 F-150 (submodel: Lariat, XL, XLT) 1997-2000 Style, 1997 F-150 (submodel: Base, Lariat, XL, XLT) [Production Date After July 1996 ONLY], 1998-2000 F-150 (submodel: Base, Lariat, XL, XLT), 1997 F-250 (submodel: Base, Lariat, XL, XLT) Light Duty (New Body Style), 98-99 F-250 (submodel: Base, Lariat, XL, XLT) [w/o bracket],NOT fit F-150 SVT models.
Installing and Testing Your New Headlights
After extracting the old headlight assembly, you’ll mount the new Elite LED units using a specific connector sequence and factory hardware. Plug the 16-pin connector from the adapter harness into the passenger-side headlight’s back. Verify threads align properly when positioning the LED into the housing, then secure with the original screws, push pins, and bolts. Repeat this process on the driver’s side. Connect communication wires to designated red-circled areas on Elite fog lights. Route harnesses carefully, avoiding dielectric grease to prevent warranty issues. Reinstall the radiator core support panel with 13 plastic clips, mid-bumper trim, and fender liners. Access the vertical aim adjuster through the wheel well for aligning headlights. Mark the wall with tape at 23 feet away to establish your aiming reference point. LED bulbs offer superior brightness levels and longevity compared to traditional halogen options, making them an excellent choice for enhanced nighttime visibility. Ensure your new LED bulbs meet legal road use requirements before completing final assembly. Complete testing functionality by activating low beams, then high beams, confirming illumination and secure connections.


