
Your Jeep Wrangler’s headlight bulb replacement depends on your generation: TJ models (1997-2006) require H6024 sealed-beam units, while JK (2007-2017) and JL (2018-2023) use H13 dual-beam halogen bulbs. You’ll need a T15 Torx driver, screwdrivers, and should disconnect your battery before starting. Access the assembly by removing grill clips and retaining screws, then rotate the bulb connector clockwise to remove it. Wear gloves to prevent oil contamination on halogen glass. Proper installation techniques, LED conversion options, and troubleshooting procedures guarantee peak headlight performance throughout your vehicle’s lifespan.
Understanding Bulb Sizes and Types Across Wrangler Generations
Jeep Wrangler headlight bulb specifications have evolved considerably across four distinct generations, each requiring specific bulb sizes that aren’t interchangeable without modifications. Your TJ models (1997-2006) utilize H6024 or 6014 bulbs in 7-inch round housings, while JK (2007-2017), JL (2018-2023), and current models standardize on H13 (9008) dual-beam halogen types. These generation differences demand careful bulb compatibility checks before purchasing replacements. The shift from sealed-beam H6024 units to modern H13 dual-filament designs represents significant electrical and mounting configuration changes. You’ll find H13 bulbs support both halogen and LED aftermarket upgrades, whereas earlier 6014 bulbs require complete housing conversions for modern lighting technology. When selecting replacement bulbs, consider light output measured in lumens and color temperature to balance brightness with visibility needs. Ensuring your chosen bulbs meet DOT regulations will guarantee compliance with legal lighting standards. The 2023 Wrangler maintains the H13 (9008) specification for both high beam and low beam functions in a single dual-filament bulb. Understanding these generational distinctions prevents costly purchasing errors and guarantees proper headlight function during replacement procedures.
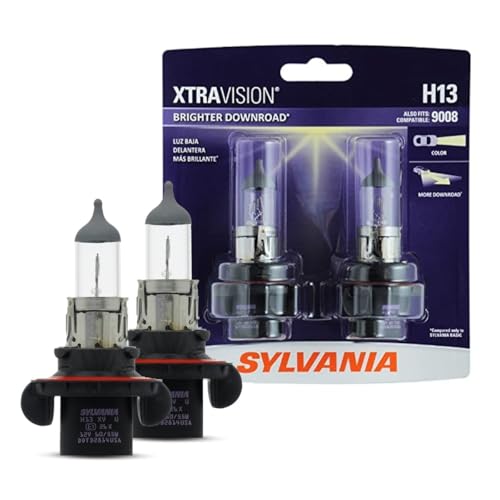
Lights Dim Over Time, Replace In Pairs: Your lights are a pair, one is never turned on without the other. If one bulb burns out, the other isn't far behind. Replace your H11 XtraVision Halogen bulbs in pairs for optimum performance.

Lights Dim Over Time, Replace In Pairs: Your lights are a pair, one is never turned on without the other. If one bulb burns out, the other isn't far behind. Replace your H13 SilverStar Halogen bulbs in pairs for optimum performance.

【Experience a 10X Brighter Night】 Transform your drive with our advanced 9008/H13 light bulbs. Each 9008 light bulbs combo, equipped with 12 high-performance chips, delivers a blinding 50,000 lumens per set. Powered by latest upgraded Z10 technology which provide unparalleled road illumination—turning night into day for a safer, more confident, and utterly superior driving journey.
Essential Tools and Safety Preparations
Proper headlight bulb replacement requires five essential tools that’ll streamline your Wrangler’s maintenance procedure and prevent common installation errors. Your tool selection should include a T15 Torx driver for assembly screws, flat blade screwdriver for retainer clips, Phillips head screwdriver for bezels, and a ratchet with appropriate sockets for specific model years. A dedicated clip remover tool prevents plastic damage during disassembly.
Before starting, disconnect your battery to eliminate electrical hazards. Essential safety gear includes protective eyewear against debris and gloves that prevent skin oils from contaminating halogen bulbs—a critical factor in premature failure. Park on level ground with the engine off and parking brake engaged. Work in well-lit conditions to properly identify fasteners and electrical connections, ensuring accurate component removal and installation. Keep replacement clips available since the original plastic retainers may break during removal due to age and brittleness.
Accessing the Headlight Assembly on Your Wrangler
Before you can replace your Wrangler’s headlight bulbs, you’ll need to remove the front grill assembly to expose the headlight mounting hardware. Start with grill removal by using a flathead screwdriver or trim removal tool to carefully pry up the six plastic panel clips securing the grill to your JK’s body. Pull the grill straight forward once the clips are removed.
For JK models (2007-2017), you’ll find four Torx screws around the headlight bucket perimeter. JL models (2018+) use three 10mm bolts instead. After removing these fasteners, gently pull the assembly away from the vehicle body. To avoid shortening bulb life, wear gloves when handling the new bulb to prevent oils from transferring to the glass.
Before fully removing the headlight assembly, disconnect the electrical connectors by lifting or sliding their lock tabs. Handle these sealed connectors carefully to prevent wiring damage. Having the proper tools nearby, such as screwdrivers and sockets, will make the removal process smoother and help you avoid dropping small fasteners.
Removing and Installing Halogen Bulbs
Once you’ve exposed the headlight assembly, replacing halogen bulbs requires careful handling to prevent contamination and guarantee proper function. Disconnect the bulb plug by turning it clockwise and pulling outward. Slide locking tabs upward to release the assembly. Pull the bulb straight out without twisting to avoid socket damage.
For installation, wear latex gloves—halogen bulb safety demands you never touch the glass with bare hands, as skin oils cause premature failure. Align socket pins with housing slots and insert gently. The bulb fits only one orientation, ensuring proper headlight alignment and beam pattern. Twist the plug clockwise until locking tabs engage. Replace dust covers to prevent moisture ingress, then secure all clips and verify housing alignment before testing functionality. For optimal results, consider changing bulbs in pairs to ensure balanced lighting across both headlights. Proper beam pattern quality ensures your headlights illuminate the road safely and effectively. The Wrangler uses H13 bulbs for both low and high beam headlights across model years 2007-2017.
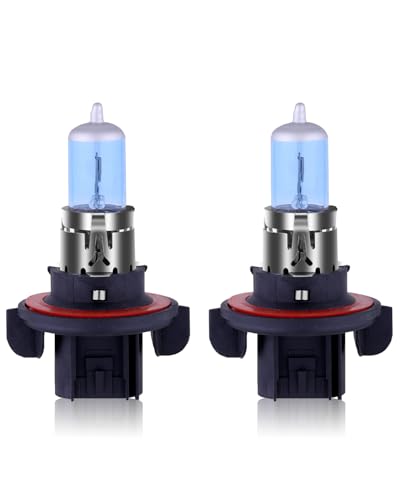
【Super Bright】Our H13 headlight bulb deliver a brightness of more than 1700/1000LM(60/55W), up to 5000K color temperature, providing the best visibility in foggy and rainy weather, Our headlight bulb filled with more than 45% Xenon gas to be more brighter and whiter, Blue ion membrane filters yellow light and gets SUPER WHITE LIGHT with color temperature up to 5000K.

WinPower H13 halogen bulb produces a color temperature of 4300K, up to 110% brighter and 30% longer light distance than other halogen. So you can be confident of getting a bright white light for excellent visibility.

Plug and play: 2 Pack H11 halogen headlight bulbs, 12V/55w, Manufactured by the Internatianal Standard, CE, DOT... Same bulbs size as original ones with same bases and plugs. Easy to install. Street Legal.
LED Bulb Installation and Alignment Considerations
When upgrading to LED headlights, you’ll encounter compatibility challenges that halogen systems don’t present. LED compatibility issues often require anti-flicker CAN-bus driver modules or resistors to prevent error codes and electrical instability. You’ll need manufacturer-specific adapters—like Truck-Lite or Mopar connectors—to maintain OEM electrical integrity while integrating DRLs and halo ring circuits.
Mechanical installation demands removing the grille and retaining rings, then aligning LED assemblies using indexing tabs and guiding pins for proper seating. Ensure adequate clearance for capacitors and cooling components. Disconnect the negative battery lead before beginning the installation process to prevent electrical shorts.
Beam pattern adjustments are critical since LEDs emit light differently than halogens. Use vertical and horizontal aim screws to establish proper cutoff lines, testing alignment at 25 feet against DOT standards. Verify heat sinks remain unobstructed to prevent thermal failure during operation.

This product is a current regulation integrated circuit operating from an input voltage of 2.8V to 6V, the constant output current can be set up to 1.5A with an external resistor.

Compatible with Ford F-150, F-250 Super Duty , F-350 Super Duty 2020–2023

Fog Light Bulb Replacement Procedures
Fog light bulb replacement on Jeep Wrangler models requires systematic access through the front bumper assembly. You’ll remove the panel behind the bumper by detaching approximately seven plastic clips and several 7mm bolts per side. Complete panel removal isn’t always necessary—lifting it aside often provides sufficient access. Locate the bulb housing secured by two tabs (top and bottom), then squeeze both simultaneously to release the assembly.
For proper fog light maintenance, verify lights are off before starting. Pull the bulb socket straight out, then install the replacement by pushing until you hear a click confirming proper seating. Verify bulb compatibility with your specific model year, as sizes vary between TJ, JK, and JL series. Proper beam alignment requires using adjustment tools like a narrow-head screwdriver or socket wrench to ensure optimal light distribution. When selecting replacement bulbs, ensure they meet DOT regulations to maintain legal compliance and optimal visibility performance. Test functionality before reassembling components and securing all fasteners.

High-quality Material: This PSX24W fog light bulb uses solid-state electronic components with shock and vibration resistance, as well as excellent waterproof performance, which can improve durability, long service life, and reduce replacement frequency.

High Brightness. 1600LM per PSX24W/2504 LED fog light bulb, 3200LM per set; Current: 600Ma; Power: 7.2W; Voltage: 12V-24V; Color: 6000K xenon white

(Set of 2) 360° Full Light Output with high illumination light output, LED Chips: Equipped with high quality 33pcs high power 5730 SMD per 2504 PSX24W LED fog lights bulb. Each LED bulb is about 1400 lumens, total 2800Lms for both PSX24W 2504 LED fog light bulbs.
Troubleshooting Common Headlight Replacement Issues
After completing your fog light service, headlight problems may still occur and require systematic diagnosis to identify root causes. Begin headlight troubleshooting by inspecting fuses in the TIPM and relay functionality, as blown fuses commonly cause complete headlight failure. Verify electrical connections at the harness connectors for corrosion, looseness, or water ingress—apply dielectric grease to prevent future degradation. Test the headlight switch and dimmer switch with a multimeter to confirm continuity. If both bulbs fail simultaneously, check for voltage spikes or socket contact issues. When installing aftermarket LED units, guarantee proper anti-flicker modules and compatible connectors are used. Switching bulbs between sides isolates whether the fault originates from the bulb or wiring harness, streamlining your diagnostic process. For persistent issues involving intermittent operation or erratic behavior, TIPM malfunctions may be disrupting power distribution to the headlight circuits and require professional diagnosis with specialized equipment.
![True Mods Headlight DRL Adapter Harness Kit Compatible with Jeep Wrangler JK CJ TJ [2 x 15A Mini Blade Fuses] [Plug N Play] Wiring for Headlights with Integrated LED Running Lights](https://m.media-amazon.com/images/I/4166dWl+-EL._SL500_.jpg)
NO-CUT INSTALL - Drawing power directly from the fuse box, our easy-to-use DRL adapter harness supplies power to your headlight's DRLs and halos without cutting into your stock wiring harness.

4 Types of Fuses: This assortment kit covers 4 types of fuses, they are Standard blade fuses, Mini blade fuses, Low Profile and Tall Profile STD Jcase box fuses. They are commonly used in most of vehicles such as Cars, Trucks, SUVs, ATVs, UTVs, Campers, RVs, Motorcycles, etc. This set is the best one to get if you are unsure what size fuses you should get for your car or if you have multiple cars.

COMPATIBLE--Compatible with most electrical devices and vehicles such as SUV, car, ATV, RV, caravan, golf cart, truck and more. Suitable for all cars, it‘s a great addition that will make you smile whenever you see it.
Maintenance Tips for Extended Bulb Longevity
While many Jeep Wrangler owners focus on selecting quality replacement bulbs, proper maintenance habits greatly extend headlight bulb lifespan and optimize performance. Clean wire harness contacts with compressed air before installation to prevent dirt buildup. Never touch halogen bulb glass with bare hands—oils create hotspots causing premature failure. Inspect rubber gaskets annually for cracks, applying dielectric grease to maintain pliability and moisture resistance. Replace damaged seals immediately to preserve watertight integrity. Check electrical connections regularly, cleaning terminals to guarantee consistent power delivery. Avoid frequent on/off cycling, which accelerates filament degradation. Replace bulbs in pairs to maintain balanced lighting and prevent over-driving single bulbs. Keep headlight lenses clean externally to reduce thermal stress and maximize bulb lifespan through deliberate maintenance habits. Consistent lumens output depends on maintaining clean optical surfaces and secure electrical connections throughout your lighting system. Use proper lighting conditions when performing bulb replacement to ensure visibility and accuracy during the installation process.


