Your Lexus RX 350 uses either H11 halogen or D2S HID bulbs depending on the trim level. You’ll need to access the housing from the engine bay, potentially removing wheel well liners. For halogen bulbs, disconnect the electrical connector, release the retaining clip, and twist counterclockwise. HID replacements require battery disconnection, ballast removal, and careful handling to avoid touching the quartz glass. Always wear gloves and verify voltage with a multimeter before reassembly. This guide covers complete installation procedures for both systems.
Model Years and Compatibility
The Lexus RX350 uses two distinct headlight bulb systems across its production years, requiring different replacement approaches depending on your vehicle’s trim level and model year. From 2007-2022, you’ll encounter either halogen H11 capsule bulbs or D2S HID bulbs for low beams, with model year differences determining which system your vehicle employs.
The 2010-2015 generation presents significant trim variations—some trims feature standard halogen H11C bulbs, while others include factory HID D2S systems. You can’t interchange these types during replacement. The 2016-2019 models continue this dual-system approach, though HID configurations may involve ballast failures alongside bulb burnout.
Your RX450h shares identical 2010-2015 compatibility specifications. Always verify your specific bulb type before purchasing replacements, as procedures differ considerably between halogen and HID systems. To access the headlight housing, you may need to remove fender liners and wheel wells for proper bulb replacement. Evaluating bulbs based on brightness, longevity, and color temperature will help you select the most suitable replacement for your needs. For optimal visibility and safety, consider replacing headlights in pairs to ensure uniform light intensity across both sides of your vehicle.
Understanding Your Headlight Bulb Types
Before you purchase replacement bulbs for your Lexus RX 350, you’ll need to identify which of three core headlight technologies your vehicle uses: halogen, HID (High-Intensity Discharge), or LED. Halogen bulbs feature a tungsten filament in halogen gas and are the most affordable option. HID bulbs use xenon gas discharge to deliver higher brightness levels and cooler color temperatures, but they require ballasts and cannot directly replace halogen units. LED bulbs offer solid-state technology with exceptional energy efficiency and extended service life. Each bulb type produces different lumen outputs and beam patterns. Check your owner’s manual or existing bulb markings to confirm your specific bulb types—halogen codes like H11 or 9005, or HID designations such as D4S, vary by model year and trim level. Modern vehicles with automatic headlight systems use ambient light sensors to optimize when your headlights activate, which can affect bulb performance and replacement timing. To ensure safe operation and compliance with road regulations, the correct bulb must physically fit the headlight housing and match your vehicle’s electrical requirements. Many bulbs share the same physical size but differ in part numbers, so understanding these equivalencies is essential when selecting compatible replacements for your vehicle.
Excellent brightness: D4S HID bulbs features a 6000K Diamond white, and its light output is 150% brighter than other bulbs for brilliant downward reflection

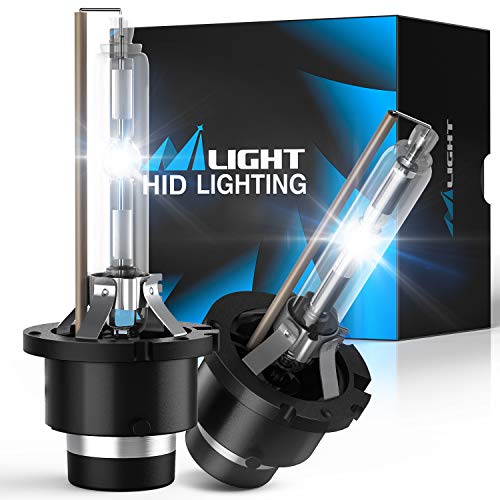
The High Intensity Discharge (HID) Xenon AC 85V 35W D2 S P32d-2, compatible with 2004 2005 2006 2007 2008 2009 lexus lexus rx330 rx350 rx400h rx 330 350 400h afs headlights projector low beam
Tools and Materials Needed
Gathering your materials beforehand guarantees you’ll complete this repair efficiently and safely. You’ll need a flathead screwdriver for engine cover clips, replacement H11 halogen or HID bulbs (verify H11C compatibility), and gloves to prevent oil transfer to the bulb glass. Keep spare clips available since engine cover fasteners become brittle over time. For HID installations, obtain spring clip tools and alignment guides matching your bulb’s semi-circular and square notches.
Safety precautions include disconnecting your battery before starting work and using a hood prop for stable access. Replace bulbs in pairs to maintain consistent light intensity. Ensure any replacement bulbs meet federal safety standards for color, brightness, and beam pattern to comply with regulations. Check Walmart or AutoZone for bulb availability. Follow local regulations for bulb disposal, as some contain materials requiring proper recycling. Like upgrading to yellow daytime running lights, proper bulb selection ensures your vehicle maintains optimal visibility and road presence. No specialized tools are needed for the quarter-turn bulb removal itself.

Perfect Focused Beam: RENO H11 with a clear beam pattern, preventing glare for oncoming vehicles. No dark spots, no shadows, ensuring a wider and farther view at night

【Visual Enhancement】: The OKOENIEO H11 headlight bulb are 200% brighter than other halogen bulbs, providing drivers with a wider and farther field of vision. Offering a greater visibility, they allow drivers to spot deer, wildlife, falling rocks, or obstacles ahead of time, ensuring safer nighttime driving.

HIGH PERFORMANCE AND VALUE: The performance choice for safety-conscious drivers, VisionPlus headlight bulbs offer high-performance and excellent value. VisionPlus is the right choice for today's demanding drivers.
Preparing Your Vehicle for Bulb Replacement
Once you’ve gathered your materials, start by parking your RX 350 on level ground and engaging the parking brake to prevent any movement during the repair. Turn off the ignition and remove the key to avoid accidental electrical shorts. Open the hood fully and verify it’s securely supported by the strut—never work with a partially supported hood.
Set up adequate task lighting directed into the engine bay so you can clearly see clips and connectors. Prepare a clean tray or magnetic dish for fasteners and clips to prevent loss. Identify which engine access panels or covers must be removed to reach the headlight housing; some model years require removing the fuse box for passenger-side clearance. Depress retaining clip center tabs carefully, as brittle clips break easily. Keep spare clips available. Before beginning work, familiarize yourself with your vehicle’s headlight warranty coverage to understand what components may be covered if damage occurs during replacement. You’ll need a flat blade screwdriver to pry out aftermarket-style push pins if they’re present on your engine covers.
Replacing Halogen Headlight Bulbs
With your RX 350 properly prepared and the work area secured, you’re ready to remove and install the halogen headlight bulbs. Access the bulb housing from the engine bay behind the headlamp assembly—some model years require removing the wheel well liner for easier reach. Wear clean gloves to prevent oil contamination on the bulb glass, which drastically reduces bulb lifespan. Disconnect the electrical connector, then release the retaining clip or twist the bulb socket counterclockwise, depending on your year. Remove the old bulb without touching the new bulb’s glass envelope. After disconnecting the harness connector, remove the rubber weather cover to access the bulb holder. Insert the replacement bulb—verify it’s the correct fitment (H11 for low-beam, 9005 for high-beam)—and secure the clip. Reconnect the connector and test function before reassembling components. Use trim tools for clips when working with retained components to avoid damaging the headlight housing during the replacement process. Over time, halogen headlights can experience UV exposure and oxidation that clouds the lens, so maintaining your bulbs in good condition helps preserve clarity. These installation tips guarantee reliable performance and maximum service life.

Lights Dim Over Time, Replace In Pairs: Your lights are a pair, one is never turned on without the other. If one bulb burns out, the other isn't far behind. Replace your H11 XtraVision Halogen bulbs in pairs for optimum performance.

100% New & Genuine Osram Made in Germany - Pack of 2 bulbs.

See the Road in a New Light: Get 900% the brightness of halogens with a powerful 50,000-lumen beam. The AUXITO H11 light bulbs illuminate more road ahead, giving you the clarity to spot hazards sooner.
Replacing HID Headlight Bulbs
HID (High-Intensity Discharge) headlight bulbs require more cautious handling than standard halogen units due to their high-voltage operation and delicate construction. Before starting, disconnect your battery to prevent electrical shock. Remove engine covers and access panels by pressing release tabs. Locate the ballast connector behind the headlight assembly, lift the tab, and wiggle it free. Twist the ballast counterclockwise and pull it out with the attached cable.
Turn the bulb cover counterclockwise until it stops, then remove it. Press the metal retaining clips inward to release the D2S bulb. Never touch the quartz glass—this damages HID bulb longevity. Align the new bulb’s notches with housing cutouts and secure with spring clips. Transfer the old o-ring to the new ballast before reinstalling the assembly. Consider the beam pattern quality to ensure optimal headlight performance after replacement. Verify ballast functionality if replacement bulbs fail immediately. Replace both bulbs simultaneously for consistent intensity, and test your headlights after installation to ensure proper alignment and functionality.

【IMPORTANT】Replacement for factory D2S HID bulb only, NOT fit if your car stock Halogen headlight bulb even system say "fits".

Fitment: 8110775020 HID Ballast Xenon HID Headlight Ballast Control Unit Compatible with New Lexus GS LX RX 350 450h 570.

1.5X brightness up d4s xenon bulbs upgrade for 10 11 12 13 14 15 lexus rx 350 rx350 f sport adaptive headlights HID bi-xenon low beam (never fit any halogen headlamp mainly of low trim base models)
Testing and Final Assembly
After installing your new headlight bulbs, you’ll need to test electrical connections before reassembling everything. Start headlight testing by cycling the switch through low, high, and DRL positions while confirming proper lamp responses. Use a multimeter to verify 12–14V at bulb connectors and inspect pins for corrosion or damage. Activate all lighting circuits to detect parasitic loads affecting brightness.
For assembly verification, reinstall dust covers with full rotation to maintain watertight seals. Secure spring clips until they latch audibly, then route harnesses away from heat and sharp edges using OEM clips. Torque mounting bolts to spec without over-tightening plastic components. Ensure all clips are replaced correctly to secure the engine covers back in their original positions.
Perform final checks: test low beams, high beams, fogs, and turn signals. Confirm no dashboard warnings appear, then verify automatic features function properly during a test drive.