To replace your Nissan Frontier’s headlight bulb, you’ll need to identify the correct 9007/HB5 type for 2001-2024 models. Open the hood, disconnect the electrical connector by depressing the locking tab, then rotate the retainer ring counterclockwise to remove the old bulb. Install the new bulb without touching the glass, rotate the retainer clockwise to lock it, and test both beams. This 15-minute job requires basic tools and can save you $50-100 in labor costs while ensuring proper visibility and compliance with safety regulations.
Understanding Nissan Frontier Bulb Types and Socket Sizes
When replacing headlight bulbs in your Nissan Frontier, identifying the correct bulb type prevents compatibility issues and guarantees safe installation. The 9007/HB5 bulb serves as the standard high/low beam for 2001-2019 and 2022-2024 models across S and SV trims. This socket consistency simplifies replacements for most Frontier generations. However, bulb compatibility varies in earlier years—1998-2000 models use distinct headlight sockets requiring verification before purchase. For fog lights, you’ll encounter socket variations: H11 fits 2022-2024 models, while 880/881 bulbs work in 2003-2004 applications, and H3 serves 2001-2002 fog positions. The 9006/HB4 socket appears as a compatible fog option for 2000-2023 models. The 2020-2021 models also utilize 9007/HB5 LED headlight bulbs while maintaining H11 fog light compatibility. For consistent lighting and optimal safety, it’s recommended to replace bulbs in pairs rather than individually. Upgrading to LED and HID conversions can offer improved visibility and longer lifespan compared to factory halogen bulbs. Always cross-reference your specific model year against OEM specifications, as aftermarket headlight assemblies may alter original socket configurations.

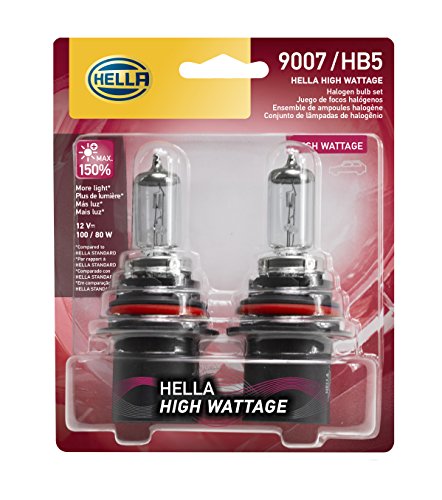
Lights Dim Over Time, Replace In Pairs: Your lights are a pair, one is never turned on without the other. If one bulb burns out, the other isn't far behind. Replace your 9007 XtraVision Halogen bulbs in pairs for optimum performance.
High Wattage bulbs provide a longer service life compared to standard HELLA bulbs. These bulbs are Off-road use only.

Lights Dim Over Time, Replace In Pairs: Your lights are a pair, one is never turned on without the other. If one bulb burns out, the other isn't far behind. Replace your 9007 SilverStar Halogen bulbs in pairs for optimum performance.
Step-by-Step Headlight Bulb Replacement Procedure
Replacing your Nissan Frontier’s headlight bulb requires five critical phases: workspace preparation, connector removal, bulb extraction, new bulb installation, and beam verification.
First, open your hood and clear obstructions blocking headlight access. Disconnect the negative battery terminal if clearances are tight. Depress the connector’s locking tab and pull straight off. Rotate the retainer ring counterclockwise one-quarter turn, noting bulb alignment for reinstallation.
Pull the old bulb straight out without twisting. Never touch the new bulb’s glass envelope—skin oils cause premature failure. Perform a housing inspection for corrosion, water damage, or seal deterioration.
Install the manufacturer-specified bulb, aligning keying tabs correctly. Rotate the retainer clockwise to lock. Connect the electrical plug until it clicks. The white plastic locking collar secures the bulb by rotating one-quarter turn clockwise into the housing. Test both low and high beams immediately. Verify beam pattern and adjust if necessary.

Lights Dim Over Time, Replace In Pairs: Be sure to replace both 9007 headlights at the same time for optimum performance. If one bulb burns out, the other isn't far behind. Replacing in pairs allows for premium visibility


Fit for 99% of vehicles - SYJIIP Halogen headlamp are close to the wattage of the stock halogen headlamp bulb, which can reduce the occurrence of CANBUS problems, avoid erroneous and flickering. As long as your stock light bulb model is the same as ours, then SYJIIP's light bulb will be suitable for your car.
Essential Tools and Safety Precautions
Gather your tools before starting any headlight bulb replacement to guarantee an efficient, uninterrupted workflow. Proper tool organization includes a 10mm socket with ratchet and extension, Phillips head screwdriver, flat blade screwdriver, and trim tool set. You’ll need a 1/4 inch ratchet with swiveling extension for accessing hidden fender bolts in tight spaces.
Safety gear requirements are non-negotiable: wear gloves to prevent skin oils from contacting the bulb glass, which causes premature failure. Safety glasses protect against debris during disassembly. Park your Frontier on level ground with wheel chocks engaged before lifting.
Disconnect the battery or harness tabs before extracting bulbs. Apply WD-40 sparingly only to retainer rings. The 2003 Frontier uses a 9007 dual filament bulb for both high and low beam functions. Verify that the bulb’s base type physically fits your headlight housing to ensure proper installation. Always test new bulbs before complete reassembly to verify functionality. Using dielectric grease on connections helps protect electrical components from corrosion and ensures reliable performance.

【Compatible with Nissan Frontier Headlight Bulbs】LECCIBUB halogen headlights are perfectly compatible with Nissan Frontier 2001 2002 2003 2004 2005 2006 2007 2008 2009 2010 2011 2012 2013 2014 2015 2016 2017 2018 2019.Reduce the risk of error warnings,radio static or flickering.You don't require additional encoders.The halogen headlights combo includes 2pcs 9007/HB5 high low beam headlights,totaling 2 Halogen bulbs in the package.

【Fitment Models】: Direct OE replacement compatible with 2009, 2010, 2011, 2012, 2013, 2014, 2015, 2016, 2017, 2018, 2019, 2020 Nissan Frontier. ONLY fits models with factory Halogen headlights

800% BRIGHTER BULBS:This product includes HB5/9007 can be used as high beam and low beam bulbs.Equipped with 24 high-luminous-efficiency LED CSP chips, the 6000K white light has strong penetrability and a longer illumination distance, enabling you to identify road conditions in advance and making night driving more reassuring.
LED and HID Upgrade Options for Your Frontier
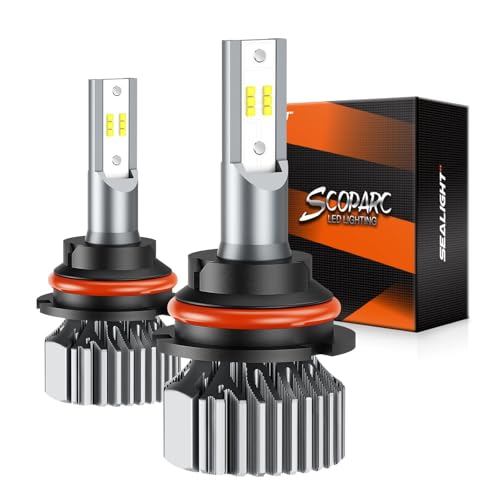
Since your Frontier left the factory with halogen headlights, you’ll gain significant visibility improvements by upgrading to LED bulbs designed specifically for the 9007/HB5 socket configuration. Top-performing options include LASFIT’s 400% brightness increase at 3000 lumens per bulb, SEALIGHT’s X4i delivering 28,000LM per set, and Carifex Pro Fit bulbs with CREE LED chips offering 50,000-hour lifespans.
LED advantages include fanless direct-fit designs, under-30-minute installation, and superior beam patterns in OEM halogen housings. Ultra-thin construction eliminates dark spots while maintaining 360-degree adjustability. These upgrades also contribute to improved fuel economy through reduced power consumption compared to traditional halogen systems.
HID drawbacks become apparent in stock halogen housings, where they produce scattered light and reduced effectiveness compared to LED alternatives. For maximum output, consider HID Projectors’ Bi-LED modification service, which provides 40% brighter performance than standard LED upgrades while maintaining proper beam control.

15X Brighter - Newly Enhanced: The Termitor 9007 HB5 fog light kits feature 24 high-performance chips, delivering up to 15 times the brightness of standard halogen bulbs. Upgrade your nighttime driving experience by replacing dim, yellow stock bulbs with Termitor 9007 fog light, offering superior illumination and enhanced visibility with a crisp 6500K cool white light for optimal light transmission
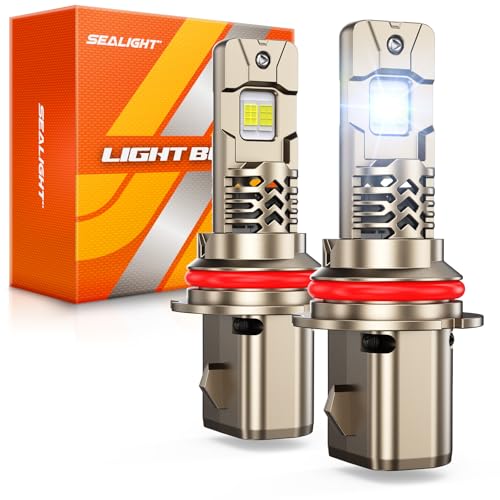
1000% Brighter: SEALIGHT 9007 Led Light bulb, 24 top led-chips, delivering 50000LM of light output, 6500K cool white, which is 10X brighter than original light bulbs, providing crisp and wide light
【800% Super Brighter】 The SEALIGHT S1 bulb for fog adopt the latest chip, 32000LM efficient lighting output. Providing wider and farther lighting range. Helping you see the road markings, obstacles, and other vehicles more clearly in driving
Bulb Lifespan, Brightness, and Color Temperature Explained
Understanding bulb specifications helps you select the right replacement for your Frontier’s specific driving conditions and longevity requirements. Halogen bulbs average 1,000 hours (14 months), while HID/xenon variants last 2,000-20,000 hours depending on OEM quality. LED bulbs provide the longest service at 5,000-45,000 hours. Bulb longevity factors include your Frontier’s vibration exposure, nighttime usage frequency, and electrical system condition. Stop-and-go traffic accelerates wear through repeated cycling.
For brightness comparison, halogens deliver 150% maximum output, OE xenon achieves 200%, LEDs reach 300%, and HID conversions peak at 450%. Color temperature ranges from halogen’s 3,000-3,500K (yellowish) to LED’s 5,000-6,500K (daylight white). Higher temperatures produce bluer light but reduce fog penetration. Heat management critically affects lifespan—excessive voltage or inadequate cooling degrades performance. Match bulb specifications to your typical driving environment. Replace headlights in pairs to maintain even brightness and consistent light output across both sides of your vehicle.
Where to Buy Replacement Bulbs and Cost Considerations
Budget allocation greatly impacts your Frontier’s headlight replacement options, with prices spanning from $9.99 economy bulbs to $155 professional installations. Walmart offers the most competitive DIY pricing, with LED kits starting at $17.79 for 9007/HB5 combinations and clearance options reaching $35.79 for 60W 12000LM systems. Advance Auto Parts averages $64.32 for 2024 Frontier headlights, while AutoZone features premium Sylvania XtraVision H11 bulbs at $23.99-$42.49 with 4.4+ star ratings. You’ll find warranty considerations vary considerably between economy and premium brands. Installation services through YourMechanic start at $155, incorporating parts and labor—ideal if you’re uncomfortable with DIY procedures. Compare retailer return policies and bulb warranties before purchasing, ensuring protection against premature failures during critical nighttime operation. Consider replacing halogen bulbs in pairs to maintain equal brightness and consistent illumination across both headlights. Major retailers provide access to factory and custom styles of replacement headlights beyond basic bulb options if you’re interested in upgrading your vehicle’s appearance. Understanding color temperature ratings can help you select bulbs that provide optimal visibility while maintaining compliance with legal brightness requirements.

Fit For Nissan Frontier: DMEPUGI high performance halogen light bulbs are perfectly fit for Nissan Frontier 2003 2004 2005 2006 2007 2008 2009 2010 2011 2012 2013 2014 2015 2016 2017 2018 2019 Headlight Bulbs.Provide brighter and clearer lighting effects.The package includes 2 pcs halogen bulbs, suitable for high low beam light bulbs.

【Pefect 1:1 Lighting】Autoone 9007 hb5 led feature advanced same halogen 9007 beam pattern with 0.03in ultra-thin profile. Delivering wider angles and farther range light on the road. Without any dark spots and no glare to the oncoming t raffic. ensures a safer driving experience for you and others

Common Pitfalls and Troubleshooting Tips
Although Nissan Frontier headlight replacement appears straightforward, several critical mistakes can compromise your lighting system’s performance and longevity. Common mistakes include handling halogen bulbs by the glass—skin oils cause premature failure—and forcing oversized LED bulbs into tight housings. Always verify your bulb number matches your Frontier’s specification before purchasing.
Corrosion impact becomes severe in humid climates. Inspect connectors for existing buildup, then clean with electrical contact cleaner before applying dielectric grease. Omitting this step risks intermittent lighting failures.
LED upgrades often trigger flickering or dash warnings. Select 1:1 design LEDs matching halogen dimensions for proper fitment. Never skip the dust cover—use extended versions if necessary to prevent moisture damage. Always test beam alignment against your garage door post-installation. For the 2008 Nissan Frontier, access the headlight assembly from under the hood rather than attempting removal from the front fascia.
Legal Requirements and Beam Pattern Compliance
Beyond proper installation techniques, your Frontier’s headlight modifications must meet strict federal and state regulations. DOT-approved LED headlights are legal across all 50 states when properly installed, while non-compliant conversions risk fix-it tickets ranging from $100 to $200. Higher legal penalties apply if illegal lights contribute to accidents, potentially affecting insurance liability.
Your replacements must meet specific compliance standards. Choose DOT-certified complete headlight assemblies rather than bulb-only conversions, which can distort beam patterns in stock halogen housings. Sylvania halogen bulbs meeting SAE standards offer guaranteed compliance for performance and longevity. Modern vehicles use replaceable halogen or HID bulbs, with HID options providing brighter, bluish-white light than traditional halogen alternatives. LED bulbs emit light differently from multiple diodes in different locations, which is why proper LED-specific reflectors or conversion kits are necessary to ensure correct beam patterns. Many aftermarket LED bulbs lack NHTSA official approval and cannot be legally used on street-registered vehicles.
Non-compliant headlights cause inspection failures, preventing vehicle registration renewal. Worse, improper beam patterns create dangerous glare for oncoming traffic. Install only certified assemblies that guarantee proper light distribution, meeting both federal safety requirements and local road regulations.