Daytime running lights (DRLs) activate automatically when you start your engine—they don’t require manual intervention in factory-equipped vehicles. Simply turn your ignition to the “on” position with your headlight switch in the “auto” or “off” position, and the DRLs will energize through your vehicle’s body control module. If they’re not working, check your owner’s manual to verify DRL presence, inspect the fuse box for blown fuses, and confirm the ambient light sensor isn’t obstructed. Understanding your specific system’s operation mechanisms will help you troubleshoot activation issues effectively.
What Are Daytime Running Lights and How Do They Work
Daytime Running Lights (DRLs) are low-wattage, forward-facing lamps that activate automatically when your vehicle’s engine runs. These daytime visibility features emit white, yellow, or amber light designed to make your vehicle conspicuous to other drivers, pedestrians, and cyclists—not to illuminate the road ahead. Unlike headlights, DRLs operate at lower intensity, typically consuming just 8–20 watts in LED configurations.
The operational mechanism requires no manual input. Your DRL module communicates with ambient light sensors, switching on when you start the ignition or release the handbrake. They deactivate when you engage your headlights or shut down the engine. These vehicle safety enhancements improve your conspicuousness in shaded areas, overcast conditions, and during dawn or dusk, reducing collision risk by helping others perceive your distance and speed accurately. LED DRLs provide immediate illumination without requiring any warm-up time, which enhances safety from the moment you start your vehicle.
Understanding Automatic Activation Systems in Your Vehicle
When you start your vehicle’s engine, the automatic DRL system initiates through a coordinated sequence of electronic signals and hardware components working in concert. Your vehicle’s body control module (BCM) receives the ignition-on signal via CAN-bus messaging and energizes the DRL relay or dedicated module. This powers your LED or halogen lamps at reduced intensity. The system continuously monitors headlight position—disabling DRLs when you activate main headlights to prevent redundant illumination. Ambient-light sensors modify activation thresholds in modern vehicle lighting technology, preventing DRL operation in darkness when full headlights are required. Fail-safe logic protects your battery by shutting down DRLs if voltage drops below minimum thresholds. DRLs enhance vehicle noticeability, making your car more visible to other drivers and helping prevent front-end collisions. Understanding these automatic activation systems helps you diagnose malfunctions and guarantees compliance with regional safety regulations.

Upgrade your vehicle with a complete driver/passenger side bar shape LED illuminated DRL daytime running light kit

❤️ High brightness --- Imported high-purity LED high-power light source five lamp beads structure design;

Practical Function: Our hood LED light strip adopts a dynamic lighting effect, which can outline the line contour and add a sense of technology to your car. Meanwhile, its bright light can attract the attention of pedestrians and other vehicles, enhancing driving safety
Manual Override Options for DRL Systems
While automatic DRL systems operate independently upon ignition, you retain control through several manual override methods that let you disable or modify their operation. Your headlight stalk provides the simplest approach—rotating to the full “on” position deactivates DRL by engaging low beams directly. For permanent changes, access your vehicle’s settings menu: select setup, navigate to vehicle customize, then light settings to disable DRL completely. Some models require button sequences; press M three times, then toggle with +/- buttons. Advanced manual override involves relay disconnection—locate the DRL relay below your steering panel, remove the securing bolt, and extract pin 2 from the connector. These procedures vary based on your specific VW model and year, as some vehicles may require different technical approaches. Always test all lighting functions afterward to verify factory settings haven’t compromised safety features. Removing the DRL relay pin eliminates circuit voltage issues that can affect auxiliary lighting systems. Note that DRLs are a safety feature and disabling them may be subject to local laws.

Integrated Diode: Each relay includes a built-in diode that suppresses induced voltage during switching, safeguarding your electrical components from potential damage.

[High quality material]: This Relay Base Bracket is made of high quality nylon, with high mechanical strength, good toughness, heat resistance, smooth surface, wear resistance, corrosion resistance, excellent electrical performance, light weight and so on.

High switching capability: Normally open 40A/14V DC and normally close 30A/14V DC. Suitable for Nilight LED light bar wiring harness kit
Checking if Your Vehicle Has Factory-Installed DRLs
Apply DRL identification techniques by starting the engine with headlights off—factory DRLs activate automatically when the handbrake releases and transmission engages. Consult your owner’s manual for specifications confirming DRL presence and locate lighting diagrams showing exact positions. Note that GM vehicles manufactured from 1995 onward include standard DRLs, while EU and Canadian-market vehicles mandate them per regional regulations. Understanding beam pattern quality helps ensure your DRLs project light effectively across the road ahead. Maintaining clear headlight visibility is essential for ensuring your DRLs and main headlamps function effectively at night. When DRLs are active, they typically emit a brighter light that automatically dims when the main headlamps are activated.
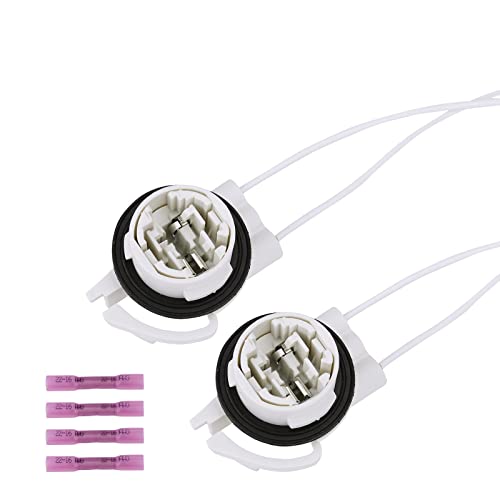
REPLACEMENT Light Socket Repair Kit-Heavy duty bindings offer a greater hold against vibration, abrasions, and moisture

Powered by 9 pieces xenon white LED lights

【Compatible Models】 Suitable for Toyota Camry SE XSE 2018 2019 2020, TRD 2018-2022 daytime running light with LED fog light.(Please check your vehicle model and years before your purchase this light).
Enabling DRLs Through Vehicle Settings and Controls
Most modern vehicles activate DRLs automatically upon engine start without requiring driver intervention. When you turn the ignition on and shift into drive mode, the system engages to enhance driving safety and vehicle visibility. Manual transmissions require you to engage gear with the engine running for activation.
You can access manual control options through your vehicle’s user interface. Some models feature dedicated buttons for temporary disablement, while Ford and Lincoln vehicles allow DRL toggling via smart junction box programming or lighting control knobs. You’ll find automatic mode settings accessible through the interface, where ambient light sensors determine activation criteria.
DRLs deactivate when you engage parking mode, activate headlights, or apply the emergency brake. The brightness may adjust based on ambient light conditions to optimize visibility without causing glare. Vehicle-specific procedures may require dealer programming using specialized equipment like Ford’s IDS programmer.

Precision Fitment: Designed for 2010-2017 Buick LaCrosse, Cadillac XTS/ATS/XTS-V/L/S, and GMC Acadia models ensure seamless integration.

Universal fitment for any vehicle with LED DRLs, ensuring compatibility with most car models

Fitment: 8R0941476B Right side LED Daytime Running Light DRL Control Module Unit Compatible with Q5 SQ5 2013 - 2017
Aftermarket DRL Installation and Activation Methods
Aftermarket DRL installations require three essential power connections: a switched ignition source, a protected ground path, and properly sized circuit protection. You’ll tap accessory or ignition-switched fuse circuits using add-a-fuse adapters rated for your DRL current draw. Connect ground terminal 31 to clean chassis metal with star washers, verifying low resistance using a multimeter. For high-current kits, run dedicated fused feeds from battery positive through a relay to isolate factory aftermarket wiring.
Route DRL circuitry inside existing harness channels, securing conductors with zip ties and protecting runs with split loom near heat sources. Use correct wire gauge—typically 18–14 AWG for LED strips—to prevent voltage drop. Install four-pin relays when switching loads exceed circuit capacity, and employ DRL control modules for dimming or turn-signal integration functions. Mount the DRL units using clip-in brackets at your preferred location, typically under the lower bumper for optimal visibility. Similar to headlight assembly removal, ensure all electrical connections are secure for proper function.

One wiring harness set includes a 4-pin SPST module box, in-line safety fuse box, input +/- terminals, H11/H8/H9 input trigger and dual outputs for reliable and efficient electrical connections
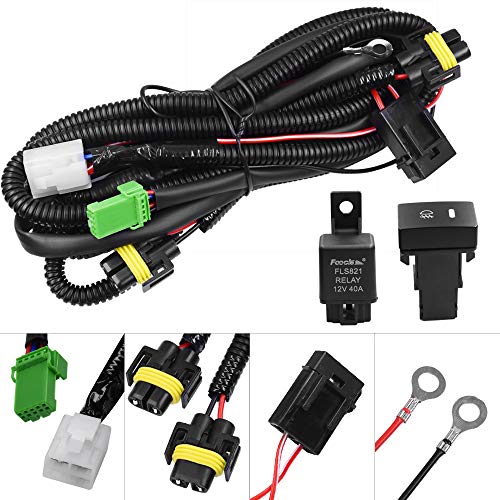
Good For Replacement fog lamps, Add-on fog lights, HID lights, LED daytime running lights, Driving lights, LED work lights, Off-road lighting kit

Universal fit: Compatible with all automobiles, boats and devices equipped with a 12 volt power source
Troubleshooting Common DRL Activation Issues
Even properly installed DRL systems fail due to component degradation, electrical faults, and sensor malfunctions. Start troubleshooting with bulb replacement if one DRL goes dark, as filament failure is the most common issue in Toyota vehicles. When both DRLs fail simultaneously, begin with fuse checking at the fuse box before proceeding to other diagnostics. Blown fuses indicate underlying problems like corroded sockets or damaged wiring requiring immediate attention.
If DRLs stay illuminated with the vehicle off, suspect a shorted module or wiring fault. Burning odors signal overheating components demanding urgent repair. Ambient light sensor disconnection prevents automatic activation, requiring sensor replacement or recalibration. Dim or flickering lights suggest weak battery voltage or charging system deficiencies. Never ignore accelerated bulb wear patterns, as they indicate module malfunction causing excessive current draw and potential battery drain. Check that no obstructions on the dash are covering the ambient light sensor, as this can prevent proper DRL activation. To identify a blown fuse, look for a broken filament or discoloration inside the fuse before replacing it with one that matches the original amperage rating. Proper headlight beam alignment ensures that all lighting systems, including DRLs, are positioned correctly for optimal visibility and safety.