
To replace your Honda Odyssey’s headlight bulb, first park on level ground, turn off the engine, and disconnect the battery. Open the hood and locate the bulb assembly behind the headlight housing. Disconnect the electrical connector, twist the bulb counterclockwise to remove it, then insert the new bulb without touching the glass. Reconnect the connector until it clicks, test the headlight’s function, and verify proper beam alignment. The following sections provide detailed specifications and troubleshooting procedures for optimal performance.
Preparation and Safety Precautions
Before replacing your Honda Odyssey’s headlight bulbs, you must establish a safe working environment and gather the necessary protective equipment. Park your vehicle on a flat, stable surface to prevent movement during maintenance. Ascertain the engine is off and remove the keys from the ignition. Allow adequate cooling time if you’ve recently driven, as bulbs and components become extremely hot.
PPE importance cannot be overstated. Wear safety glasses to protect your eyes from debris and potential bulb fragments. Use clean, non-abrasive gloves to prevent skin oils from contaminating the bulb glass, which causes premature failure. Never touch bulb surfaces directly with bare hands. Oil transfer from your hands to the bulb can result in premature burnout and reduced bulb lifespan.
Open and securely prop the hood for safe access. Disconnect the battery if your vehicle manual recommends it, preventing accidental short circuits during replacement. Identify whether your vehicle uses halogen bulbs or LED replacements to ensure you select the correct bulb type for your model. Gather essential tools needed such as screwdrivers and sockets before beginning work to ensure you have everything required for a smooth replacement process.
Accessing the Headlight Assembly
Two primary access points exist for replacing your Honda Odyssey’s headlight bulbs: through the engine compartment or by removing the entire headlight assembly.
For engine compartment access, open the hood using the interior release lever and secondary latch beneath the hood center. Secure the hood with the support rod. Locate the electrical connector behind the headlight housing, press the release tab, and disconnect it. Inspect for corrosion—a common issue causing electrical failures. Understanding color temperature and bulb specifications can help you select the right replacement when the time comes.
For full assembly removal, you’ll need to detach bumper trim components. Remove plastic push clips and 10mm bolts securing the bumper near wheel wells. Release retaining clips holding the assembly using a flathead screwdriver. Access the front wheel well and locate two Phillips screws on both sides. Many clips can break during the removal process, so have extra clips ready before beginning the job. Safety concerns include avoiding excessive force that may crack plastic housings or damage wiring harnesses during extraction.
Identifying the Correct Bulb Type
Selecting the correct replacement bulb for your Honda Odyssey requires matching both the bulb type and your vehicle’s specific model year and trim level. Recent models (2019-2021) use H11 or H8/H9 for low beams and 9005 for high beams. Models from 2011-2018 typically utilize H11 low beams and 9005 high beams, while earlier versions (2005-2010) may require 9006 for low beams. Higher-end trims often feature HID bulbs (D2S/D2R or D3S/D3R) instead of halogen. For 2000-2004 Odyssey models, the headlight bulbs use a 9003/H4 bulb size, which is a dual-beam configuration.
Verify your bulb size through the owner’s manual or Honda’s official bulb chart. Different headlight technologies require specific replacements—you can’t substitute LED bulbs for factory HID systems without complete conversion kits. It’s important to replace bulbs in pairs to maintain consistent lighting output across both sides of your vehicle. Premium bulbs with enhanced brightness and color temperature can improve nighttime driving safety and visibility compared to standard factory options. Consider bulb aging when choosing replacements; match both connector type and wattage specifications to prevent electrical issues or improper fitment.

【Visual Enhancement】: The OKOENIEO H11 headlight bulb are 200% brighter than other halogen bulbs, providing drivers with a wider and farther field of vision. Offering a greater visibility, they allow drivers to spot deer, wildlife, falling rocks, or obstacles ahead of time, ensuring safer nighttime driving.

Lights Dim Over Time, Replace In Pairs: Your lights are a pair, one is never turned on without the other. If one bulb burns out, the other isn't far behind. Replace your H11 XtraVision Halogen bulbs in pairs for optimum performance.
Installing the New Headlight Bulb
With the correct bulb identified and purchased, you’re ready to begin the installation process. Handle the new bulb exclusively by its base—never touch the glass surface, as oil from your skin will cause premature failure. Insert the bulb into the socket, ensuring proper bulb alignment with the housing guides. Rotate the socket clockwise approximately a quarter turn until it locks firmly into position. Reconnect the electrical connector by pressing it onto the bulb terminals until you hear an audible click, confirming secure connections. Verify no wiring is pinched or obstructed. Test the headlight immediately by turning on your vehicle’s lighting system. If the bulb doesn’t illuminate, recheck all connections and alignment before proceeding with reassembly of any removed components. When selecting replacement bulbs, compare options such as LED and HID conversions to enhance your nighttime driving safety and visibility. Consider selecting bulbs based on color temperature and brightness levels to optimize your visibility in various driving conditions. Once the installation is complete, remove the hood strut from its support groove and gently lower the hood.
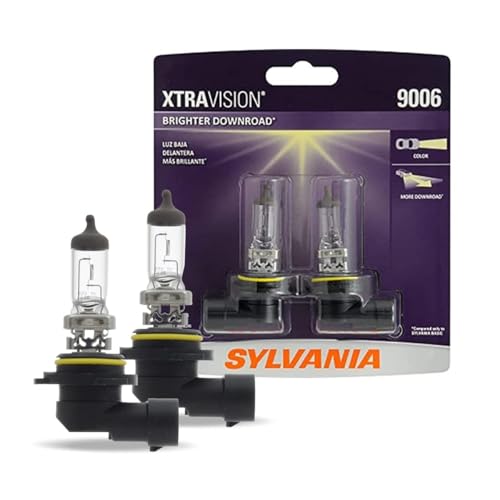
Lights Dim Over Time, Replace In Pairs: Your lights are a pair, one is never turned on without the other. If one bulb burns out, the other isn't far behind. Replace your 9006 XtraVision Halogen bulbs in pairs for optimum performance

Lights Dim Over Time, Replace In Pairs: Your lights are a pair, one is never turned on without the other. If one bulb burns out, the other isn't far behind. Replace your 9003 XtraVision Halogen bulbs in pairs for optimum performance.

⭐【Super Bright H11 Bulbs】Our H11 headlight bulbs deliver over 1000LM brightness and a 3800K color temperature, ensuring optimal visibility in foggy and rainy conditions. Upgrade your automotive headlight bulbs for safer nighttime driving.
Testing and Verification
Once you’ve completed the installation, several verification methods will confirm your new headlight bulb functions correctly and safely. Start by activating your headlight switch to verify proper illumination. Check for flickering or dimness that indicates electrical issues. If the bulb doesn’t illuminate, perform continuity testing using a multimeter on the terminals to confirm an intact filament—a beep or low resistance reading confirms functionality. For thorough bulb performance assessment, swap bulbs between sides to determine if problems follow the bulb or remain with the wiring. Inspect the headlight circuit fuse and relays to rule out power supply issues. Use a voltmeter to check for 12 volts present on both sides of the tested fuses. To prevent premature bulb failure, apply dielectric grease on bulb bases for better electrical contact and reduced corrosion. Consider upgrading to LED headlight technology for improved visibility and reduced power consumption compared to traditional bulbs. Finally, verify clean beam pattern and adequate brightness by testing against a wall from twenty-five feet, ensuring proper alignment and ideal light output for safe nighttime driving.
Tools and Maintenance Tips
Successful Honda Odyssey headlight bulb replacement requires only a few basic tools, most of which you’ll likely find in your garage. You’ll need a flathead screwdriver, clip remover tool, and the correct H11 halogen bulb for 2011-2017 models. Always wear gloves to avoid touching the bulb glass, as skin oils reduce bulb longevity markedly.
For peak maintenance, periodically conduct wiring inspection to identify corrosion or damaged connectors that compromise electrical integrity. Check headlight function regularly to detect early failures. Use OEM or high-quality replacement bulbs recommended specifically for Honda Odyssey to guarantee compatibility and extended service life. Replace both headlights simultaneously when one fails to maintain balanced illumination and road safety. Keep a 1/4 inch ratchet available if headlight assembly removal becomes necessary for improved access. Before beginning any bulb replacement work, locate the hood release lever in the driver’s left side foot area to access the engine compartment.

Easy Installation: 1:1 design, no external driver or connector required, plug and play

See the Road in a New Light: Get 900% the brightness of halogens with a powerful 50,000-lumen beam. The AUXITO H11 light bulbs illuminate more road ahead, giving you the clarity to spot hazards sooner.

【Huge Improvement in Visibility】-AUTOONE H11 led bulbs are equipped with high luminous efficacy CSP chips. And 1:1 halogen h11 bulbs’ beam pattern, spread out the light more to help in the side and front vision but no endangering other drivers. Safer and bright upgrade for fog lights or drl


