To replace your Mazda 3 headlight bulb, you’ll need to open the hood and locate the bulb housing behind the headlight assembly. Disconnect the wiring harness by releasing the connector clip, then rotate the bulb counterclockwise to remove it. Install the new bulb—H11 for low beams or 9005 for high beams on 2010-2018 models—by aligning the tabs and twisting clockwise. Reconnect the harness until it clicks, replace the dust cover, and test both beam settings. The following sections provide detailed specifications and troubleshooting guidance.
Gathering Tools and Preparing Your Mazda 3 for Bulb Replacement
Before you begin replacing your Mazda 3 headlight bulb, assemble the necessary tools to guarantee efficient completion of the task. You’ll need a 10-inch narrow flat-head screwdriver for prying actions, optional 7-inch pliers for leverage, and a cloth to handle bulbs without oil contamination. Protective gloves prevent skin contact that creates hot spots, shortening bulb life.
Gathering materials includes verifying bulb type compatibility and having replacement seals accessible. For workspace organization, prepare a container for removed components and confirm adequate lighting in your work area. Consult the owner’s manual to identify the specific headlight bulb specifications for your vehicle model and year. Different model years may require different bulb types such as 9005 or H7 bulbs depending on your Mazda 3’s generation. Using the correct bulb socket type ensures proper installation without compatibility issues.
Park your vehicle on a flat surface with the engine off and cooling. Access the hood latch beneath the steering wheel, pull the release lever, then turn the exterior release lever fully right. Lift and secure the hood using the support rod in the designated hole.

🚗【Compatibility Check Before Purchase】: Halogen Headlight Bulbs compatible with Mazda 3 (2010-2018). The Halogen headlight bulb combo includes 9005 high beam and H11 low beam bulbs headlights totaling 4 in the package.

FIT THE FOLLOWING VEHICLE - W3T19371 ballast replacement for 2006-2014 Acura TL TL-S | 2006-2014 Acura TSX | 2012-2014 Acura ILX | 2010-2013 Acura ZDX | 2013-2014 Acura RDX | 2010-2013 Acura MDX | 2009-2011 Acura CSX | 2011-2013 Honda CR-Z | 2004-2014 Honda Odyssey | 2012-2014 Mazda CX-5 | 2007-2012 Mazda CX-9 | 2007-2009 Mazda 3 | 2009-2012 Mazda 5 | 2007-2009 Mitsubishi Out lander | 2008-2012 Mitsubishi Lancer Evolution

[Enhanced Visibility] forenner H11/H8/H9/H16 9005/HB3 light bulb feature a dual-sided CSP chip with a 6500K color temperature, delivering brighter, clearer light. Whether you're driving down a dark country road or navigating late-night city streets, this enhanced visibility helps you see farther and wider—so you can feel more confident and secure behind the wheel after dark.
Identifying the Correct Bulb Type and Accessing the Headlight Assembly
Why does selecting the correct bulb type matter for your Mazda 3’s headlight replacement? Bulb compatibility guarantees proper fitment within the headlight housing receptacle and maintains the engineered beam pattern. For 2010-2018 models, you’ll need H11 bulbs for low beams and 9005 (HB3) for high beams. Older 2003-2009 models typically use H7 for dipped beams. Verify specifications match OEM wattage—55W for halogen low beams, 60W for high beams—or LED equivalents at 14-21W with 1400-2400 lumens.
To achieve assembly access, open your hood and locate the headlight housing behind the grille. You’ll find dust caps or panels covering the bulb compartments. Remove these protective covers to expose the bulb connectors. Check connector pin alignment and locking mechanisms before proceeding with removal. The H11/H8/H9 and 9005/HB3 bulb sizes remain consistent across both 2004-2016 and 2019 model years for LED headlight replacements. Always replace headlight bulbs in pairs to ensure balanced lighting across both sides of your vehicle. Having extra clips ready can prevent damage during the removal and installation process, as clips commonly break when accessing headlight components.

⭐【Super Bright H11 Bulbs】Our H11 headlight bulbs deliver over 1000LM brightness and a 3800K color temperature, ensuring optimal visibility in foggy and rainy conditions. Upgrade your automotive headlight bulbs for safer nighttime driving.

Easy Installation: 1:1 design, no external driver or connector required, plug and play

Lights Dim Over Time, Replace In Pairs: Your lights are a pair, one is never turned on without the other. If one bulb burns out, the other isn't far behind. Replace your H11 XtraVision Halogen bulbs in pairs for optimum performance.
Removing the Old Headlight Bulb Safely
With the correct bulb type identified and the headlight assembly accessible, you’re ready to extract the old bulb from its housing. First, press the connector clip to release and disconnect the wiring harness from the bulb base. Grip the bulb base firmly and rotate counterclockwise approximately 1/8 to 1/4 turn until it disengages. Pull straight out without lateral twisting to prevent socket damage. Bulb handling requires wearing gloves or using a clean cloth—avoid touching the glass surface, as skin oils compromise bulb longevity. If the bulb resists removal, verify the connector’s fully detached before applying additional force. Inspect the socket for corrosion or debris. Most vehicles require no tools for bulb replacement itself, making this a straightforward maintenance task. After successful replacement, check headlight aim alignment to ensure proper beam focus and visibility. Old bulb disposal should follow local regulations, particularly for halogen or HID types containing hazardous materials.

Lights Dim Over Time, Replace In Pairs: Your lights are a pair, one is never turned on without the other. If one bulb burns out, the other isn't far behind. Replace your 9003 XtraVision Halogen bulbs in pairs for optimum performance.

Lights Dim Over Time, Replace In Pairs: Your lights are a pair, one is never turned on without the other. If one bulb burns out, the other isn't far behind. Replace your H7 XtraVision Halogen bulbs in pairs for optimum performance.

Get the best lighting performance and an increased visibility and comfort on the road compared to basic bulbs
Installing the New Bulb and Reconnecting Components
Grasp the new bulb by its base—never the glass envelope—and align the mounting tabs or slots with their corresponding positions in the headlight socket. Press firmly until you feel a click, confirming secure seating. Verify bulb orientation matches the original configuration to guarantee proper electrical connections and stability. Twist the socket clockwise per manufacturer specifications to lock it into the housing.
Align the electrical connector with the bulb terminals, then push until it clicks into place. Position the connector tab opposite the bulb’s securing tab for correct engagement. Gently pull the plug to confirm it’s locked securely. Ensure your selected bulb meets DOT compliance standards to maintain safe nighttime driving visibility. Common bulb types for headlights include H11 or 194 bulbs that are widely used across many vehicle models.
Reinstall protective dust covers, guaranteeing tight seals without gaps. Replace any removed components—air filter housing, clips, or screws. Check that wiring isn’t pinched during reassembly to prevent damage or shorts. Once all components are reinstalled, lower the hood and use the prop rod to release it from the open position before closing it completely.

【300% Brighter Than Original Halogens】:SHENKENUO Ultra - High Performance Halogen Bulbs,with 3600LM per set,which is 300% super brighter than original halogen bulb, Provide brighter and clearer lighting effects, enabling drivers to see the road ahead more clearly, thereby improving driving safety
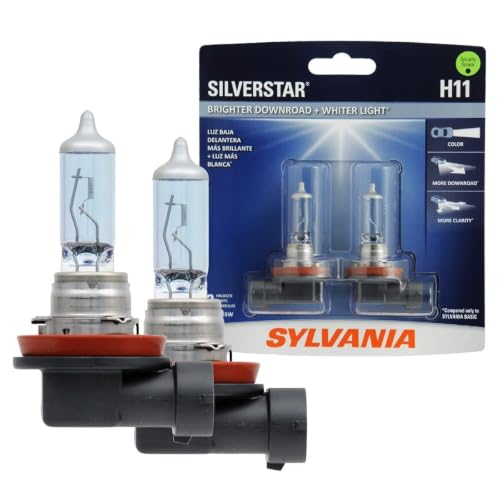
Lights Dim Over Time, Replace In Pairs: Your lights are a pair, one is never turned on without the other. If one bulb burns out, the other isn't far behind. Replace your H11 SilverStar Halogen bulbs in pairs for optimum performance.

【300% Brighter Than Original Halogens】:SHENKENUO Ultra - High Performance Halogen Bulbs,with 3600LM per set,which is 300% super brighter than original halogen bulb, Provide brighter and clearer lighting effects, enabling drivers to see the road ahead more clearly, thereby improving driving safety.
Testing Your New Headlight and Maintenance Tips
Proper verification guarantees your replacement bulb functions correctly and safely. Begin bulb testing with the ignition off, then activate headlights to confirm illumination in both low and high beam modes. Inspect for consistent brightness without flickering or dim spots. Verify beam alignment to prevent dazzling oncoming drivers. Check electrical connections for corrosion and secure engagement of retaining clips.
Implement maintenance strategies to maximize headlight performance. Clean lenses regularly and inspect housing for moisture accumulation. Replace bulbs in pairs to guarantee balanced light output. Handle halogen bulbs with clean cloths to prevent oil contamination that degrades filament life. Monitor wiring harnesses for wear, and test for blown fuses if issues arise. Use manufacturer-approved components to maintain superior system performance and compliance with lighting regulations. Ensure the ignition is off before beginning any bulb replacement procedure.

【Note Before Purchase 】-Package Include Pair 9005 High Beam and H11 Low Beam ,fit for Mazda 3 2010-2018, Please check the correct vehicle age when place order.

🚗【Compatibility Check Before Purchase】: Halogen Headlight Bulbs compatible with Mazda 3 (2004-2009).The Halogen headlight bulb combo includes 9005 High Beam+ H7 Low Beam Light Bulbs headlights totaling 4 in the package.

Vehicle Specific Fit: Suitable for Mazda 3 2004-2009; for Mazda 5 2006-2010.