To replace your Hyundai Accent’s headlight bulb, first disconnect the negative battery terminal for safety. Open the hood and locate the plastic access cap behind the headlight assembly. Remove the cap, disconnect the electrical connector, and release the metal spring clip securing the bulb. Pull out the old H4 (9003) or 9005 bulb without touching the glass of the replacement. Insert the new bulb, secure the clip, reconnect the wiring, and test both high and low beams to verify proper function before finalizing your work.
Tools and Materials Required
Preparation makes headlight bulb replacement straightforward and prevents common mistakes that can damage components or compromise safety. You’ll need a 10mm socket and ratchet set to remove bolts securing the headlight assembly or fuse box. Include a flathead screwdriver for prying clips, work gloves to prevent oil contamination on bulb glass, and a flashlight for visibility. Acquire the correct 9003-type replacement bulb for your specific model year, though LED or HID upgrades offer enhanced brightness. Dielectric grease prevents connector corrosion. Guarantee proper tool maintenance by cleaning sockets after use, and practice material storage by organizing fasteners in a container. Safety requires protective eyewear, allowing engine cool-down, and maintaining a dry workspace. The entire replacement process takes about 5 minutes once you have gathered all necessary tools and materials. Keep your owner’s manual accessible for bulb orientation guidance and torque specifications.

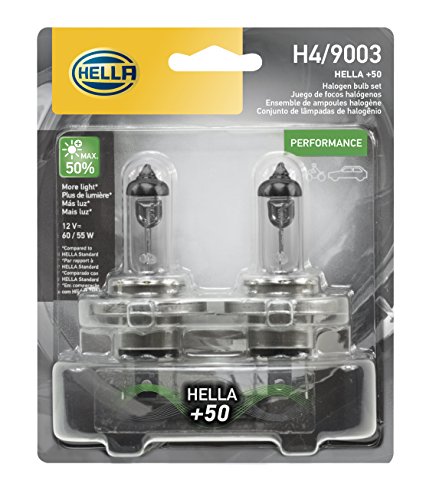
Lights Dim Over Time, Replace In Pairs: Your lights are a pair, one is never turned on without the other. If one bulb burns out, the other isn't far behind. Replace your 9003 XtraVision Halogen bulbs in pairs for optimum performance.

LIGHTS DIM OVER TIME, REPLACE IN PAIRS: Your lights are a pair, one is never turned on without the other. If one bulb burns out, the other isn't far behind. Replace your 9003 XtraVision Halogen bulbs in pairs for optimum performance.

Powerful brightness: The H4/9003/HB2 halogen car headlight bulb offers powerful illumination that will enable you to see the road clearly and improve your visibility, ensuring safer driving in all conditions.
Identifying the Correct Bulb Size for Your Hyundai Accent
Why does selecting the wrong headlight bulb size compromise both safety and installation success? Incorrect bulbs won’t fit properly, produce poor beam patterns, and can damage your headlight assembly. Most Hyundai Accent models from 2000-2020 use H4 (9003) bulbs for high and low beams, while some 2014-2020 non-projector versions require 9005 bulbs. Your specific requirements depend on model year, trim package, and headlight type (projector versus reflector).
Perform bulb compatibility verification through manual reference checks in your owner’s manual first. Cross-reference online bulb finder tools from manufacturers like Sylvania or Boslla by entering your exact year and trim. Physically inspect your existing bulb’s printed size code before purchasing replacements. Understanding beam pattern quality helps ensure optimal visibility and safety performance from your replacement bulbs. For 2000-2013 models, brake and tail lights commonly use 1156/1157 bulb sizes, which differ from headlight specifications. Different trim packages use different assemblies, making year-specific confirmation essential for proper fitment and ideal light output.

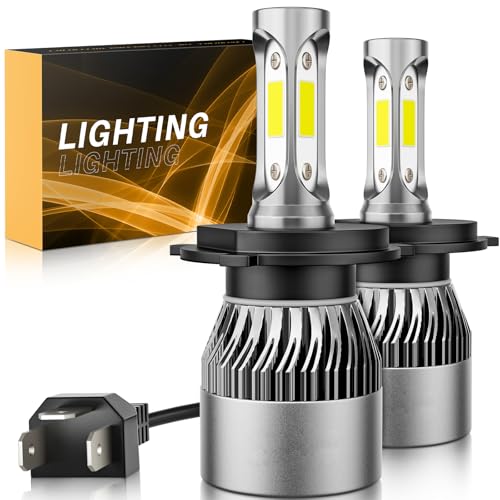
【900% Upgrade】 Equipped with top automotive-grade chips, autoone upgraded h4 bulbs deliver an impressive brightness per pair at a cool 6500K. The super-focused pattern ensures a wider and longer lighting range, making the 9003/hb2/h4 bulb 9 times brighter thanstock bulbs

【900% Brightness Enhancement】Powered by upgraded automotive-grade chips, these H4/9003/HB2 bulbs deliver up to 900% more brightness than stock halogens, offering a clearer and wider 6500K view for safer night driving

【Compatible with Hyundai Accent Headlight Bulbs】LECCIBUB halogen headlights are perfectly compatible with Hyundai Accent 2000 2001 2002 2003 2004 2005 2006 2007 2008 2009 2010 2011 2012 2013 2014 2015 2016 2017.Reduce the risk of error warnings,radio static or flickering.You don't require additional encoders.The halogen headlights combo includes 2pcs 9003 high low beam headlights,totaling 2 Halogen bulbs in the package.
Accessing the Headlight Assembly
With the correct bulb identified, you’ll need to access your Accent’s headlight assembly to complete the replacement. Begin by engaging the primary hood release lever inside the driver’s door, then lift the hood and secure it with the support rod. For safety purposes, disconnect the negative battery terminal using a 10mm socket to disable electrical components before beginning work. Locate the headlight assembly at the front corners under the hood. You’ll notice plastic caps behind each headlight—these provide bulb access without removing the entire assembly. Use your thumb and index finger to twist the cap counterclockwise for removal. Among essential maintenance tips, keep these caps in a safe location and inspect them for wear that could compromise sealing. To extend the life of your headlights and prevent clouding over time, consider applying a UV sealant after bulb replacement. If complete assembly removal becomes necessary, disconnect the wiring harness by squeezing the retaining clips and remove the 10 mm securing bolts. Before removing any fasteners or bolts, use a black marker to mark alignment points on the headlight assembly to ensure proper reinstallation and prevent aiming issues.

Protective Barrier: This headlight dust cover creates a dependable barrier against dust, moisture, and road debris, effectively shielding the interior components of the headlamp assembly. It helps maintain lighting performance while reducing the risk of damage over time in challenging environments

Vehicle Fitment: Compatible with Hyundai Elantra 2011-2016 1.8L/2.0L, Elantra Coupe 2013-2014 1.8L/2.0L, Elantra GT 2013-2017 1.8L/2.0L, Santa Fe Sport 2013-2016 2.0L/2.4L Compatible with Kia Forte 2014-2016 1.8L/2.0L, Forte Koup 2014-2016 1.6L/2.0L, Forte5 2014-2016 1.6L/2.0L, Sedona 2015-2018 3.3L, Sorento 2016-2018 2.0L/2.4L/3.3L, Soul EV 2015-2019 Electric Please verify your vehicle model, year, engine, installation position, and OE part number before purchasing to ensure proper fitment

【Multi-Vehicle Compatibility】Compatible with multiple models including Hyundai Sonata, Elantra, Santa Fe, Azera, Equus, Kia Cadenza, Sportage, Sedona, etc., and also compatible with most sedans, trucks, and vans. Highly versatile, easily matches your vehicle without additional modifications.
Disconnecting the Old Bulb
Once you’ve removed the access cap, locate the electrical connector attached to the base of the headlight bulb. Grasp it firmly and pull straight off without twisting. If there’s a locking tab, press or lift it before pulling. Apply gentle pressure to avoid damaging the plastic connector or wires.
Next, identify the metal spring clip securing the bulb. Press down or squeeze the clip’s bottom to release tension, then pivot it away from the socket. Verify it’s fully disengaged before proceeding.
Following these safety precautions, gently pull the bulb straight out of the socket. Avoid touching the glass portion—use gloves or a clean cloth. Keep all electrical connectors and hardware organized for reassembly. Inspect the socket for corrosion while the bulb is removed. On some model years, you may need to remove the inner fender liner to access the bulb socket more easily. Confirm that the bulb you’ve removed is an H4 type fitting by checking for the characteristic three tabs on the base.

【700% Enhanced Brightness】Equipped with 32 advanced CSP chips, these H4 9003 HB2 LED bulbs deliver a stunning 700% boost in brightness over halogen. The 6500K white light provides crystal-clear visibility and significantly improves night driving safety.

【800% Breakthrough Brightness】Marsauto H4 bulb shine 800% brighter than traditional bulbs. M1S 9003 H4 bulb uses non-traditional chip technology, and its light output is much higher than other chips on the market. At the same time, the number of lamp beads on a single side has been increased from one to two, which solves the problem of low lumen caused by one lamp bead and can also increase the width of illumination, escorting car owners at night.
Up to 50% more light output than standard bulbs which provides you the best lighting performance, giving performance-oriented drivers additional safety time and comfort on the road.
Removing the Burned-Out Bulb
Before extracting the burned-out bulb, verify you’ve completed all preliminary steps from the previous section. Grasp the bulb’s base firmly and pull straight out from the socket with a gentle wiggle if needed. Don’t twist unless your specific model requires it—most Hyundai Accent bulbs extract directly once the retaining clip‘s released. Handle carefully to prevent glass breakage or connector damage.
Common bulb issues include corrosion buildup and socket damage, so inspect the socket thoroughly before proceeding. Among essential bulb maintenance tips: never touch halogen glass with bare hands, as skin oils reduce lifespan notably. Consider upgrading to options like Sylvania SilverStar Ultra for enhanced brightness and visibility during replacement. LED and HID alternatives also offer improved brightness and longer lifespan compared to standard halogen bulbs for better nighttime driving visibility. If the bulb resists removal, recheck that you’ve fully disengaged the retaining mechanism. Once extracted, examine the old bulb for burn patterns or filament damage to confirm replacement necessity. When disconnecting the bulb connector, push down on the lock tab to release it properly.

【Visual Enhancement】: The OKOENIEO 9003/H4 headlight bulbs are 200% brighter than other halogen bulbs, providing drivers with a wider and farther field of vision. Offering a greater visibility, they allow drivers to spot deer, wildlife, falling rocks, or obstacles ahead of time, ensuring safer nighttime driving.

【Compatible with Hyundai Accent 2000-2017 】-Package Include Pair 9003/H4 High Low Beam Headlight Bulbs ,fit for Hyundai Accent 2000-2013 2014 2015 2016 2017. Please check the correct vehicle age when place order
Installing the Replacement Bulb
Now that you’ve removed the old bulb and inspected the socket, take your replacement bulb from its packaging without touching the glass surface. Oil from your fingers will shorten bulb life and cause premature failure. Proper bulb handling requires using clean gloves or a lint-free cloth during installation.
Examine the bulb orientation carefully—you’ll notice two smaller tabs at the bottom and a larger tab on top. Align these tabs with their corresponding slots in the headlight housing before inserting. Push the bulb firmly into place until it sits flush and secure. When selecting your replacement, ensure it meets OEM specifications to maintain proper brightness levels and color temperature for optimal visibility. Different bulb types like halogen, LED, and HID options offer varying levels of brightness and longevity for your specific vehicle needs.
Engage the spring clip or metal retainer by hooking it onto the anchor point, ensuring it locks properly. Connect the electrical plug until it clicks securely. Replace the protective cap by twisting clockwise to seal against moisture. Route the electrical connector wire around the metal clip to prevent any interference with the headlight assembly.
Securing the New Bulb and Reconnecting Components
After inserting the replacement bulb into the socket, immediately secure it with the metal retaining arm or spring clip. Swing the arm down and hook it into the designated slot until it snaps firmly. Test the bulb’s stability with slight pressure—it shouldn’t wiggle. Following bulb installation tips, align the electrical connector with the bulb base and push until it clicks securely. Never touch the glass bulb beforehand to prevent contamination. Observing electrical connection precautions, verify wiring remains free from tension or pinching. Place the dust cover over the socket, align the tabs, and rotate clockwise until locked. Route cables away from sharp edges using factory clips. Before proceeding further, identify your headlight bulb type—whether halogen, LED, or HID—as this affects compatibility and installation requirements. Ensure your replacement bulb meets DOT regulations to maintain legal compliance and optimal nighttime visibility. Before closing, confirm all components are secure and test the headlights for proper function. This replacement procedure applies to 2011-2015 Hyundai Accent models and works similarly for related Hyundai and Kia vehicles.
Reassembling the Headlight Housing
Once the new bulb is secure and all internal components are connected, begin reassembling the headlight housing by locating the alignment points molded into the housing and their corresponding mounts on the radiator support or fender. Slide the housing into place, making sure tabs align properly to prevent damage. Push firmly until it seats completely.
Reconnect the wire harness connectors at the rear until you hear an audible click. Verify retaining clips engage fully and wiring isn’t pinched. Ensure you are properly installing all components with correct alignment as specified in your vehicle’s manual.
Reinstall all bolts with a socket wrench, tightening snugly without overtightening. Replace plastic fasteners and trim pieces removed earlier. Verify that protective seals are weather resistant to prevent moisture entry and maintain optimal headlight performance.
Check headlight alignment by inspecting gaps and fit against body panels. Verify protective seals are seated to prevent moisture entry. This proper bulb maintenance guarantees peak performance and longevity. Close the hood to confirm flush fitment.
Testing Your New Headlight Bulb
Before reconnecting the vehicle’s battery, verify your new headlight bulb functions properly through systematic testing procedures. Set your multimeter to resistance mode for continuity testing—touch probes to the bulb’s terminals. A reading near zero ohms confirms the filament’s intact. If you see infinite resistance (OL), the bulb’s defective and needs replacement.
Next, reconnect the bulb to its wiring harness and switch your multimeter to voltage measurement mode. Turn on the headlights and touch probes to the bulb contacts. A reading near 12 volts indicates proper electrical supply. Voltage below this suggests wiring or fuse issues rather than bulb failure.
Finally, observe the bulb’s illumination during operation, checking for flickering or dimming that indicates internal faults requiring immediate attention. Wear protective gloves throughout the testing process to prevent electric shock from exposed terminals.