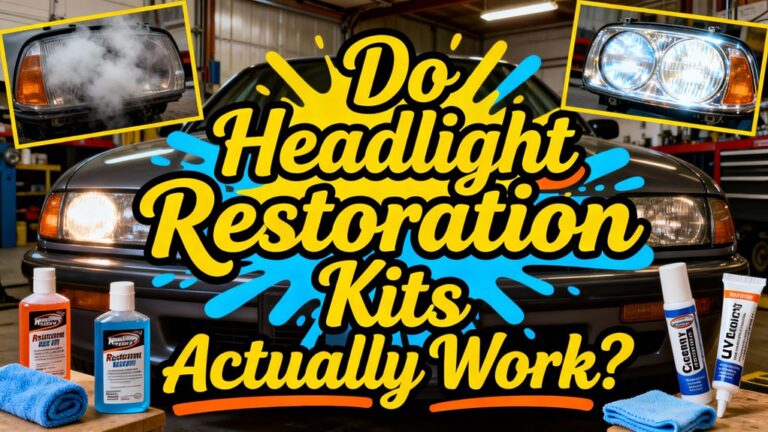
To restore cloudy headlights, you’ll start by wet sanding the oxidized surface using progressively finer grits from 400 to 2500, maintaining constant water lubrication. Next, apply rubbing compound with a buffing pad to restore optical clarity. Finally, seal the lens with a two-component UV-resistant clear coat within 24 hours to prevent re-oxidation. This systematic approach removes degraded plastic layers and provides long-lasting protection. Understanding the complete restoration process, proper tool selection, and maintenance techniques guarantees professional-grade results.
Understanding Why Headlights Become Cloudy
When you notice your headlights losing their crystal-clear appearance, you’re witnessing a predictable degradation process driven by multiple environmental and chemical factors. UV radiation breaks down the protective clear coat on polycarbonate lenses, causing oxidation that manifests as yellowing and cloudiness. Road debris creates micro-scratches that scatter light and reduce visibility. Chemical exposure from road salts and car wash products accelerates this deterioration. Without proper headlight maintenance, moisture can penetrate aging seals, causing internal fogging that’s impossible to clean externally. The plastic itself degrades over time, its microstructure becoming rougher and less transparent. Constant exposure to environmental elements gradually strips away the lens’s ability to maintain its original transparency. UV protection is critical—once the factory coating deteriorates, oxidation accelerates rapidly, compromising both aesthetics and nighttime driving safety. Expert technicians use advanced, eco-friendly techniques to remove oxidation and restore clarity effectively. Fortunately, headlight restoration kits have proven effective at removing this oxidation and haze to restore clarity and improve light output.
Assessing the Severity of Headlight Oxidation
Before attempting any restoration, you must accurately diagnose the extent of oxidation affecting your headlights, as this assessment directly determines which restoration method you’ll need and whether DIY efforts will succeed or professional intervention becomes necessary. Examine your headlights under strong lighting to identify oxidation types: light haze indicates surface-level damage, moderate yellowing with roughness suggests deeper degradation, while severe cloudiness with pitting requires aggressive treatment. Employ proper inspection techniques by running your fingers across the lens to detect texture changes and testing beam patterns against a flat surface to measure light output reduction. Check for moisture inside the housing, which signals seal failure. Mildly hazy lenses may only require machine polishing without wet sanding, while heavily damaged lenses with deep gouges may achieve 75-80% restoration to like-new condition. Internal oxidation or deep crazing typically demands professional replacement rather than DIY restoration attempts. This degradation of the protective coating occurs when continuous UV exposure breaks down the factory-applied layer designed to shield the polycarbonate plastic from environmental damage.
Gathering Your Restoration Tools and Materials
Successfully restoring cloudy headlights requires assembling the correct tools and materials before you begin work, as using inadequate or mismatched equipment will compromise results and potentially damage your headlight lenses. Tool organization begins with selecting a rotary polisher or corded drill, accompanied by 3″ and 5″ backing plates for machine application. Material selection encompasses progressive sandpaper grits (500-3000), cutting compounds (V34, V36, V38), foam and wool buffing pads, and UV-protective sealants. You’ll need automotive masking tape, microfiber towels, spray bottles for clay lubricant, rubbing alcohol for degreasing, and safety equipment including eye protection and gloves. Complete restoration kits from manufacturers like Meguiar’s or Mothers provide pre-matched materials, guaranteeing compatibility. The rotary polisher stands as the fastest sanding method for headlight restoration due to its gear-driven design that minimizes pad stalling during operation. Many quality restoration kits feature UV block clear coat technology that protects your headlights from future yellowing and oxidation after the restoration is complete. Comprehensive restoration kits offer two-step and complete restoration options that cater to different levels of headlight degradation and ensure all necessary materials work together seamlessly. Proper preparation prevents workflow interruptions and guarantees professional-grade restoration outcomes.

Full-Cycle Sanding Support - The car drill polishing kit featuring 3 inch sanding discs range 60/80/120/240/400/800/1000/1500/2000/3000/5000/10000 grit sandpaper for dry and wet use, with orbital sander pads, imitation wool buffing pad, and upgraded backing pads for 1/4 and 1/8 inch shank. Seamlessly transition from sanding to polishing.

KIT INCLUDES: 1 - Disc Pad Holder, 3.25 in (8,2 cm) 6 - 3M Gold Sanding Discs 500 Grit, 3 in (7,6 cm) each 4 - 3M White Finishing Discs 800 Grit, 3 in (7,6 cm) each 1 - 3M Trizact Refining Disc 3000 Grit, 3 in (7,6 cm) 2 - 3M Quick Headlight Clear Co

KIT CONTENTS - Each headlight restoration kit includes (8) Step 1 Oxidation Removing Wipes, (1) Step 2 Sanding Kit, and (2) Step 3 Ceramic Coating Wipes.
Preparing Your Work Area and Protecting Vehicle Paint
Establishing an ideal work environment directly impacts restoration quality and prevents costly damage to surrounding vehicle surfaces. Select a shaded, well-ventilated location to control drying times and minimize dust contamination while protecting against harmful fumes from chemical compounds.
For extensive vehicle protection, apply automotive-grade masking tape along headlight edges and adjacent paint panels, extending coverage to trim pieces and rubber seals. Avoid cheap tape that leaves residue or fails during wet sanding. Supplement with plastic sheets over chrome and sensitive areas.
Before taping, wash headlights thoroughly with soap and water, then wipe edges with rubbing alcohol to enhance adhesion. Fill a spray bottle with water and consider adding soap for lubrication during the sanding process. Organize your work area by arranging sanding papers, compounds, and protective gear sequentially. Wear safety glasses, gloves, and a respirator when handling abrasives or clear coats.
Wet Sanding: The Step-by-Step Process
With your work area prepared and vehicle surfaces protected, wet sanding removes the damaged outer layer of the headlight lens to restore optical clarity. Start with 400–600 grit waterproof sandpaper for heavily oxidized lenses, maintaining constant water lubrication to prevent heat buildup. Apply light pressure using horizontal strokes—never circular motions—to create a uniform matte finish. Progress through 800–1000 grit to refine scratches, then finish with 1500–2500 grit for smooth surface preparation.
Proper wet sanding techniques require completing each grit stage before advancing. Don’t skip grit progression steps, as this leaves deep scratches that resist polishing. Rinse frequently and inspect for a uniformly frosted appearance with no glossy patches. Sand edges and corners thoroughly to ascertain even clarity. Change sandpaper between headlights to prevent cross-contamination from grinding debris. Check for patchiness between sanding stages to ensure surfaces are smooth before moving to the next grit level. Most restoration kits come pre-packaged with sandpaper of various grits to ensure you have all necessary materials for each stage of the wet sanding process. Using a drill with buffing pads can increase efficiency during the sanding stage while maintaining consistent pressure across the lens surface.

Complete Restoration Kit: Package includes 100 pcs of 3 inch sanding discs with an assortment of grits (800, 1000, 2000, 3000, 5000, 20 pcs of each grit), a 1/4-inch shank, a backing plate, a foam buffing pad, a synthetic wool pad, 2 sponge pads.

Complete Grit Range: This headlight polishing kit covers 60/80/120/180/240/400/800/1000/2000/3000/5000/7000/10000 grit, encompassing the entire process from coarse grinding to ultra-fine polishing

ALL IN ONE SET: Perfect for all Your sanding and polishing needs! Comes with total 120 pieces abrasive sand paper in grit 60 80 100 150 240 400 800 1200 2000 3000 5000 10000(10 pieces each grit), 2 backer plates with 2 1/8" and 3 1/4” shanks, 1 wool pad, 1 wave orange polishing pad and 1 flat yellow polishing pad, 1 cushioning pad.
Polishing With Rubbing Compound for Crystal Clear Results
After wet sanding creates a uniformly matte surface, rubbing compound becomes your primary tool for restoring optical transparency to headlight lenses. Start with a gentle compound type to assess oxidation severity—aggressive formulations remove more plastic material and risk permanent surface damage. Apply compound using a microfiber cloth or dual-action buffer, employing circular rubbing techniques with moderate, consistent pressure. Work systematically across the lens for several minutes until cloudiness diminishes. Wipe away excess compound with a clean cloth to inspect progress; repeat applications if necessary. Never use compounds near painted surfaces to prevent unintended abrasion. Following polishing, immediately apply a UV-resistant sealant—this critical step prevents rapid re-oxidation. The sealant creates a protective barrier against minerals in rainwater and harmful UV rays that would otherwise cause oxidation to return within months. Proper compound selection and controlled rubbing techniques restore clarity while preserving lens integrity and maximizing nighttime visibility.

BUFF OUT IMPERFECTIONS: Meguiar's Ultimate Compound removes scratches, swirls & oxidation for a clear, perfect finish

Package Dimensions: 18.288 H x 3.048 L x 6.604 W (centimetres)
HIGH PERFORMING: Efficiently remove P1200 grade or finer scratches with this high-performing compound
Applying Protective Clear Coat to Prevent Future Damage
Once you’ve restored optical clarity through polishing, you must apply a protective clear coat within 24 hours—exposure to UV radiation begins degrading unprotected polycarbonate immediately, reversing your restoration work in weeks rather than years. Two-component (2K) clear coats provide superior protection compared to single-component alternatives due to their chemical hardening process and exceptional UV resistance. Follow proper application techniques: clean the surface thoroughly, spray multiple light passes from 6-8 inches distance, allow 10-minute flash-off periods between coats, and cure at 140°F for 25-30 minutes. Different coating types include specialty headlight formulations with salt and chemical resistance, ceramic coatings offering hydrophobic properties, and polycarbonate-specific lacquers. Ceramic-based coating systems create a harder, more scratch-resistant surface than conventional polishes or sealants. This barrier prevents oxidation, physical damage from road debris, and maintains ideal light output for safer nighttime driving. Unlike temporary fixes such as toothpaste or WD40, a UV-resistant clear coat ensures your restoration remains effective for years. Without proper restoration and protection, deteriorated headlights can reduce light output to just 22% of their original performance, significantly compromising nighttime visibility.

PREMIUM CLEAR FINISH: Professional-grade polyurethane automotive spray paint designed for automotive refinishing and new paint jobs — delivers long-lasting protection and deep gloss for cars, motorcycles, and custom projects.

UV Headlight Coating Kit: The Sylvania UV Block Clear Coat Kit is a premium headlight clear coat designed to protect and restore dull or cloudy lenses to like-new condition
Catalyst-Activated 2K Formula: Our clear coat uses a built-in hardener that chemically bonds as it cures tougher, longer-lasting, and more protective than 1K clear coats.
Quick DIY Methods for Minor Cloudiness
Professional-grade protective coatings deliver maximum longevity, but not every headlight requires this level of intervention. For minor cloudiness, you’ll find several quick fixes that provide temporary solutions. Toothpaste effectiveness stems from mild abrasives—apply non-gel varieties using circular motions to remove light oxidation. Baking soda mixed with water creates a gentle scrubbing paste for surface haze removal. WD-40 use offers rapid clarity improvement; spray and wipe to eliminate mild fogging. Magic Eraser sponges work as mechanical abrasives for light surface oxidation. Bug spray containing DEET provides another emergency option when rubbed onto lenses. These methods won’t match professional restoration durability, but they’ll restore adequate visibility quickly. For more stubborn oxidation, wet sanding with fine-grit sandpaper removes oxidized layers more effectively than these quick fixes. To maintain your results longer, consider applying a UV protectant sealant after completing your chosen restoration method. Always test these solutions on small areas first to prevent unexpected lens damage. Keep in mind that cloudiness and yellowing are clear indicators that your headlights need restoration attention.

SEE CLEARLY: Renew your plastic without replacement with Meguiar's PlastX Plastic Cleaner. This clear plastic scratch remover quickly improves long-term wear and tear on a variety of uncoated plastics, leaving behind water-resistant polymers

HEADLIGHT CLEANING KIT TO RESTORE CLARITY: Introducing a car detailing kit featuring high-quality car care products that quickly and easily restore headlights; the simple two-step process removes oxidization and yellowing for long-lasting clarity

CLEAR LIGHTS: Meguiar's Clear Headlight Coating is the ultimate solution to maintain exceptional optical clarity on both new and restored headlights, ensuring optimal visibility and safety during nighttime driving
Maintaining Restored Headlights for Long-Lasting Clarity
When you’ve successfully restored your headlights, protecting that clarity requires systematic maintenance protocols rather than sporadic attention. Implement preventative measures including UV sealant reapplication every three to six months, as protective coatings degrade under continuous sun exposure. Your maintenance schedule should incorporate routine washing with plastic-safe automotive soap to remove contaminants that accelerate oxidation. Inspect headlights regularly to detect early haze formation, allowing timely intervention through light sanding and resealing. Apply minimum three coats of automotive-grade UV sealant or 2K clear coat for best protection duration. Park in shaded areas when possible to minimize UV degradation. Consider transparent protection films for long-term defense against physical abrasion and environmental damage. Understanding the science behind headlight degradation helps you choose appropriate maintenance products for your specific headlight material. Avoid harsh chemicals and abrasive tools that compromise protective layers, ensuring sustained optical performance and safety compliance. Different headlight types may require tailored polishing compounds to maintain optimal clarity without damaging sensitive components.