
To replace your Ford Escape headlight bulb, you’ll park on level ground, open the hood, and locate the bulb assembly behind the headlight housing. Remove the rubber dust cap, disconnect the electrical connector, and rotate the bulb socket counterclockwise to extract it. Pull the old bulb from the socket, insert the new one without touching the glass, and reverse the process. Test functionality before closing the hood, and you’ll uncover essential maintenance tips and troubleshooting techniques throughout this thorough guide.
Preparation and Safety Measures
Before you begin replacing your Ford Escape headlight bulb, park the vehicle on a level, flat surface and engage the parking brake to prevent any movement during the procedure. Turn off the ignition and headlight switch, then open and secure the hood. Following proper safety protocols, wear clean gloves to prevent skin oils from contaminating the bulb glass and safety glasses to protect against debris. Confirm workspace organization by gathering essential tools: flathead screwdriver, microfiber cloth, and manufacturer-specified replacement bulbs. Verify adequate lighting or position a portable work light. Inspect new bulbs for defects before installation. If the vehicle was recently driven, allow hot engine components to cool. Keep a fire extinguisher accessible when handling electrical components, and consider disconnecting the battery for added protection. Understanding superior illumination technology can help you decide whether to upgrade to advanced headlight systems in the future. For base model Ford Escapes, ensure you have the correct H11-type halogen bulbs as replacements for the low beam headlights.
Accessing the Headlight Bulb
After completing your safety preparations, locate the hood release lever on the driver’s side interior panel and pull it firmly until you hear the latch disengage with an audible click. Lift the hood completely to expose the engine compartment and headlight assemblies. Identify the rubber dust cap on the headlight assembly‘s backside—this protects the bulb from moisture and debris. Different headlight types require specific access methods, so verify your model’s configuration beforehand. Carefully remove the rubber cap without tearing it to maintain proper sealing. Press the locking tab on the electrical connector and detach it from the bulb socket without pulling wires directly. Grip the bulb socket and rotate counterclockwise to open it. Pull the socket straight out. For installation tips, avoid touching the replacement bulb’s glass surface with bare hands to prevent premature failure. Common compatible bulb sizes include H11 for low beams depending on your vehicle’s specifications. When selecting a replacement bulb, consider whether you prefer halogen and LED upgrade options based on your priorities for brightness and longevity. Ensure both headlights are functioning after completing the installation by testing them with the ignition on.
Removing the Old Headlight Bulb
With the electrical connector detached and protective cap removed, you’re ready to extract the old headlight bulb from the assembly. Rotate the bulb socket counterclockwise approximately a quarter to half turn until it detaches from the headlight housing. Pull the socket assembly straight out without twisting. Locate the release tab on the bulb or socket, then depress it while simultaneously pulling the bulb free. Proper bulb removal techniques require handling the base carefully to avoid breaking glass or bending connector pins. After extraction, conduct a thorough bulb socket inspection, checking for corrosion, moisture damage, or worn contacts. Use gloves when handling bulbs to prevent skin oils from contaminating components, as this practice is especially important for halogen bulbs which have shortened lifespans when exposed to oils. Dispose of the old bulb according to local regulations.

🚗【Compatibility Check Before Purchase】: Halogen Headlight Bulbs compatible with Ford Escape (2017-2023). The Halogen headlight bulb combo includes 9005/HB3 high beam and H11 low beam and H11 Fog Light bulbs, totaling 6 in the package.

Compatible For Ford Escape 2017-2023: This light bulbs kit suitable for for 2017,2018,2019,2020,2021,2022,2023 Ford Escape models for flawless fit and function,hassle-free plug-and-play installation.Package Includes: 2*high beam, 2*low beam, 2*fog light bulbs.Please check the car light model you need before purchasing.

Fit For Ford Escape S SE 2013-2023 - This item include 2*high beam and 2*low beam white light bulbs, total 4 headlight bulbs. Please confirm your vehicle model before purchasing.
Installing the New Headlight Bulb
Once you’ve removed the old bulb and inspected the socket for damage, retrieve the new headlight bulb from its packaging while wearing clean gloves to prevent skin oils from contaminating the glass surface. Confirm proper bulb alignment by matching the notches or tabs on the bulb base with the corresponding slots in the socket—it’ll only fit one way. Push the bulb firmly into the socket until it clicks, confirming secure contact. Insert the bulb assembly back into the headlight housing, rotating it clockwise approximately 90 degrees to lock it in place. Reconnect the electrical connectors by pressing them onto the bulb socket until they snap securely. Replace the rubber dust cover, confirming it’s completely seated to prevent moisture ingress. Repeat these steps for the opposite headlight if necessary.

⭐【Super Bright H11 Bulbs】Our H11 headlight bulbs deliver over 1000LM brightness and a 3800K color temperature, ensuring optimal visibility in foggy and rainy conditions. Upgrade your automotive headlight bulbs for safer nighttime driving.
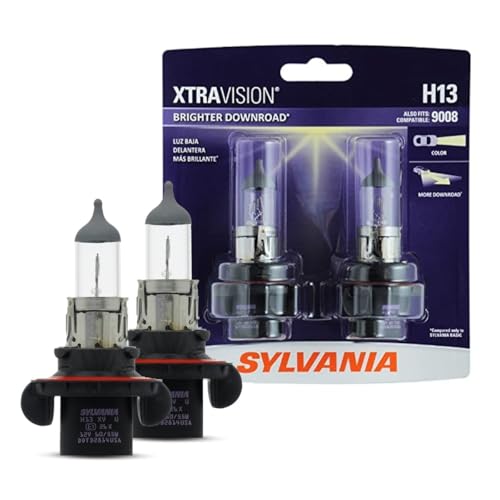
Lights Dim Over Time, Replace In Pairs: Your lights are a pair, one is never turned on without the other. If one bulb burns out, the other isn't far behind. Replace your H11 XtraVision Halogen bulbs in pairs for optimum performance.

【800% BRIGHTER THAN HALOGEN】 – OXILAM Upgraded H11/H8/H9 LED bulbs with 16 high-power chips deliver 32,000LM of intense 6500K pure white light, which cuts through darkness like daylight. Making night driving safer and more comfortable.
Testing and Final Steps
Before reconnecting your vehicle’s battery, verify that the new headlight bulb is firmly seated and all electrical connections are secure. Test the bulb using your multimeter in continuity mode to confirm electrical integrity before reinstallation. Reconnect the battery’s negative terminal and turn on the headlights immediately. Check both low and high beam settings to ascertain proper operation. Observe beam strength and coverage from outside the vehicle. If the bulb doesn’t illuminate, use your circuit tester to verify power delivery through the relay and fuse. Ascertain rubber dust caps are properly installed to protect against moisture intrusion, which affects bulb longevity. When testing, touch the probe leads to the two wires in the headlight socket to verify the connection. Perform a final inspection confirming no wires are pinched and all connectors are firmly attached. Test headlights during a short drive to verify consistent performance under various conditions.

Fit For Ford Escape S SE 2013-2023: This item include 2*9005/HB3 high beam+2*H11/H8/H9 low beam headlight bulbs, 6000K White light halogen bulbs, total 4 light bulbs.

SHENKENUO Ultra - High Performance Halogen bulbs are fully compatible with Ford Escape S SE (2013-2022) and No additional modifications required

【Compatible with Ford Escape 2013-2016】Comes with 1 pair each of high beams, low beams, fog lights, and license plate lights combo kit. Fit for 2013 2014 2015 2016 Ford Escape light bulbs. This 8-pack complete set is a direct replacement for your original halogen bulbs, allowing you to swap out high beams, low beams, and fog lights in one hassle-free go.
Model-Specific Notes and Variations
Ford Escape headlight bulb replacement procedures vary considerably across four generations of production, requiring you to identify your vehicle’s specific year before beginning work. First-generation models (2001-2007) use a securing bar clip system, while second-generation vehicles (2008-2012) employ a twist-and-pull method with counterclockwise rotation. Third-generation Escapes (2013-2019) incorporate rubber caps requiring removal before accessing twist-lock sockets. Model variations become most apparent in 2017, where certain configurations demand coolant reservoir removal or headlight assembly detachment using 8mm bolts for adequate clearance. Fourth-generation models (2020-2023) simplify the process with plug-and-play accessibility. Bulb compatibility differs across generations, necessitating Owner’s Manual consultation for correct replacement sizes. Popular aftermarket options include halogen, LED, and HID conversion bulbs, each offering different brightness levels and longevity characteristics suited to your vehicle’s needs. Before beginning any replacement work, make sure the emergency brake is engaged and the vehicle remains completely stationary. All generations share one critical requirement: avoid bare-finger contact with bulb glass to prevent premature failure from oil contamination.

【Visual Enhancement】: The OKOENIEO H11 headlight bulb are 200% brighter than other halogen bulbs, providing drivers with a wider and farther field of vision. Offering a greater visibility, they allow drivers to spot deer, wildlife, falling rocks, or obstacles ahead of time, ensuring safer nighttime driving.
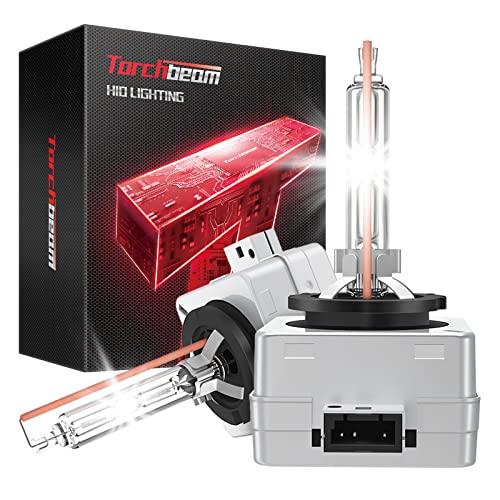
Safer Night Driving: Torchbeam d3s bulbs made with German xenon gas. Replacement OEM Part Number: 42302C1, 42302(WX/XV), 42403(C1), 66340, 66340CBH, 66340CBI, ect.

【Experience a 10X Brighter Night】 Transform your drive with our advanced 9008/H13 light bulbs. Each 9008 light bulbs combo, equipped with 12 high-performance chips, delivers a blinding 50,000 lumens per set. Powered by latest upgraded Z10 technology which provide unparalleled road illumination—turning night into day for a safer, more confident, and utterly superior driving journey.
Tools and Materials Needed
Successful headlight bulb replacement requires gathering specific tools and materials before you begin work on your Ford Escape. You’ll need H11 halogen bulbs confirmed compatible with your specific model year, purchased from reputable suppliers for quality assurance. Essential tools include a Phillips head screwdriver, 10mm socket wrench, and trim removal tool for assembly access. Safety equipment consists of protective glasses and powder-free nitrile gloves to prevent oil contamination on bulb glass. Material sourcing should include lint-free microfiber cloths, electrical contact cleaner spray, and rubber dust covers for reassembly. Keep a small flashlight, magnetic parts tray, and your owner’s manual accessible. To safely access the headlight housing, you may need to remove additional screws and covers using a ratchet and Phillips screwdriver. Tool maintenance includes cleaning implements with isopropyl alcohol post-replacement. Consider applying anti-seize compound to socket threads for future serviceability. O’Reilly Auto Parts stocks all necessary supplies for headlight replacement, available at local stores or online at O’ReillyAuto.com.

Repalce Part Numebr: 8A5Z-13C170-A; DL3Z-13C170-A; 8A5Z13C170A; DL3Z13C170A; Bulb 7L7Z-13N021-A; 7L7Z13N021A

Fitment: Our headlights assembly fit for 2017 2018 2019 Ford Escape.( Low Beam H11 / High Beam HB3 Included )
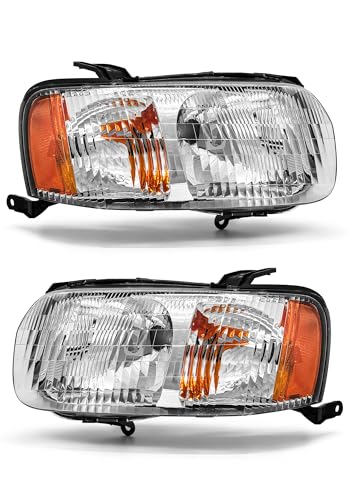
Vehicle Compatibility: precisely modeled to fit your original car model, Headlights assembly compatible with 2001 2002 2003 2004 Ford Escape head light .(𝐃𝐨 𝐧𝐨𝐭 𝐢𝐧𝐜𝐥𝐮𝐝𝐞 𝐛𝐮𝐥𝐛𝐬)
Common Mistakes to Avoid
While replacing your Ford Escape headlight bulb appears straightforward, several critical errors can compromise the installation quality and bulb longevity. Never touch the glass portion with bare hands—skin oils create hot spots that reduce performance. Verify bulb types match your specific model year before purchase; universal-fit alternatives often cause misalignment. Don’t substitute different wattages, which strain electrical systems. Always disconnect the ignition first to prevent shock hazards. When detaching connectors, gently disengage tabs rather than yanking wires. Confirm you’ve allowed adequate lead time to source certified bulbs rather than rushing with cheap alternatives. Avoid forcing connectors at wrong angles—they’ll click when properly seated. Consider replacing both bulbs simultaneously to maintain uniform brightness and color temperature. Finally, verify the rubber seal reinstalls completely to prevent moisture intrusion.
Troubleshooting Tips
Even when you’ve avoided installation errors, your Ford Escape’s headlight may still fail to function properly. Begin electrical connections troubleshooting by testing the bulb socket with a voltmeter—12V indicates proper power delivery. Verify ground integrity by checking continuity between the socket’s ground terminal and chassis. Inspect the wiring harness for corrosion or damaged connectors that interrupt current flow.
Perform bulb compatibility checks by confirming the replacement matches your Escape’s year-specific requirements (typically 9005/9006 or H13). Swap the suspect bulb into the working socket to isolate whether the bulb or wiring causes the failure. Check the headlight relay and fuse box for blown fuses using a test light. If you discover corrosion on fuse contacts, remove the affected fuse and clean with a pen or paper clip to restore proper connection. A weak battery or failing alternator can also cause headlights to flicker or dim inconsistently even after bulb replacement.
When reinstalling components, ensure you’re carefully handling bulbs without touching the glass to prevent premature failure from skin oils and contaminants. If problems persist after these diagnostics, moisture inside the housing or a faulty headlight control module likely requires professional diagnosis.
Maintenance Recommendations
Maintaining your Ford Escape’s headlight system requires consistent monitoring and timely intervention to guarantee ideal visibility and safety. Conduct monthly visual inspections to detect dimming, flickering, or lens damage early. Schedule professional headlight maintenance during routine service intervals at 5,000–7,500 miles, aligning with oil changes. Replace bulbs in pairs when one fails to maintain consistent beam patterns.
Understanding bulb lifespan helps plan replacements: halogen bulbs last 500–1,000 hours, HID bulbs average 5,000 hours, and LED bulbs extend to 50,000 hours. When selecting replacement bulbs, consider color temperature ratings and lumens output to ensure optimal brightness and visibility. Clean lenses regularly using manufacturer-recommended products. When replacing bulbs, handle only the base—never touch glass surfaces. Inspect wiring and sockets for corrosion, ensuring proper electrical contact. Seal rubber covers tightly after installation to prevent moisture intrusion, protecting both bulb longevity and system integrity. Professional headlight bulb replacement typically costs between thirty and three hundred dollars depending on bulb type and labor involved. Regular headlight maintenance helps prolong vehicle lifespan by ensuring optimal lighting performance and preventing electrical system deterioration.


