To replace a halo headlight bulb, you’ll first disconnect your vehicle’s battery for safety. Access the bulb assembly by removing the fender liner or front housing, then disconnect the wiring harness and remove the protective rubber boot. Rotate the bulb holder counterclockwise to extract the old bulb, handling the replacement with clean gloves to prevent oil contamination. Insert and rotate clockwise to lock, reconnect the harness, and test functionality. The following sections provide detailed troubleshooting steps and alignment procedures.
Tools and Materials Required
Before beginning a halo headlight bulb replacement, gather several essential items to guarantee safe and efficient work. You’ll need a replacement bulb matching your vehicle’s bulb specifications from the owner’s manual or part catalog. Essential tools include Phillips and flat head screwdrivers, socket set with ratchet, and potentially Torx bits for specific models. Obtain clean gloves or cloth to prevent skin oils from contaminating the bulb surface. Safety precautions require protective goggles and work gloves during disassembly. For halo LED bulbs, you may need replacement resistors or wiring accessories to prevent system faults. Keep a flashlight or headlamp available for illuminating tight engine bay spaces. Additional items include anti-corrosion spray, clean rags, and your vehicle’s manual for reference during the procedure. Having needle-nose pliers on hand can help you remove stuck bulbs that are difficult to twist out of their sockets. When selecting replacement bulbs, consider brightness levels, color temperature, and longevity to ensure safe nighttime driving visibility. To ensure optimal performance and longevity, apply dielectric grease to the bulb connections to enhance durability and prevent corrosion-related issues.

Reliable Quality: Crafted with high-quality quartz and enhanced filament, these halogen bulbs have excellent ability of light concentration and heat dissipation. Compared to ordinary halogen bulbs, they can withstand greater vibration and ensure longer lifespan.

Super bright white light, 12SMD 3030, OEM/factory headlights or fog light replacement bulbs, includes 2 bulbs
Accessing the Halo Bulb Assembly
Once you’ve gathered the necessary tools, locate the halo bulb assembly by identifying whether your vehicle requires front-access through the engine bay or rear-access via the wheel well. For rear-access models, fender liner removal is necessary—use 8mm or 10mm sockets to remove securing screws. You may need to lift the vehicle or remove the wheel for adequate clearance. Carefully pull back rubber boots covering the headlight’s rear section to expose the bulb housing. Remove plastic protective covers secured by clips or small screws to achieve bulb socket access. The halo bulb typically sits behind smaller covers within the headlight assembly. Disconnect wiring connectors by pressing release tabs, then locate the torx or Phillips screws (commonly T15 or T20) securing the bulb housing for removal. Before beginning this process, ensure you have identified your bulb type—whether halogen, LED, or HID—as different bulb types require specific handling procedures and may have model-specific installation requirements. For optimal visibility after installation, verify that your headlight beam is properly aligned on a level surface] to ensure safe nighttime driving.
Removing the Old Halo Bulb
With the headlight assembly now accessible, you’ll begin the removal process by disconnecting the electrical connectors attached to the halo bulb. Press the release tab gently, using a flathead screwdriver if clips are tight. Remove any protective rubber boots or covers by twisting counterclockwise, noting their orientation for reinstallation.
Grip the bulb holder firmly and rotate counterclockwise to align the retaining tabs, then pull straight out with steady pressure. If the bulb resists due to corrosion, apply penetrating lubricant and wait before attempting removal again. Avoid breaking the bulb inside the socket, which complicates extraction.
Inspect the socket for corrosion or debris during socket maintenance. Applying dielectric grease to the contacts can help prevent future oxidation and corrosion. For certain vehicle models, you may also need to navigate through the vehicle’s menu system to disable any daytime running lights that could interfere with bulb installation. Modern halo bulbs often feature LED technology that provides enhanced brightness and energy efficiency compared to traditional halogen options. Practice proper bulb disposal, as halo bulbs may contain hazardous materials requiring specialized recycling facilities.

KIT CONTENTS - Each headlight restoration kit includes (8) Step 1 Oxidation Removing Wipes, (1) Step 2 Sanding Kit, and (2) Step 3 Ceramic Coating Wipes.

【Package Include】This item include pair H4/9003 high low dual beam LED headlight bulbs and pair 7 inch H6024 Glass Round Headlight Housing.Please confirm your original housing model before purchasing.

KIT INCLUDES: 1 - Disc Pad Holder, 3.25 in (8,2 cm) 6 - 3M Gold Sanding Discs 500 Grit, 3 in (7,6 cm) each 4 - 3M White Finishing Discs 800 Grit, 3 in (7,6 cm) each 1 - 3M Trizact Refining Disc 3000 Grit, 3 in (7,6 cm) 2 - 3M Quick Headlight Clear Co
Preparing and Installing the New Bulb
After selecting the correct replacement halo bulb for your vehicle, handle it exclusively with lint-free gloves or a clean microfiber cloth to prevent skin oils from depositing on the glass surface. Align the bulb base precisely with the socket’s notches or grooves, then insert gently until fully seated. Rotate clockwise to lock the mechanism securely. Verify the bulb doesn’t wobble, as movement compromises bulb lifespan and performance.
Reconnect the wiring harness firmly to the terminals until you hear a distinct click, confirming proper electrical connection. Inspect connectors for corrosion before attachment. Reinstall rubber dust covers tightly to seal against moisture ingress. Secure all connections with electrical tape to ensure they remain stable during vehicle operation. To further protect your headlights from deterioration, consider applying a UV sealant after installation to prevent oxidation and yellowing over time. Test functionality by turning on the headlights, checking for steady illumination without flickering. Adjust beam alignment if necessary to meet safety regulations.

Reliable Quality: Crafted with high-quality quartz and enhanced filament, these halogen bulbs have excellent ability of light concentration and heat dissipation. Compared to ordinary halogen bulbs, they can withstand greater vibration and ensure longer lifespan.

[Enhanced Visibility] forenner H11/H8/H9/H16 9005/HB3 light bulb feature a dual-sided CSP chip with a 6500K color temperature, delivering brighter, clearer light. Whether you're driving down a dark country road or navigating late-night city streets, this enhanced visibility helps you see farther and wider—so you can feel more confident and secure behind the wheel after dark.

【Compatibility check before purchase】:The 9012/HIR2 high low beam halogen headlights compatible with Ford Edge (2011 2012 2013 2014 ) . Before purchasing, make sure that these halogen headlight bulb kits are compatible with your car
Reassembling the Headlight Components
The new bulb installed and tested, you’re ready to secure the headlight assembly back together. Begin with lens alignment by matching tabs and slots to their original positions, ensuring surfaces are clean for proper bonding. Apply automotive-grade silicone sealant to damaged or absent areas, then press the lens firmly against the housing. Use a heat gun to reactivate factory adhesive if necessary for assembly sealing. Secure the lens with screws in a crisscross pattern, tightening evenly to prevent cracking. Reconnect all wiring harnesses until they click firmly into place, routing wires according to manufacturer specifications. Apply clamps or tape to maintain pressure while the sealant cures. Bend tabs back to their original positions to ensure moisture does not enter the headlight assembly. LED headlights offer improved night-time visibility and longer lifespan compared to traditional halogen bulbs. For different Ford Edge model years, the reassembly process may vary slightly in component placement and sealant requirements. Inspect all edges for gaps that could compromise waterproofing before final installation.
Testing and Adjusting Your New Halo Bulb
Before declaring your halo bulb installation complete, you’ll need to verify proper function through systematic electrical and visual testing. Start with continuity testing using a multimeter in resistance mode—disconnect the bulb and touch probes to the base contacts. A low resistance measurement confirms filament integrity, while an infinite reading indicates failure. For bench-testing, connect a powered bulb tester‘s clips to battery terminals, applying voltage directly to illuminate the halo ring and verify even brightness without flicker. Once installed, check all electrical connections for tightness and test low beam, high beam, and halo functions simultaneously. Project the beam pattern onto a wall, then adjust vertical and horizontal aim screws to manufacturer specifications. Ensure your halo bulb operates within the appropriate color temperature range for optimal visibility and legal compliance. After installation, consider applying UV block clear coat protection to maintain long-term clarity and prevent headlight degradation. Conduct road tests to confirm stable operation under real driving conditions. Testing with a multimeter provides accurate diagnosis of bulb condition, helping you avoid unnecessary replacements and confirming functionality before finalizing the installation.

Lights Dim Over Time, Replace In Pairs: Your lights are a pair, one is never turned on without the other. If one bulb burns out, the other isn't far behind. Replace your H7 XtraVision Halogen bulbs in pairs for optimum performance.

High Wattage bulbs provide a longer service life compared to standard HELLA bulbs. These bulbs are Off-road use only.
High Wattage bulbs provide a longer service life compared to standard HELLA bulbs. These bulbs are Off-road use only.
Troubleshooting Common Installation Issues
Even successful halo bulb installations can encounter operational problems that require systematic diagnosis and correction. Start by verifying bulb orientation—improper chip positioning creates poor beam patterns and excessive glare. Test the pattern on a wall at 7.5 m (25 ft) before final assembly. Address wiring compatibility issues next: CANBUS errors trigger flickering and dashboard warnings if you’re using non-compatible bulbs. Install anti-flicker modules or flip plug orientation to correct polarity problems. Check connector integrity by inspecting metal prongs for bending or misalignment that prevents proper power delivery. Apply dielectric grease to all connections to prevent corrosion and ensure reliable electrical contact. Confirm your dust cover seals completely—moisture penetration damages halo LEDs. Re-seat all connections with the vehicle powered off, and verify the bulb locks securely without forcing it into position.

High-Quality Canbus Decoder: Xprite 9005/H10 LED canbus decoder adopts resistor and capacitor error-free design, providing stable output performance. The heavy-duty case enhances heat dissipation and safety protection, ensuring a longer lifespan.
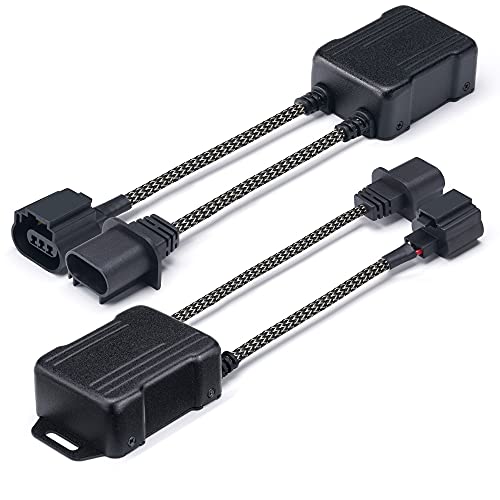
Compatibility Assurance - This LED Bulbs Resistor Anti -Flicker Harness ensures seamless integration with Jeep vehicles, resolving flickering issues during modifications.

Upgrade Canbus Decoder: Xprite H8/H9/H11 LED canbus decoder adopts resistor and capacitor error-free design, providing stable output performance. The heavy-duty case enhances heat dissipation and safety protection, ensuring a longer lifespan.