
To restore oxidized headlights, you’ll need progressive wet-sanding papers (400-3000 grit), a polishing compound, and UV-resistant clear coat. Start by masking surrounding paint, then wet-sand through each grit stage using crosshatch patterns with constant water lubrication. Apply rubbing compound with a drill pad at 1200-1600 RPM using overlapping passes. Seal immediately with UV-protective coating to prevent re-oxidation. The process takes 45-60 minutes and transforms cloudy lenses to near-factory clarity. Understanding proper technique, maintenance schedules, and protection options will help you achieve professional-grade results.
Essential Materials and Tools You’ll Need
Before you begin restoring oxidized headlights, you’ll need to assemble a complete set of abrasives, polishing tools, and surface preparation materials. Start with wet/dry sanding papers in progressive grits: 400–600 for heavy oxidation, 800–1000 for smoothing, and 1500–3000 for final leveling. You’ll require a sanding block to maintain flat contact and prevent surface waves. Include a spray bottle for constant wet-sanding to avoid heat buildup. For polishing, acquire polishing compounds ranging from micro-abrasive to finishing grade, plus appropriate buffing pads—foam, microfiber, or wool—matched to your polisher type. Essential preparation materials include isopropyl alcohol for surface degreasing, automotive masking tape to protect surrounding paint, degreasing soap for initial cleaning, and lint-free wipes for dust removal between stages. Following the restoration process with proper techniques will help you achieve professional-quality results that match those obtained with commercial restoration systems. After completing the restoration process, applying a clear coat provides long-term protection against future oxidation and yellowing. Additionally, you’ll need clear gloss urethane to seal and protect the restored headlights from future oxidation.

KIT INCLUDES: 1 - Disc Pad Holder, 3.25 in (8,2 cm) 6 - 3M Gold Sanding Discs 500 Grit, 3 in (7,6 cm) each 4 - 3M White Finishing Discs 800 Grit, 3 in (7,6 cm) each 1 - 3M Trizact Refining Disc 3000 Grit, 3 in (7,6 cm) 2 - 3M Quick Headlight Clear Co

KIT CONTENTS - Each headlight restoration kit includes (8) Step 1 Oxidation Removing Wipes, (1) Step 2 Sanding Kit, and (2) Step 3 Ceramic Coating Wipes.

KIT INCLUDES: 1 - 3M Trizact Refining Disc 1000 grit, 3 in/7.6 cm 1 - 3M Trizact Refining Disc 3000 grit, 3 in/7.6 cm 2 - 3M Quick Headlight Clear Coat Wipes 1 - Foam Pad with 3M Hookit Attachment, 3 in/7.6 cm 1- Disposable Glove
Preparing Your Headlights for Restoration
Proper headlight preparation determines restoration quality and longevity. Begin with thorough headlight assessment by examining for light hazing, cloudiness, or heavy oxidation to establish process intensity. Inspect for deep scratches requiring multiple compound applications. Wash headlights with soap and water, then wipe residue using microfiber cloth. Apply clarifying compound with soft cloth for light surface oxidation removal.
Implement protective measures by applying automotive masking tape around headlight edges to shield paint from compound damage. Cover fenders and bumper areas completely. Park in shaded workspace to prevent rapid material drying and tape adhesion issues. Ensure headlights are completely dry before applying masking tape to guarantee proper tape adherence. Keeping the surface wet during sanding prevents damage to the plastic lens during restoration. For enhanced long-term results, plan to apply a UV protectant sealant after restoration to maintain headlight clarity.
Fill spray bottle with water for controlled moistening during subsequent steps. Spray lubricant or deionized water aids cleaning without scratching. Dry thoroughly with microfiber towel before proceeding to restoration phases.
Applying Rubbing Compound With a Drill Pad
Attach your disc pad holder or foam polishing pad to the household drill chuck securely, ensuring tight connection to prevent detachment during operation. For compound selection, use V34 Hybrid Compound or 3M Rubbing Compound with an orange foam pad, hex-logic cutting pad, or wool pad. Set your drill speed between 1200-1600 RPM for controlled polishing.
Apply a dime-sized dab of compound to the pad, then smear it evenly across the headlight lens before activating the drill to minimize slinging. Master drill techniques by employing back-and-forth, up-and-down criss-cross patterns with horizontal overlapping passes. Maintain consistent speed, uniform pressure, and flat pad contact while keeping the pad moving continuously to prevent heat buildup. These active ingredients work to break down oxidation and yellowing on the lens surface. LED headlights offer enhanced brightness and durability compared to traditional halogen bulbs once your lens restoration is complete. Polish until the lens achieves crystal clarity with no haze remaining. If needed, add more compound to restore full clarity and continue polishing the surface.
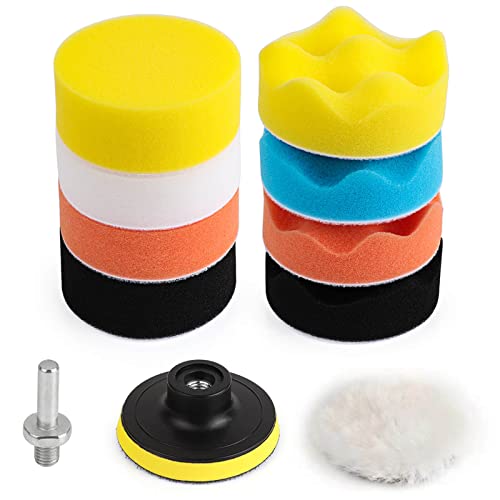
Package Includes: 8 pcs 3" Sponge Polishing Pads, 1 pcs Woolen Buffer Pad,1 pcs Drill Adapter,1 pcs Suction Cup

Full-Cycle Sanding Support - The car drill polishing kit featuring 3 inch sanding discs range 60/80/120/240/400/800/1000/1500/2000/3000/5000/10000 grit sandpaper for dry and wet use, with orbital sander pads, imitation wool buffing pad, and upgraded backing pads for 1/4 and 1/8 inch shank. Seamlessly transition from sanding to polishing.

High Quality:Our ZFE 3-inch drill buffing pad is made of high-quality sponge and wool, microfiber material has the characteristics of being flexible, washable, and reusable. These polishing pads can be used for waxing, polishing, and sealing various coatings, with good cleaning and improving brightness effects.
Wet Sanding Techniques for Best Results
When tackling oxidized headlights, wet sanding removes the damaged UV-degraded polycarbonate layer to restore optical clarity. Begin by pre-soaking sandpaper in soapy water for lubrication. For severely foggy lenses, start with 800 grit, progressing through 1000, 1500, 2000, and finishing with 2500-3000 grit. Never skip grit stages—this guarantees complete scratch removal from previous passes.
Execute slow, overlapping crosshatch passes with constant water lubrication. Perform 4-8 passes per section, then rinse thoroughly. After each grit, wipe clean with microfiber and inspect for uniform fogging and surface smoothness. You’ll notice progressive clarity improvement as you advance through finer grits. Apply light to medium pressure throughout the sanding process to achieve optimal results without damaging the lens surface.
Use a backing pad to maintain even pressure distribution. Avoid edge slippage and over-sanding. Beginners should start at 1000 grit to prevent excessive material removal from aggressive coarser abrasives. After completing wet sanding, mildly hazy lenses may only require machine polishing with specialized compounds before applying protective coatings. After completing wet sanding, apply a UV sealant coating to protect the restored lens from future oxidation and degradation.

Comprehensive 130-Piece Kit: Contains A Variety Of Tools Including 3-Inch Wet Dry Sanding Discs (800, 1000, 1500, 2000, 3000, 5000 Grit, 20 pcs Each), Foam Pads*2, Disc Pad Holder*1, 2pcs Connecting Rods (1/4'' Shank, Cylindrical And Hexagonal), 3.3''Face Buffing Polishing Pads(Yellow*1and Red*1), Fiber Cloth*1, Manual Sanding Block*1, Masking Tape*1

Complete Restoration Kit: Package includes 100 pcs of 3 inch sanding discs with an assortment of grits (800, 1000, 2000, 3000, 5000, 20 pcs of each grit), a 1/4-inch shank, a backing plate, a foam buffing pad, a synthetic wool pad, 2 sponge pads.

Complete 137PCS Sanding Kit: This all-in-one sanding and polishing kit includes 120pcs 3-inch sandpapers (60–10000 grit), 1 handheld sanding pad, 3 buffer pads, 2 wool pads, 5 sponge pads, 2 backing plates (inner & outer thread), and multiple adapter rods (6.35mm, 5.8mm, 3mm). Ideal for both professionals and DIY users who need precision from coarse sanding to fine polishing.
Sealing and UV Protection Application
After achieving optical clarity through progressive wet sanding, you must immediately protect the exposed polycarbonate surface from re-oxidation. Begin sealant preparation by decontaminating the lens with isopropyl alcohol using microfiber towels, eliminating polishing residue and oils. Conduct thorough surface inspection for remaining imperfections requiring correction. Mask adjacent panels with automotive tape to prevent overspray. Apply UV-resistant clear coat in thin horizontal passes, moving from top to bottom. Self-leveling formulations prevent runs when applied correctly. Alternative urethane-based sealants require dip-application techniques—saturate the applicator towel, wring excess product to avoid drips, then distribute evenly across the entire lens surface. Allow 2-4 hours for initial cure; full hardness develops within 24 hours. Avoid water exposure during this period. If moisture persists after sealing, this may indicate damage to the housing that necessitates professional inspection. Understanding UV exposure and oxidation helps explain why immediate sealant application is critical to preventing headlight degradation. Unsealed headlights oxidize rapidly, negating your restoration efforts within months. The sealant acts as a protective barrier against moisture, dirt, and environmental contaminants that would otherwise compromise the restored clarity and safety of your headlights.

PREMIUM CLEAR FINISH: Professional-grade polyurethane automotive spray paint designed for automotive refinishing and new paint jobs — delivers long-lasting protection and deep gloss for cars, motorcycles, and custom projects.

CLEAR LIGHTS: Meguiar's Clear Headlight Coating is the ultimate solution to maintain exceptional optical clarity on both new and restored headlights, ensuring optimal visibility and safety during nighttime driving

Home Remedy Alternatives: Toothpaste Method
Budget-conscious vehicle owners frequently turn to household toothpaste as a low-cost alternative to commercial headlight restoration systems. Toothpaste effectiveness stems from mild abrasive properties that temporarily remove oxidation layers, typically lasting 1-2 months before reapplication becomes necessary. You’ll apply non-gel whitening toothpaste to dampened microfiber cloths, rubbing in circular motions for 5-10 minutes per headlight. However, safety concerns arise from the method’s inherent limitations. The abrasive particles, sized 1-4 μm, create micro-scratches that accelerate future oxidation by increasing surface area exposed to UV damage. Without calibrated particle sizing for automotive polycarbonate plastics or protective UV sealants, you’ll face recurring haze formation. Toothpaste contains fluoride and other chemicals that may damage plastic components of your headlight assembly. This interim solution costs approximately $1 versus $15-20 restoration kits, though professional treatments lasting 2-3 years ultimately provide superior longevity and protection.
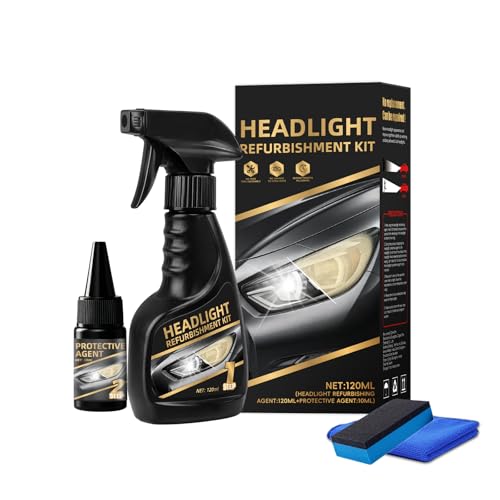
Make Your Vision Brighter:This 2026 New Automotive Headlight Restoration Kits effectively clears up yellowing and cloudiness, shine your car headlamp in just minutes, instantly improving brightness and visibility

RESTORES FOGGY HEADLIGHTS: Quickly restore and eliminate oxidized and yellowed lenses for a crystal clear, like-new appearance

UV Headlight Coating Kit: The Sylvania UV Block Clear Coat Kit is a premium headlight clear coat designed to protect and restore dull or cloudy lenses to like-new condition
Time Investment and Maintenance Schedule
Professional headlight restoration requires 45-60 minutes per vehicle when following complete wet-sanding protocols, though rushed applications compromising proper grit progression often necessitate premature rework. You’ll invest 15 minutes total across 400, 1000, and 2000 grit stages, plus 5 minutes for rubbing compound application. Critical time management involves 4-6 hour cure periods after clear coat application—overnight curing yields superior durability. Wipe New formulations demand 24-hour moisture-free curing cycles. For maintenance tips, reapply lens clarifying compound every 4-6 months when oxidation reappears. Multi-day workflows enhance results: complete coarse-to-medium sanding day one, then execute fine-grit finishing and clear coat application day two. Environmental preparation—shaded workspace, adequate ventilation, proper surface temperature—prevents streaking defects requiring complete procedure repetition. Unlike temporary fixes such as toothpaste or WD40, applying a UV-resistant clear coat provides long-lasting protection against future oxidation and re-yellowing. Modern vehicles use polycarbonate plastic lenses that inherently experience degradation from UV exposure and environmental factors. Ceramic coating systems create a harder, more scratch-resistant surface than conventional polishes or sealants, potentially lasting years rather than months.
Results You Can Expect and Known Limitations
When properly executed, DIY headlight restoration transforms cloudy, yellowed lenses to near-factory clarity through systematic oxidation removal. Expected outcomes include measurably brighter light projection during nighttime operation and elimination of polycarbonate haze. Restoration effectiveness varies with oxidation severity—moderately degraded lenses respond to single applications, while heavily oxidized units require multiple treatment cycles. Kits priced $10–$25 deliver comparable results to professional services costing hundreds.
However, limitations exist. Results aren’t permanent; oxidation recurs within months without UV protectant reapplication. Quality sealants extend clarity retention to 18+ months, but degradation inevitably resumes. Severely damaged lenses with micro-cracking show improved transparency yet retain structural defects. For extended protection beyond basic household methods, applying a UV protectant sealant after restoration prevents future fogging and maintains brightness longer than unprotected lenses. Popular internet methods suggest using household items like vinegar, though these unverified techniques may worsen headlight conditions and lack the lasting protection of commercial products. While restoration recovers functional performance cost-effectively, it’s a temporary solution requiring periodic maintenance to sustain visibility gains.


