
To replace your Audi A4 headlight, you’ll need Torx drivers (T20-T30), socket wrenches, and trim tools. Start by disconnecting the negative battery terminal and applying masking tape to protect surrounding surfaces. Remove the fasteners securing the headlight assembly, disconnect the wiring harness, and carefully extract the housing. Install the appropriate bulb type—H7 halogen for base models or D1S/D3S for HID systems—without touching the glass surface. Reconnect all electrical connections, then adjust beam alignment by positioning your vehicle 6-7 meters from a wall. The following sections detail each critical step for ideal results.
Tools and Equipment You’ll Need
Before attempting an Audi A4 headlight replacement, you’ll need to assemble an extensive toolkit that includes both standard automotive tools and some specialized equipment. Essential screwdrivers include Phillips head, flat blade, and bit-socket varieties with hex star bits. You’ll require socket wrenches in 10mm and 17mm sizes, plus T20, T25, and T30 torx sockets. A 5mm hex socket and flex joint enable angled access in confined spaces. Additionally, you’ll need a 6mm hex socket for making left-right headlight adjustments during the alignment process. Proper equipment organization streamlines workflow—arrange trim tools, ratchets with extensions, and torque wrenches within reach. For vehicle elevation, use a floor jack with jack stands and wheel chocks. Safety gear includes gloves and glasses. A flashlight illuminates dark areas. Regular tool maintenance guarantees reliable performance throughout this precision-dependent procedure.

Applicable for Audi S4 2013-2016;S5 2013-2017;A4 2013-2016;A4 Quattro 2013-2016;A5 Quattro 2013-2017;A5 2013-2016;allroad 2013-2016;RS5 2013-2016;

Yuesstloo 31 pcs camshaft timing tool kit fits for 2006-2018 TSI TFSI EA888 1.8 2.0 engine. Compatible with most Audi A3 A4 A5 A6 Q5 TT/TT Quattro 2.0T, for VW Jetta Mk5, VW Jetta Mk6, VW Passat B6, VW CC, VW Scirocco, VW Golf Mk6 GTI.
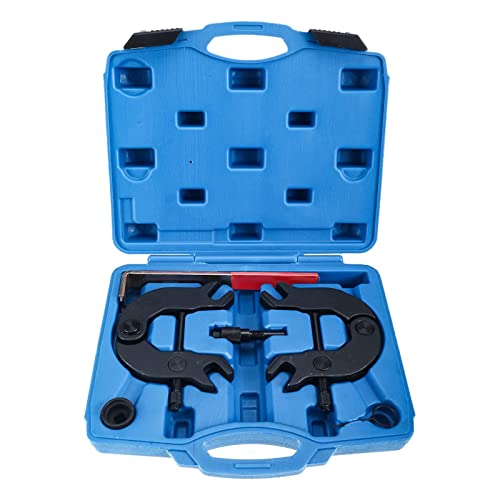
Two Locking Alignment C Fixtures (Right and Left) that interface with camshafts for securing/maintaining TDC
Safety Measures Before Starting
Proper preparation minimizes injury risk and guarantees successful headlight replacement on your Audi A4. Begin by positioning your vehicle on level ground, engaging the parking brake, and removing keys from the ignition to eliminate electrical hazards. Following established safety protocols, disconnect all headlight wiring connectors before accessing bulb assemblies.
Don personal protection equipment including safety goggles and gloves. The goggles shield your eyes from glass debris, while gloves prevent skin oils from contaminating halogen bulb surfaces—a critical factor affecting bulb lifespan. Never touch glass components directly.
Secure the hood fully and verify your workspace offers adequate lighting. If working near the passenger-side assembly, remove the air duct obstruction first. Avoid forcing resistant components; reassess your approach when encountering unexpected resistance to prevent damage. For retrofits requiring lens separation, consider baking the assembly to safely access internal projector or LED components. If condensation appears in the headlight housing during replacement, address it promptly using desiccant packets or other moisture removal methods before reassembly. Organize your essential tools including a socket wrench, screwdriver, and pliers to avoid project delays.
Understanding Your Audi A4 Bulb Types
Your Audi A4’s headlight system employs three distinct bulb technologies—halogen, HID xenon, and LED—each requiring specific replacement components based on your model year and trim level. Base models from 2000-2014 typically use H7 halogen bulbs for low beams, while HID-equipped variants utilize D1S bulbs in earlier models and D3S in 2009-2016 versions. Your 2015-2016 A4 requires D3S/D3R bulbs for both LED and HID configurations.
Understanding bulb types extends beyond fitment. H7 SL2 LED upgrades deliver 1400 lumens at 14 watts, while the Pro version outputs 1800 lumens at 15.4 watts. HID xenon D3S bulbs provide 2500-3500 operational hours compared to halogen’s sub-1000-hour lifespan. Wattage ratings determine electrical load and heat output, critical factors during replacement planning. When comparing different bulb technologies, consider that enhanced brightness options from brands like Philips and Sylvania can significantly improve nighttime visibility and driving safety. LED replacement bulbs feature Next-Generation Thermal Separation Technology to manage heat dissipation and maintain optimal performance throughout their operational lifespan.

Lights Dim Over Time, Replace In Pairs: Your lights are a pair, one is never turned on without the other. If one bulb burns out, the other isn't far behind. Replace your H7 XtraVision Halogen bulbs in pairs for optimum performance.

800% Brighter Night Vision Powered by advanced chip technology, Marsauto H7 bulbs deliver 8x the brightness of standard halogen bulbs, producing crisp 6500K white light for enhanced visibility and faster reaction time—whether driving at night or in low-light conditions.
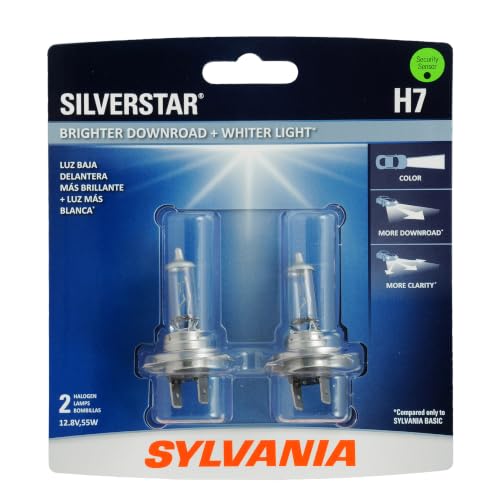
Lights Dim Over Time, Replace In Pairs: Your lights are a pair, one is never turned on without the other. If one bulb burns out, the other isn't far behind. Replace your H7 SilverStar Halogen bulbs in pairs for optimum performance.
Preparing Your Vehicle for Headlight Replacement
Having identified the correct bulb specifications for your A4 model, you’ll now set up your workspace to execute the replacement safely and efficiently. Park on level ground, engage the parking brake, and allow the engine to cool completely—essential headlight maintenance tips preventing burns. Disconnect the battery’s negative terminal to eliminate electrical hazards. Gather your 10mm socket, ratchet, extension, Torx drivers (T25/T30), and replacement H7 bulbs. Vehicle cleanliness importance extends to your work area; wipe down the headlight housing with isopropyl alcohol to prevent contamination. Position a flashlight for visibility in tight spaces. Handle new bulbs exclusively with gloves or clean cloth—skin oils cause premature failure. After replacement, consider applying a UV sealant to protect your headlights from future oxidation and yellowing. Removing the entire headlight assembly provides easier access to bulbs and clearer visibility during replacement. Organize components systematically in trays, ensuring nothing gets misplaced during disassembly.

Packaging Details: You will receive two H7 female headlight connector harnesses. Suitable for daytime running lights/fog lights/halogen bulbs/high and low beam headlights, LEDs, SMD bulbs, etc., meeting various automotive lighting needs. We recommend checking the bulb model before ordering to ensure compatibility.

【Visual Enhancement】: The OKOENIEO H7 halogen bulbs are 200% brighter than other halogen bulbs, providing drivers with a wider and farther field of vision. Offering a greater visibility, they allow drivers to spot deer, wildlife, falling rocks, or obstacles ahead of time, ensuring safer nighttime driving.

Get the best lighting performance and an increased visibility and comfort on the road compared to basic bulbs
Removing the Old Headlight Assembly and Bulb
Begin the extraction process by applying low-tack masking tape along the bumper and grille edges where the headlight assembly meets painted surfaces—this protective barrier prevents scratches and paint chips during removal. Disconnect the negative battery terminal to eliminate electrical hazards. Using appropriate Torx drivers (T25/T30), remove the two upper visible screws first, then locate and extract lower hidden fasteners accessed through the wheel well. Follow the manufacturer-recommended sequence to free all five attachment points. Depress the connector release tab while pulling the wiring harness firmly. For bulb extraction methods, twist or pull sockets according to lamp design—H7 bulbs twist-release, while D3S xenon requires removing the rubber cover first. As with other vehicles, using dielectric grease on electrical connections helps ensure proper contact and prevents corrosion. Before pulling the housing rearward, test the functionality of the replacement bulb to confirm proper operation. Pull the housing rearward with even pressure, avoiding twisting motions. Support the assembly throughout these headlight removal techniques to prevent damage. Removing the entire headlight assembly provides easier access to bulbs and clearer visibility during the replacement process.

Kit Includes: 1 Driver Side Headlight Assembly; 1 Passenger Side Headlight Assembly
OEM Part Number:N90683302,N90 683 302.

COMPATIBILITY: Compatible with Audi A4 / S4 B8 2008-2012 ,Compatible with Audi A4 Allroad 2010-2012
Installing Your New Headlight Bulb
Before proceeding with installation, verify you’ve selected the correct replacement bulb by cross-referencing the original component’s base configuration—H7 12V 55W halogen bulbs for standard low beam applications, D3S xenon bulbs for HID systems, or P21W specifications for turn signals. Bulb compatibility considerations extend beyond wattage specifications to include physical tab alignment and connector configurations.
For proper installation techniques, align the new bulb‘s seating tabs with the housing guides before insertion. Push the bulb firmly into position until the clips engage completely. Rotate clockwise until the locking mechanism secures the assembly. Reconnect the electrical connector, listening for an audible click that confirms proper engagement. Replace the dust cap by aligning the two rear holes first, then securing the front section. Handle the new bulb carefully to avoid contact with the glass surface, as oils from your skin can reduce bulb lifespan and performance. Consider checking the color temperature of your replacement bulb to ensure optimal visibility and aesthetic consistency with your vehicle’s lighting system. For enhanced visibility and durability, explore how LED technology compares to traditional halogen bulbs in reducing power consumption. Conduct a preliminary functionality test with the ignition off to verify proper operation before final reassembly.

H7 Driving Light Bulbs: RENO H7 fog bulbs with clearer visibility, in some cars gives an error code, reno can render a decoder to install
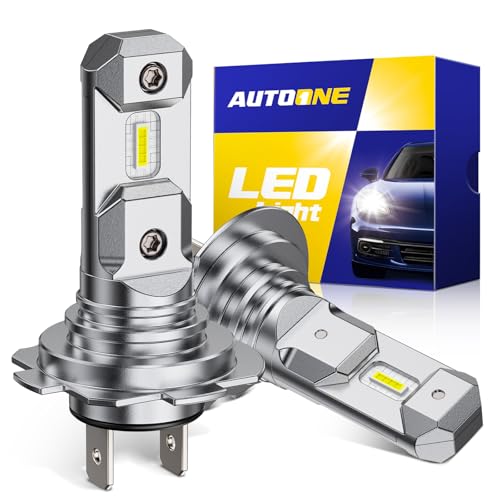
800% Brighter Than Halogen: Enhance visibility with AUTOONE H7 bulbs, delivering an impressive 800% brightness increase that outperforms standard halogen bulbs. Emitting 36,000 lumens per set in a clear 6500K tone, these high-performance fog lights enable you to see farther along the road—spotting potholes, debris, or curves earlier, giving you more reaction time to stay safe.

Experience 8X Enhanced Brightness: Equipped with advanced chip technology, Marsauto H7 bulbs deliver 800% greater brightness than standard bulbs, projecting crisp 6500K white light for farther visibility and quicker reaction times, day or night.
Adjusting Headlight Beam Alignment
Proper headlight alignment directly affects nighttime visibility and oncoming driver safety after bulb replacement or housing service. To achieve correct headlight aim, position your A4 on a level surface 6–7.6 m from a vertical wall with tires inflated to specification and normal load conditions. Turn on low beams and mark the wall at each lamp’s centerline height. The beam cutoff should fall 4–6 cm below center at this distance, following the manufacturer’s ~1.5° downward angle specification. Access vertical and lateral adjustment screws behind the housing—typically Torx or Allen fasteners—and turn incrementally until the hot-spot centers properly without dazzling oncoming traffic. For optimal results, adjust one direction at a time, starting with horizontal alignment followed by vertical adjustments. For hands-on adjustment, shine the headlights on your garage door to observe light movement as you turn the screws. Vehicles with adaptive systems require electronic recalibration after mechanical adjustment. Record final measurements for regulatory compliance.
Testing Your New Headlights
After installing replacement headlight bulbs or housings, you’ll need systematic verification to guarantee both electrical integrity and optical performance meet OEM specifications. Begin your headlight functionality assessment by turning on the ignition and activating low beams, then high beams, confirming both sides illuminate evenly. Perform voltage verification at the connector terminals using a multimeter—you should measure 11-12 volts with correct polarity. If equipped with xenon systems, check ballast connectors for identical voltage readings. Test operation before closing the hood to avoid reopening for corrections. If warning lights persist after bulb replacement, use VAG-COM to recalibrate the system and clear fault codes. Inspect the headlight sensor in the front wheel well for bent brackets or loose connections that compromise auto-leveling function. Additionally, verify that daytime running lights activate properly by observing voltage changes at the terminals when the system is engaged. Before considering your replacement complete, review the manufacturer warranty coverage applicable to your new headlight components to understand what protection is included. For optimal visibility and safety, perform a night road test to ensure the beam is properly aimed and provides adequate lighting without glare to oncoming drivers.


