

To replace your Toyota Tacoma’s headlights, you’ll need a 10mm socket wrench, trim removal tools, and replacement assemblies or H4 bulbs for 2005-2011 models. First, disconnect the battery and engage the parking brake. Remove the grille using a 10mm socket, then unfasten bumper bolts with 10mm and 14mm sockets. Disconnect the wiring harness, remove three 10mm bolts securing the assembly, and pull it outward. Install the new headlight, reconnect electrical connectors, and test alignment 25 feet from a wall to guarantee proper beam patterns and road visibility.
Gathering Your Tools and Materials
Before you begin replacing your Toyota Tacoma’s headlights, assemble the necessary tools to complete the job efficiently and safely. You’ll need a 10mm socket wrench with ratchet handle, socket extensions for obstructed bolts, and plastic trim removal tools to prevent damaging clips. Include a flathead screwdriver for prying and smaller fasteners. Proper tool organization prevents lost components—use a catch tray for bolts and clips.
Safety precautions require latex gloves to avoid contaminating halogen bulbs with skin oils, safety glasses for eye protection, and a flashlight for engine bay visibility. Gather replacement headlight assemblies or bulbs matching your model year, spare clips, microfiber cloths, and anti-seize lubricant. For 2005-2011 Tacomas, you’ll need H4 (9003/HB2) bulbs for the low and high beam headlights. Consider exploring LED upgrade options for improved brightness and longevity over standard halogen replacements. Before beginning installation, disconnect the battery to adhere to safety protocols and prevent electrical hazards. Reference your owner’s manual for torque specifications and bulb types. Confirm your Tacoma’s parked on level ground with the engine cool before starting work.

H4 HB2 9003 Vehicle Headlight Socket: Provide great solution to replace old and broken vehicle headlights or fog lights in vehicles without standard pins for 4" × 6", 7" × 6" and 5" × 7" work; Make car headlight/fog light wire replacement easier a lot
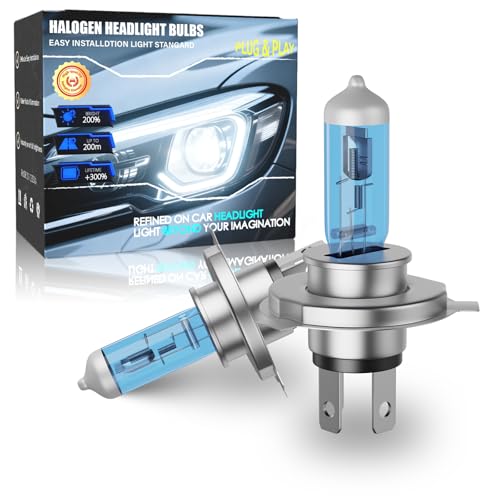
[Product Composition]: This product Fit for 1997-2015 Toyota Tacoma, this 2-bulb set includes 2*9003/H4 high low beam bulbs,totally 2 Halogen headlight bulbs in the package.

✤【Fitment】Full LED Side Marker Bumper Light Kit Compatible with Toyota Tacoma SR, SR5, TRD Sport, TRD Off-Road, Limited and TRD Pro 2016 2017 2018 2019 2020 2021 2022 2023.
Preparing Your Tacoma for Headlight Replacement
Successfully replacing your Toyota Tacoma’s headlights begins with proper vehicle preparation and workspace setup. Engage the parking brake and turn off the ignition as critical safety precautions. Open the hood to access the headlight housing, then remove any obstructing components like the battery or air intake system if necessary. Clear debris around the headlight area to prevent contamination during the procedure.
Locate the mounting bolts and clips securing the headlight assembly to the frame. Identify the wiring harness connections you’ll need to disconnect. If enhanced access is required, loosen fender liners or splash shields by removing their fasteners. This vehicle preparation guarantees adequate maneuvering room and prevents damage to plastic tabs or housing during removal. Keep all hardware organized for proper reinstallation. Use gloves to prevent oils from your hands touching the bulbs during the replacement process.
Removing the Front Bumper and Grille Components
Accessing your Tacoma’s headlight assemblies requires systematic removal of front-end components that obstruct direct access to the mounting hardware.
Grille Removal
Open the hood completely. Use a 10mm socket to remove bolts securing the grille at top and side mounting points. Release plastic push clips by gently prying with trim tools. Pull the grille straight upward to detach without breaking tabs.
Bumper Detachment
Remove fender flare bolts using a 10mm socket—approximately six per side. Push aside wheel well liners to access fog light wiring and bumper fasteners. Unfasten bumper bolts at multiple locations: top edge, underneath, wheel wells, and fender corners. Use 10mm and 14mm sockets as needed. Release plastic clips with trim tools, pressing red release posts inward where applicable. Disconnect fog light connectors behind wheel wells before fully removing the bumper. Use a 17mm socket to remove the skid plate mounting bolts before accessing the lower bumper area.

High-Quality Material: This push-fit clip-on rivet kit for bumpers is made from high-quality ABS material, featuring a smooth, fine surface and a solid, sturdy internal structure. It offers excellent water resistance and impact resistance, ensuring long-lasting durability.

[Compatible with] Front Demon Bracket is specifically designed to fit Toyota Tacoma models from 2009 to 2023. It seamlessly integrates with your vehicle's front end for a perfect fit and enhanced functionality.
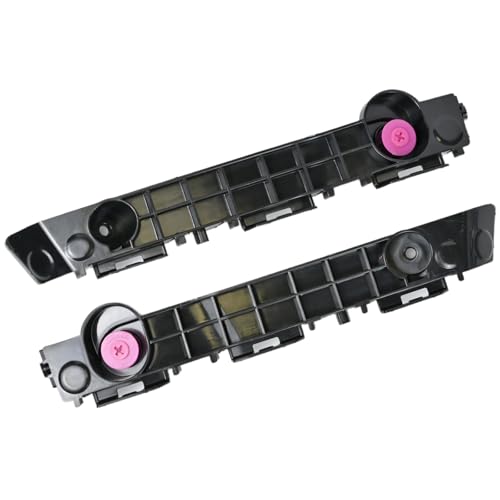
【Fitment】: Front Bumper Bracket Trim fit for Toyota Tacoma 2016 2017 2018 2019 2020 2021;
Disconnecting and Removing the Old Headlight Assembly
With the bumper and grille removed, the headlight assembly becomes accessible for disconnection and extraction. Locate the 10 mm bolts securing the assembly—typically two at the top and one on the side. Remove these using a socket wrench. Identify plastic clips on either side and disengage them carefully with a trim removal tool to prevent breakage.
Next, access the rear of the headlight to disconnect electrical connectors. Press release tabs on each harness and pull straight back, referencing wiring diagrams if connector orientation is unclear. Verify all five connectors are detached, following safety precautions to avoid damaging wires. To prevent electrical shorts, ensure the battery is disconnected before beginning this process. Take care not to touch the bulb glass during this process, as oils from your skin can damage halogen bulbs.
Pull the assembly outward with a slight upward angle to release bottom clips. Apply steady force while wiggling gently until completely free. Slide the headlight towards the inside as you maneuver it out of the mounting position. Place the removed headlight on a padded surface.

【Full Toolkit】Not just a basic pry kit—Includes 4 pry tools + 1 clip remover — designed for dashboards, door panels, trims, audio units, and interior clips. Designed to handle delicate trims and tough disassembly jobs. Multiple colors available for easy tool identification.

Non-Scratch Pry Tools: Made from durable nylon, this auto trim removal tool kit protects your car’s surfaces from scratches while offering strong leverage for trims, panels, and dashboards

Product Type: Auto Part
Replacing Individual Headlight Bulbs
For Tacoma owners who prefer replacing individual bulbs rather than the entire assembly, this approach offers a cost-effective solution that typically takes 15-20 minutes per side. Begin by opening the hood and removing the rubber dust cover from the headlight assembly’s rear. Disconnect the wiring harness, then release the spring-loaded retaining clip securing the bulb. Extract the old bulb carefully, avoiding contact with the replacement’s glass surface to maintain ideal bulb lifespan and headlight brightness. Verify your Tacoma’s model year for correct bulb specifications—commonly H4 or 9003 types. Understanding the differences in filament design and base types will help ensure compatibility with your vehicle’s headlight socket. Align the new bulb‘s tabs with the socket, insert firmly, and secure the retaining clip. Reattach the dust cover and wiring harness. Test headlight function immediately, checking for proper illumination and beam alignment before completing installation. When selecting replacement bulbs, pay attention to lumens output to ensure improved visibility and safety on the road. For consistent performance and visibility, consider replacing bulbs in pairs even if only one has failed.

Lights Dim Over Time, Replace In Pairs: Your lights are a pair, one is never turned on without the other. If one bulb burns out, the other isn't far behind. Replace your 9003 XtraVision Halogen bulbs in pairs for optimum performance.

【1200% Brighter Output】 Enhance your drive with our advanced H4/HB2/9003 bulbs, equipped with 16 state-of-the-art per unit and producing an exceptional 60,000 lumens per pair. Leveraging innovative ZC01 tech, these H4/HB2/9003 lights provide outstanding, energy-efficient brightness for improved visibility and safety on anywhere

1000% Super Brighter: Upgraded 24 PCS CSP 7535 LED chips, 60,000LM super brightness H4/9003 bulb per pair. Enhance your driving safety during low light or adverse weather conditions
Installing Aftermarket or Retrofit Headlights
Aftermarket and retrofit headlight installations require more extensive disassembly than simple bulb replacements, demanding 60-90 minutes and careful attention to wiring configurations. Remove the front grille, bumper components, and wheel liner clips using a Phillips head screwdriver and 10mm socket. Disconnect the OEM wiring harness from high beam, low beam, and side marker plugs. Transfer trim pieces from old assemblies to maintain factory fit.
Aftermarket benefits include improved visibility and modern aesthetics, while retrofit options offer customizable lighting performance. Connect supplied adapters matching color-coded plugs—dark gray to headlight, blue to gray adapter. For halogen-equipped Tacomas, install an add-a-fuse harness for independent DRL function, allowing you to disable daytime running lights through your vehicle’s menu system if desired. Route wiring carefully to prevent damage and consider applying UV sealant protection to your new headlights to prevent oxidation and yellowing over time.
Test all functions before final tightening. Consider reviewing an installation video for visual guidance on proper procedures and component placement. Reinstall components in reverse order, verifying proper alignment and beam pattern.

RLB-HILON Headlamp Adjuster Kits including 4pcs screws and 4pcs nuts and 2pcs springs

1 pair of headlight conversion harnesses for upgrading 2016-up Tacoma Sport, off road, limited and Pro (NOT for SR SR5 and Trail (SR5) ) to use the 2020+ oem led headlights.

[Fit For] - 05-11 Toyota Tacoma 2nd-gen pre-facelift ONLY
Reassembling the Front End Components
Once you’ve installed the new headlight assemblies and verified proper function, begin reassembly by positioning the headlight into its mounting location. Slide the assembly toward the fender, ensuring side tabs engage properly. Reconnect the electrical connector until tabs click. Install three 10mm bolts—two top, one bottom—torquing carefully to avoid overtightening. Snap upper clips firmly into place.
Reposition the fender liner, securing tabs and bolts. Align the fender flare, preventing alignment issues by checking gap consistency before fastening. Replace bumper clips at radiator and headlamp positions, ensuring secure fastening of all six clips. Install the air deflector with center clips. When reassembling, verify that projector lens technology components are properly seated to maintain optimal light output and road illumination performance.
Align grille tabs with slots, securing bottom clips first. Install two 10mm center bolts. Reconnect sensor wiring harnesses. Pull the bumper slightly forward for easier access during final adjustments. Verify all clips engage fully, eliminating rattles and gaps.
Testing and Adjusting Your New Headlights
Why risk reduced visibility or blinding oncoming drivers when proper headlight testing takes only minutes? Park your Tacoma 25 feet from a vertical wall on level ground. Turn on low beams and mark horizontal and vertical reference lines aligned with headlight centers. Observe each beam’s hot spot and vertical cutoff for centering and proper height.
For beam adjustment, locate horizontal and vertical adjustment screws on the headlight assembly’s rear. Turn the horizontal adjuster to center the hot spot on your marked line. Adjust vertical aim so the cutoff sits 2 inches below headlight height at 25 feet distance—preventing glare while maximizing road illumination. Some Tacoma models feature an adjustment dial located to the left of the steering wheel near the aux switches for convenient headlight leveling.
Verify both headlights produce uniform patterns. Test-drive at night to confirm adequate coverage without affecting oncoming traffic.


