
To replace your Volkswagen Jetta headlight bulb, first disconnect the negative battery terminal and allow the engine to cool. Access the headlight assembly from behind, typically by turning the steering wheel for clearance. Disconnect the electrical connector, release the retaining clip, and remove the burnt-out bulb by its base. Install the new bulb without touching the glass surface, reconnect the electrical connector, and test both high and low beams. The sections below provide detailed specifications, safety procedures, and maintenance guidelines to guarantee peak performance.
Gather Your Tools and Materials
Before you begin replacing your Volkswagen Jetta’s headlight bulb, verify the exact bulb type required for your specific model year and trim level. Models from 2010 onward typically use H7 halogen bulbs, while 1999-2005 models require 9007 or 907 style bulbs. Procure OEM or high-quality aftermarket replacements meeting proper wattage and certification standards.
Assemble essential tools: clean gloves for bulb safety, a flathead screwdriver or trim removal tool, appropriate sockets (10mm, T20, T30), and a reliable work light. Maintain tool organization by keeping a clean cloth or container for securing screws and components during disassembly. Consider brightness levels measured in lumens when evaluating aftermarket bulb options to ensure optimal nighttime visibility. Using dielectric grease on bulb bases can improve electrical contact and bulb performance.
Verify you’ve obtained replacement clips or rubber seals for potentially damaged components. Keep your reference guide accessible. Confirm your workspace provides adequate lighting and remains dry to prevent electrical hazards. Position your vehicle on level ground and engage the parking brake before opening the hood.

Lights Dim Over Time, Replace In Pairs: Your lights are a pair, one is never turned on without the other. If one bulb burns out, the other isn't far behind. Replace your H7 XtraVision Halogen bulbs in pairs for optimum performance.

[10X Brighter & High CRI Crystal Light] Featured with 24 high-power chips for stable luminous flux output, these FAHREN H7 Gauges Light Kit produce 10X brighter illumination than stock bulbs. Boasting a high-CRI 6500K cool white beam, it upgrades dim factory yellow lights to boost light penetration and road visibility, delivering even light distribution, clearly capturing road details.

【Experience a 1200% Brighter Night】 Transform your drive with our advanced H7 light bulbs. Each H7 light bulb combo, equipped with 12 high-performance chips, delivers a blinding 70,000 lumens per set. Powered by the latest upgraded Z10 technology, it provides unparalleled road illumination—turning night into day for a safer, more confident, and utterly superior driving journey.
Prepare Your Vehicle for Safe Access
To guarantee a safe and efficient headlight bulb replacement, position your Volkswagen Jetta on a level surface and engage the parking brake firmly. These vehicle stability measures prevent unwanted movement during the procedure. Turn off the engine completely and remove the ignition key to eliminate electrical hazards. Open the hood fully and secure it with the prop rod.
Allow engine components to cool down if you’ve recently driven the vehicle, as hot surfaces can cause burns. Wait at least 15-20 minutes before proceeding. For enhanced safety precautions, disconnect the negative battery terminal to prevent electrical shocks or short circuits. Before beginning your replacement, identify your vehicle’s lighting package type to ensure you order the correct bulb specification.
Establish adequate lighting in your workspace and wear protective gloves to avoid contaminating the new bulb with skin oils. Safety glasses protect against debris during component removal. After replacing the bulb, you may eventually need to restore clarity to your headlights by using wet sanding with progressively finer grit sandpapers if oxidation occurs over time.
Locate and Access the Headlight Assembly
The headlight assembly sits at each front corner of your Volkswagen Jetta, directly behind the exterior lens housing visible from outside the vehicle. Open the hood and locate the rear of the headlight assembly in the engine bay. Note the positioning orientation of plastic bulb covers before proceeding—they’re typically marked and keyed for rotation removal.
Turn the steering wheel away from your working side to improve access. You may need to remove or loosen front grille clips or bumper corner fasteners for adequate clearance. Use a flashlight to identify electrical connectors and fasteners, which typically include T25 or T30 Torx screws accessible from the engine bay. Before beginning work, identify the correct bulb type for your Jetta model, whether halogen, HID, or LED, to ensure compatibility with your vehicle. Disconnect electrical connectors by pressing release tabs carefully. Wear gloves when handling the bulb to protect against oils from your skin that can reduce halogen bulb lifespan. The headlight assembly’s spatial constraints require methodical attention to avoid damaging wiring or fragile clips during access.
When removing the bulb cover, turn it about 1/8 of a turn to disengage it from the assembly housing.

800% Brighter Night Vision Powered by advanced chip technology, Marsauto H7 bulbs deliver 8x the brightness of standard halogen bulbs, producing crisp 6500K white light for enhanced visibility and faster reaction time—whether driving at night or in low-light conditions.

WinPower H7 halogen bulb produces a color temperature of 4300K, up to 110% brighter and 30% longer light distance than other halogen. So you can be confident of getting a bright white light for excellent visibility.
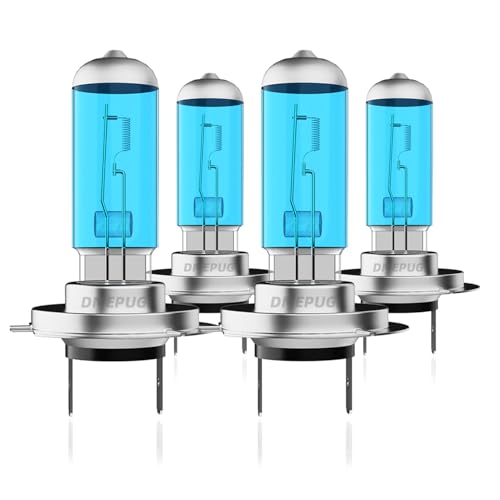
🚗【Compatible with Volkswagen Jetta 2007-2019,Sonata 2011-2014 Halogen Headlight Bulbs】Before making your purchase, it's crucial to ensure that these Halogen headlight bulbs and fog lights are compatible with your Volkswagen Jetta 2007 2008 2010 2011 2012 2013 2014 2015 2016 2017 2018 2019. The Halogen headlight bulb and fog lights bulbs combo includes H7+H7 high beam and low beam bulbs,totaling 4 in the package.
Remove the Burnt-Out Bulb
Grasp the plastic or rubber dust cover at the rear of the headlight assembly and rotate it counterclockwise until it releases, or pull it straight off if your Jetta model uses a friction-fit design. Set it aside for later reinstallation. Next, grip the electrical connector—not the bulb glass—and pull straight off the bulb base. Release any metal clips or tabs securing the bulb before removal. Hold the bulb by its plastic base only, avoiding bare-hand contact with the glass surface to prevent oil contamination. Pull the bulb straight out, twisting counterclockwise if required. Check for retaining rings that need disengagement first. Note the bulb types and orientation for correct replacement. Set aside burnt-out bulbs for proper bulb disposal following local regulations.

Get the best lighting performance and an increased visibility and comfort on the road compared to basic bulbs
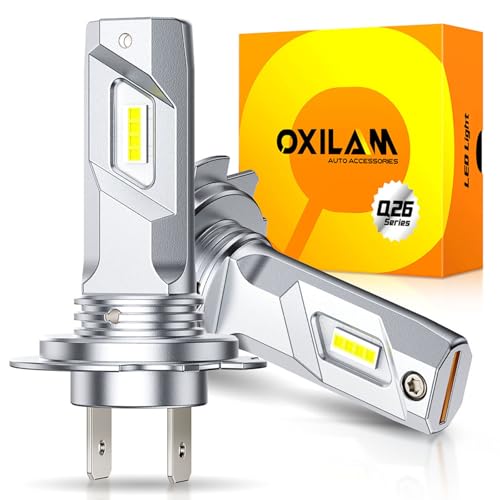
3-Minute Instant Upgrade: OXILAM Q26 H7 LED bulbs feature a 1:1 halogen-sized body, eliminating the need for adapters or polarity adjustments. Install them in just 3 minutes—no modifications, no tools, no hassle!

Experience 8X Enhanced Brightness: Equipped with advanced chip technology, Marsauto H7 bulbs deliver 800% greater brightness than standard bulbs, projecting crisp 6500K white light for farther visibility and quicker reaction times, day or night.
Install the Replacement Bulb
Handle your new replacement bulb carefully to avoid skin oils contacting the glass surface, as contamination causes premature failure and hot spots during operation. Verify the replacement bulb types match your Jetta’s specifications (typically 9007 for certain models). Following proper bulb orientation tips, align the tabs or flat edges with corresponding socket slots. Push firmly until you hear a click, then twist clockwise if required to lock. Reattach the electrical connector until the locking tab snaps securely. Replace the dust cover by twisting clockwise until sealed, preventing moisture ingress. Reinstall any removed housing panels and tighten fasteners appropriately. Test headlight operation before closing the hood. Confirm proper beam pattern and check for dashboard warning lights. After installation, ensure proper headlight alignment to verify correct beam positioning and optimal visibility. Dispose of old bulbs per local regulations.

Lights Dim Over Time, Replace In Pairs: Your lights are a pair, one is never turned on without the other. If one bulb burns out, the other isn't far behind. Replace your 9007 XtraVision Halogen bulbs in pairs for optimum performance.
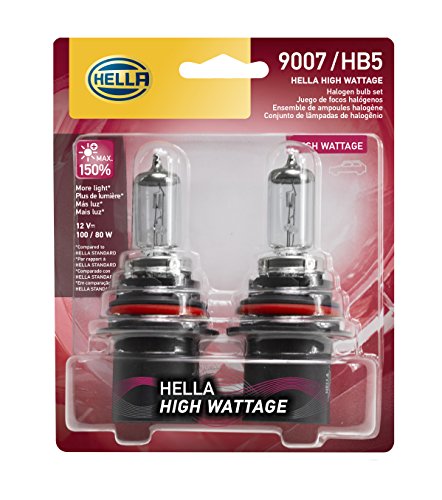
High Wattage bulbs provide a longer service life compared to standard HELLA bulbs. These bulbs are Off-road use only.

Choose the Right Bulb for Your Jetta
Selecting your replacement bulb requires matching the exact OEM specifications for your Jetta’s model year, trim level, and factory lighting configuration. Consult a bulb compatibility guide to identify correct types: H7 and 9006/HB4 for 2005-2011 models, or D2S/D2R HID bulbs for projector-equipped variants. Early models typically use halogen technology, while 2015-2018 Jettas may feature HID or LED assemblies requiring specialized replacements.
When evaluating lighting upgrade options, LED replacements like SL2 or SL2 Pro models offer 1400-1800 lumens output at 14-15 watts consumption with 6000K color temperature. Verify electrical compatibility and beam pattern alignment to prevent glare hazards. Always replace bulbs in pairs from reputable brands—Sylvania, Hella, or ACDelco—ensuring uniform illumination and maintaining road safety standards. These LED upgrades feature a fully integrated, compact design that eliminates the need for external drivers during installation. Consider comparing lifespan and durability across different brands to determine the best value for your needs.
Understanding color temperature for optimal illumination helps you select bulbs that provide the best visibility without creating unsafe glare conditions for oncoming traffic.

Experience a Blazing 15X Brightness Boost: Enhance your driving journey with our high-power H7 exterior fog light bulbs, boasting 24 advanced chips per light and an astounding 126,000LM brightness per set. Powered by cutting-edge technology, these lights deliver dependable and efficient illumination, ensuring an optimal nighttime off road driving experience

Worry-Free Fanless Cooling: Fanless H7 LED design means no fan failure—stable light output, safer long-term use

Ultimate Night Vision: Sealight H7 led bulb features 16 high-performance CSP chips for 64000LM output, 900% brighter than original bulbs. Its 6500K cool white light offers strong penetration, wide beam range and long casting distance. It sharpens road details, boosts visibility at night, in rain and fog, lessens blind spots, aids early hazard judgment, and ensures clearer vision for safer driving.
Test Your New Headlight
Before reconnecting your new headlight bulb to the vehicle’s electrical system, verify its functionality through systematic testing procedures to prevent installation complications and guarantee peak performance. Set your multimeter to continuity mode and touch probes to the bulb’s terminals. A beep or low resistance reading confirms intact filaments. For voltage measurement, reconnect the bulb to the wiring harness and switch your multimeter to volts mode. Turn on the headlights and place probes on the bulb contacts—you’ll need approximately 12 volts for proper operation. Lower readings indicate wiring issues requiring immediate attention. Complete bulb testing by activating both low and high beams to verify full functionality. If the bulb tests correctly but doesn’t illuminate, inspect fuses, relays, and switch components before final installation. Visual inspection for broken filaments or burn marks can help confirm the bulb is functioning properly before final installation. To maintain long-term headlight performance and clarity, consider applying a UV protectant after installation to prevent future fogging and oxidation. Consult your vehicle manual for specific bulb access instructions if you encounter any difficulties during the testing process.
Maintain Your Headlights for Long-Term Performance
Once you’ve successfully replaced your Volkswagen Jetta’s headlight bulb, implementing systematic maintenance procedures will maximize component longevency and guarantee consistent illumination performance. Clean lenses monthly using mild soap and water to prevent oxidation buildup. If fogging occurs, apply headlight restoration compounds followed by UV-protectant coatings to delay yellowing. Chemical Guys offers specialized headlight restoration solutions that effectively remove oxidation and restore clarity to cloudy lenses. Inspect housing seals quarterly to prevent moisture ingress that causes electrical shorts and condensation. Check electrical connections, fuses, and wiring harnesses for corrosion during routine inspections. Replace bulbs in pairs using gloves to avoid skin oil contamination—a critical bulb longevity tip that prevents premature failure. Verify proper headlight alignment after any maintenance work. Proper beam pattern quality ensures optimal visibility and compliance with road safety regulations. Schedule professional inspections before seasonal changes, and address dimming or flickering immediately to maintain ideal visibility and regulatory compliance. Regular maintenance checks can identify potential headlight problems before they compromise your safety on the road.


