To adjust your truck’s headlights, park on a level surface 25 feet from a wall and mark reference points for each headlight’s center. Locate the vertical and horizontal adjustment screws on your headlight assemblies—typically accessible with a screwdriver or Torx socket. Turn the vertical adjuster until the brightest beam portion sits 2-4 inches below the horizontal centerline, then adjust the horizontal screws to center each beam on its vertical reference mark. These fundamental steps establish proper aim, though various truck configurations and maintenance factors require additional considerations for peak performance.
Preparing Your Truck for Headlight Adjustment
Before adjusting your truck’s headlights, you must verify the vehicle’s condition to confirm accurate alignment results. Conduct a thorough vehicle inspection by examining headlights for damage, checking all fluid levels, and confirming tire pressures match manufacturer specifications. Remove unnecessary cargo to simulate normal operating weight, or maintain typical loads for load simulation if you consistently drive with heavy equipment. Position your truck on a flat, level surface facing a wall with at least 25 feet of clear space. Bounce the suspension to settle it at normal ride height. Ascertain spare tire, jack, and tools are properly stored to prevent weight distribution shifts. Place a weight equivalent to 121 lbs on the driver’s seat to stabilize the vehicle suspension during measurements. Modern truck headlights may use projector housings with halogen, HID, or LED bulbs to provide better illumination and lower glare than traditional reflector designs. Gather essential tools: tape measure, masking tape, screwdriver or ratchet set, and your owner’s manual for model-specific adjustment procedures.
Marking Reference Points on the Wall
With your truck properly positioned and prepared, you’ll now create the reference grid that enables precise headlight alignment. Begin by marking your vehicle’s centerline (YC) on the wall using masking tape aligned with the front emblem. Locate each headlight’s center point—often indicated by tiny markings on the lens—and mark these positions as YL (left) and YR (right), ensuring equal distances from centerline.
Measure the height from ground to each headlight center and transfer this measurement to the wall at ideal height. Connect these points horizontally to establish your X-axis reference. Extend vertical lines through each headlight center to form Y-axis references. These marking techniques create a crosshair grid essential for proper beam positioning, with the brightest beam portion falling 2-4 inches below horizontal centerline to prevent blinding oncoming traffic.
Adjusting Headlight Vertical Aim
Once you’ve established your reference grid, turn your attention to the vertical adjustment screws located on each headlight assembly. These screws, accessible from behind the headlamp housing, control beam height using a screwdriver or E6 Torx socket. Turn the adjustment mechanism slowly while observing the alignment point—the brightest beam area or cutoff line—on the wall. For projection beam headlamps, this cutoff line marks the changeover between illuminated and shadowed areas. Follow proper aiming procedures by raising or lowering the beam until the alignment point coincides precisely with your horizontal X-axis reference line. Repeat independently for each headlight, ensuring the brightest portion falls within 4 inches of the centerline at 25 feet. Make small adjustments and recheck the alignment against your tape markings to confirm accuracy. Identifying signs of misaligned headlights such as reduced visibility can help you determine if professional alignment is necessary or if your DIY adjustment has resolved the issue. Testing your alignment during a night drive helps verify even illumination without creating glare for other drivers. This prevents glare while maintaining adequate road illumination for safe nighttime driving.

1 unit of front headlight adjustment screw driver tool ONLY for 2018-2022 JL. If you've lifted your JL, your headlights are longer at factory height and may be a distraction...
Adjusting Headlight Horizontal Aim
After achieving proper vertical beam alignment, turn your attention to horizontal aim adjustment to complete the headlight alignment process. Locate the horizontal adjustment screws behind each headlight housing—you’ll likely need to remove weather stripping or bezels for access. Using appropriate tools like a screwdriver or socket set, slowly turn the horizontal adjuster while observing beam movement on the wall. The brightest portion of each beam should center on your marked vertical reference line, within 4 inches left or right. Make incremental adjustments to avoid overcorrection, ensuring both left and right beams align symmetrically. Proper horizontal adjustment maximizes beam visibility while preventing glare to oncoming traffic. Before adjusting the horizontal aim, you may need to disconnect the electrical connector by depressing the safety catch to access the adjustment mechanism more easily. For aftermarket headlights, note that adjusters face front rather than toward the rear like factory lights. A properly aligned clear cutoff line on the low beam ensures optimal road illumination without blinding other drivers. Double-check both headlights maintain consistent positioning relative to your reference marks before reassembling any removed components.

Brand New Headlight Horizontal Adjustment Screw Length: 4.09 Inch; Thread Diameter: 0.21 Inch; Thread Type: Fine Match Vehicle To Compatibility Chart To Ensure Exact Fitment...
Special Adjustments for Different Truck Types
Different truck configurations demand specialized headlight adjustment techniques beyond standard passenger vehicle procedures. If you’ve installed lift kits or larger tires, you’ll need aggressive downward beam adjustment to compensate for elevated mounting points. Heavy duty adjustments become critical when operating 2500 or 3500 models, which feature dual vertical adjustment screws for precise tuning under variable load conditions. When towing or hauling, verify beam alignment after each loading session, as rear weight raises your front end and headlight pitch. Commercial trucks require customized aiming protocols due to higher cab positions and multiple headlamp configurations. LED and HID systems demand more precise adjustment than halogen lights because of their focused beam patterns, and upgrading to LED headlight assemblies can significantly enhance your truck’s nighttime performance. Before making adjustments, consider cleaning any yellow oxidation from your lenses to ensure optimal light output. Properly aimed headlights enhance visibility at night, allowing you to see road hazards and obstacles more clearly. Always recheck alignment after suspension modifications or significant load changes to maintain safety compliance.

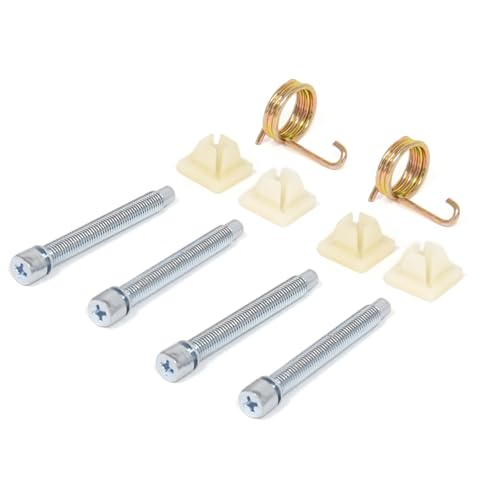
RLB-HILON Headlight Adjuster Kits including 8pcs Screws and 8pcs nuts and 4pcs Springs

RLB-HILON Headlamp Adjuster Kits including 4pcs screws and 4pcs nuts and 2pcs springs

Replacement for Chevrolet C10 Pickup Truck 1962-1968 - See below Description for Specific Fitments
Testing Your Headlight Alignment on the Road
After completing static adjustments for your truck’s specific configuration, you must verify headlight performance under actual driving conditions. Conduct night testing on a level, straight road section to evaluate beam patterns accurately. Observe that the most intense portion of each beam falls at or slightly below your horizontal reference line, preventing glare for oncoming traffic. For projector and LED headlights, confirm sharp cut-offs with clearly defined upper boundaries. The horizontal intensity peak should align slightly right of the vertical centerline for right-hand traffic. Drive at varying speeds over different road contours to assess beam consistency. Most vehicles have headlight controls located on the dashboard or steering column that allow for manual adjustment of beam intensity. Make fine adjustments using your truck’s vertical and horizontal adjustment screws, then re-verify alignment to guarantee ideal roadway illumination and compliance with safety standards. To maintain long-term headlight clarity and performance, consider applying UV-protective sealant to prevent oxidation and yellowing that can reduce beam effectiveness. Keep your owner’s manual handy during road testing to reference manufacturer-specific headlight specifications and adjustment recommendations.

RLB-HILON Headlamp Adjuster Kits including 4pcs screws and 4pcs nuts and 2pcs springs
Replacement for Chevrolet C10 Pickup Truck 1969-1972 - See below Description for Specific Fitments

HEAD LIGHT ADJUSTER KIT
Maintaining Proper Headlight Aim Over Time
Even when properly adjusted, truck headlights won’t maintain their ideal aim indefinitely due to normal vehicle operation and environmental factors. You’ll need to schedule headlight inspections at least biannually and following any suspension work, tire replacement, or vehicle modifications. Changes in tire pressure, cargo load, and suspension wear gradually alter beam orientation, requiring periodic verification.
Maintain consistent tire inflation and typical load conditions to preserve alignment. Road impacts, frequent off-road use, and seasonal temperature variations accelerate misalignment. Before critical driving seasons, verify aim using alignment tools against a flat vertical surface at 25 feet. Mark reference lines and document measurements for trend analysis.
Inspect headlight mounting security and suspension components regularly. Address any wear immediately, as damaged components compromise beam stability and violate safety compliance standards. When selecting replacement bulbs, consider brightness levels and color temperature to ensure optimal nighttime visibility. Misaligned headlights can reduce light distance by 85 feet, significantly compromising nighttime visibility and road safety.

Compatible with 1969-1973 Blazer, Compatible with 1970-1973 Camaro, Compatible with 1969-1973 Jimmy, Compatible with 1962-1968 C10 C20 C30 K10 K20 K30, Compatible with 1969-1973 C15 C25 C35 C1500 C2500 C3500 K15 K25 K35 K1500 K2500 K3500, Compatible with 1969-1973 C10 C20 C30 K10 K20 K30

Fitment: Please check Amazon Fitment Filter and Description to see if this item will work on your vehicle before purchase!