To clean plastic headlights, you’ll first mask surrounding areas and degrease the lenses with plastic-safe cleaner. For heavy oxidation, wet-sand using 400-600 grit sandpaper in cross-hatch motions with constant lubrication, progressing to finer grits. Follow with machine polishing using compound at increasing RPMs for optical clarity. For light haze, non-gel whitening toothpaste works effectively. Seal your restoration with UV-resistant automotive-grade 2K polyurethane clear coat applied in thin layers. The complete process addresses both surface contamination and deeper oxidation issues.
Preparatory Steps Before Restoration
Before attempting any restoration work, you’ll need to verify the headlight surface is completely free of contaminants that could interfere with subsequent sanding and polishing steps. Apply a plastic-safe degreaser or dedicated headlight cleaner using a soft detailing brush or microfiber cloth to remove dirt, grease, and oxidation residues. Rince thoroughly and dry completely before proceeding.
Conduct a thorough headlight inspection to assess oxidation severity, cloudiness, and potential cracks or deep pitting. This evaluation determines whether polishing alone suffices or wet sanding becomes necessary. Document the condition for progress tracking. For those seeking an inexpensive alternative, toothpaste’s mild abrasiveness can effectively remove grime and oxidation when scrubbed in circular motions.
Gather your preparation materials: painter’s tape, sanding discs, polishing compounds, conditioned pads, spray bottles, and microfiber towels. Mask surrounding paint, trim, and rubber seals firmly to prevent accidental damage. Confirm all sensitive areas are adequately protected before initiating restoration procedures. Fill a spray bottle with water, optionally adding a few drops of soap for improved lubrication during the sanding process.

Crystal Clear Restoration: Effectively removes yellowing, cloudiness, and oxidation from headlights, restoring them to a clear, bright finish.
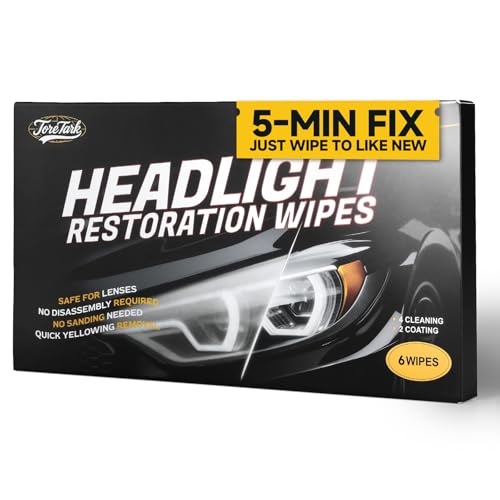
Please watch the operation video carefully before use

HEADLIGHT CLEANING KIT TO RESTORE CLARITY: Introducing a car detailing kit featuring high-quality car care products that quickly and easily restore headlights; the simple two-step process removes oxidization and yellowing for long-lasting clarity
Wet Sanding Process for Removing Oxidation
Once your headlight surface is clean and protected, wet sanding becomes the most effective method for physically removing the oxidized clear coat layer that causes cloudiness and yellowing. Proper grit selection is critical—start with 400-600 grit for heavily oxidized OEM-coated lenses, or 800-1000 grit for moderate oxidation. Progress through 1200, 1500, and up to 2000-2500 grit to eliminate scratches from coarser abrasives.
Maintain constant lubrication using water or clay lubricant to prevent paper clogging and heat buildup. Apply firm, consistent pressure using cross-hatch motions with adhesive-backed sanding sheets on a sanding block. The slurry will appear yellowish initially, then white as oxidation removes completely. Rinse frequently to prevent accumulation. Sand evenly across the entire lens to avoid thin spots or distortion. Since UV rays degrade the protective layer on headlights, thorough sanding is essential to remove all compromised material before proceeding to the polishing stage. Professional-quality headlight restoration products can also be used in conjunction with wet sanding to enhance clarity and provide lasting protection. After sanding is complete, polishing with a compound will remove any remaining haze and restore the headlight’s clarity.

KIT INCLUDES: 1 - Disc Pad Holder, 3.25 in (8,2 cm) 6 - 3M Gold Sanding Discs 500 Grit, 3 in (7,6 cm) each 4 - 3M White Finishing Discs 800 Grit, 3 in (7,6 cm) each 1 - 3M Trizact Refining Disc 3000 Grit, 3 in (7,6 cm) 2 - 3M Quick Headlight Clear Co

Full-Cycle Sanding Support - The car drill polishing kit featuring 3 inch sanding discs range 60/80/120/240/400/800/1000/1500/2000/3000/5000/10000 grit sandpaper for dry and wet use, with orbital sander pads, imitation wool buffing pad, and upgraded backing pads for 1/4 and 1/8 inch shank. Seamlessly transition from sanding to polishing.

Comprehensive 130-Piece Kit: Contains A Variety Of Tools Including 3-Inch Wet Dry Sanding Discs (800, 1000, 1500, 2000, 3000, 5000 Grit, 20 pcs Each), Foam Pads*2, Disc Pad Holder*1, 2pcs Connecting Rods (1/4'' Shank, Cylindrical And Hexagonal), 3.3''Face Buffing Polishing Pads(Yellow*1and Red*1), Fiber Cloth*1, Manual Sanding Block*1, Masking Tape*1
Polishing Techniques to Restore Clarity
After wet sanding removes oxidation and levels the headlight surface, polishing becomes essential to eliminate the fine scratches left by even 2000-2500 grit sandpaper and restore optical clarity. Machine polishing with a dual-action or rotary polisher delivers controlled abrasion using foam pads and plastic-specific polishing compounds like Meguiar’s PlastX. Start at low speed to spread compound, then increase RPMs while maintaining light, consistent pressure to prevent heat buildup. Multiple stages with progressively finer abrasive techniques refine the finish from heavy correction to final gloss. Hand polishing works effectively for minor oxidation or as a finishing step, applying compound with microfiber cloths in circular motions. Use crosshatch motions during machine polishing to ensure even coverage and prevent scorching of the plastic surface. After polishing, apply UV-protective clear coat to prevent re-oxidation and extend headlight clarity.

SEE CLEARLY: Renew your plastic without replacement with Meguiar's PlastX Plastic Cleaner. This clear plastic scratch remover quickly improves long-term wear and tear on a variety of uncoated plastics, leaving behind water-resistant polymers

Cleans, Clarifies & Restores Plastics: Ultra-fine polishing action removes oxidation and haze to restore clear, like-new plastic surfaces

Application - Helps restore clarity to uncoated clear plastics with light oxidation, cloudiness, yellowing, stains, or fine surface scratches.
Alternative Household Cleaning Methods
While professional-grade compounds and power tools deliver superior results, several household products offer accessible alternatives for headlight restoration without specialized equipment. Baking soda serves as a mild abrasive when mixed with water to form a thick paste. Apply this mixture using circular or cross-hatch patterns with a microfiber cloth, then rinse thoroughly. For enhanced chemical action, combine baking soda with white vinegar or hydrogen peroxide—the resulting bubbling reaction breaks down oxidation layers effectively. To achieve optimal results, use progressively finer grit materials as you work through multiple cleaning stages.
Non-gel whitening toothpaste alternatives provide another viable option, containing sufficient abrasives to remove light haze. Apply generously to dampened cloth and scrub for 5–10 minutes before rinsing. After rinsing off the toothpaste, apply wax to the headlight surface for added protection against future haziness. For best preparation before starting any cleaning process, protect the surrounding paint with masking tape to avoid accidental damage. WD-40 offers quick decontamination by breaking down surface grime, though it won’t address deeper oxidation. Always protect surrounding paint with masking tape during application.

A HOUSEHOLD CLASSIC: This bulk 7 lb resealable bag of ARM & HAMMER Baking Soda unlocks 100+ uses across your home—from kitchens and laundry rooms to crafting tables and beyond

100% Sodium Bicarbonate / It's just pure sodium bicarbonate with no additives and no fillers. Combine with citric acid to make your own fizzy bath bombs.

Pure Original Ingredients Baking Soda is the perfect kitchen staple
Protecting Your Headlights With Clear Coat
Following successful restoration of your headlights, applying a protective clear coat becomes essential to maintain optical clarity and prevent rapid re-oxidation. Clear coat advantages include UV-resistant formulations that prevent yellowing, scratch resistance from road debris, and enhanced aesthetic appeal through glossy finishes. Select automotive-grade 2K polyurethane or ceramic-infused clear coats for ideal durability.
Prepare surfaces through progressive wet-sanding (1000-3000 grit), then apply multiple thin layers with adequate flash time between coats. However, clear coat limitations include thermal expansion cracking, relatively short protection duration (6-12 months), and minimal thickness (~2 mils) compared to protective films. For extended protection, consider thermoplastic polyurethane (TPU) films offering self-healing properties, hydrophobic surfaces, and longevity exceeding 10 years without degradation. Premium TPU films with optimal thickness between 6.5-8.5 mil provide superior impact resistance while maintaining exceptional optical clarity for long-term headlight performance.

Dupli-Color Perfect Match Premium Automotive Clear Coat is an easy-to-use, high-quality, fast-drying, acrylic lacquer aerosol paint

PREMIUM CLEAR FINISH: Professional-grade polyurethane automotive spray paint designed for automotive refinishing and new paint jobs — delivers long-lasting protection and deep gloss for cars, motorcycles, and custom projects.

TRUE 2K TECHNOLOGY: Professional-grade polyurethane clear coat delivers superior durability and chemical resistance for automotive finishes with authentic two-component formulation