Turn on your headlights from 30 minutes after sunset to 30 minutes before sunrise, and whenever visibility drops below 500 feet due to rain, fog, or snow. Use low beams as your primary nighttime tool—they illuminate about 200 feet ahead without blinding others. Switch to high beams on dark, unlit roads, but dim them within 500 feet of oncoming vehicles and 300 feet when following another car. Never use high beams in fog or adverse weather, as they’ll create dangerous glare. Understanding proper headlight maintenance and legal requirements guarantees you’ll stay safe and compliant.
When to Turn on Your Headlights
When driving at night, you must turn on your headlights from 30 minutes after sunset to 30 minutes before sunrise—this is the law in most states. You’ll also need them whenever visibility drops below 500 to 1,000 feet, depending on your jurisdiction.
Turn on your headlights during adverse weather conditions like rain, snow, sleet, or fog. If you’re using your windshield wipers continuously, your headlights must be on—this rule applies in about 20 states. Don’t rely on parking lights alone; that’s illegal.
Watch for reduced visibility during dawn and dusk, even when it’s not completely dark. You should also use headlights in construction zones and on certain mountain roads where signs indicate mandatory daytime use for enhanced safety. Over time, plastic headlights can become yellowed and hazy, which reduces light output and safety. Daytime running lights can reduce collision risk by 5-10% during daylight conditions. Unlike traditional headlights, low-intensity forward-facing lights activate automatically when your engine is running to increase your vehicle’s conspicuity to other road users.
Mastering Low Beam Headlights
Your low beam headlights serve as your primary nighttime driving tool, illuminating approximately 200 feet of road ahead while directing light downward to protect other drivers from blinding glare. Activate them by turning your headlight dial to the headlight symbol. You’ll experience low beam benefits during fog, rain, or snow since the downward angle prevents light reflection off moisture. Modern low beam technology creates a focused pattern with a horizontal cut-off that eliminates scattered light.
Switch from high beams when you’re within 500 feet of oncoming vehicles or 200-300 feet behind another car. Use low beams exclusively in populated areas and adverse weather conditions. The headlight control is typically located on the left side of the steering wheel, making it easily accessible while driving. Many states require daytime low beam use for motorcycles, enhancing visibility to other drivers and reducing accident risk through improved road awareness. Adaptive headlights can further enhance safety by automatically adjusting beam direction based on your vehicle’s steering input. Consider upgrading to an automatic headlight switch for improved safety through timely headlight activation in changing light conditions.
Effective High Beam Usage
High beams deliver 8,000 to 12,000 lumens of light, illuminating 350-500 feet of road ahead—nearly double the range of low beams. Use them exclusively on dark, unlit roads with minimal traffic to detect hazards early. Practice proper high beam etiquette by dimming within 500 feet of oncoming vehicles and 300 feet when following another car to prevent blinding other drivers.
For rural driving, activate high beams to spot pedestrians, animals, and obstacles beyond low beam range. Switch to low beams in urban areas where street lighting provides adequate visibility. Consider upgrading to LED or HID headlight options for improved nighttime visibility and longer-lasting performance. Never use high beams in fog, rain, or snow—they’ll create dangerous glare that reduces everyone’s visibility. Low beams are recommended for reduced visibility conditions, as high beams reflect off moisture particles and impair vision.
Maintain proper headlight aiming and never rely on high beams to compensate for defective low beams. This guarantees both safety and legal compliance. For optimal nighttime driving, ensure your headlights are properly aligned using adjustable screws on the headlight housing to guarantee the brightest part of the beam sits at the correct angle.

Easy Installation: 1:1 design, no external driver or connector required, plug and play

【Perfect Beam Focus】FORENNER H1 Light Bulbs or Headlight Covers feature an ultra-thin 0.03-inch chip pitch, significantly enhancing beam focusing performance. They project a concentrated, precise beam that forms a super-focused light pattern with no dark zones or shadows, effectively eliminating glare for oncoming vehicles. This ensures a wider and longer nighttime field of vision, enhancing driving safety.

Better Driving Experience: ZonCar 9005 HB3 H11 H9 H8 powersports light bulbs combo are 7 times brighter than halogen bulbs, providing farther vision
Dimming for Oncoming and Nearby Traffic
Proper dimming etiquette protects everyone on the road from dangerous glare. Switch to low beams when you’re within 500 feet of oncoming vehicles—most states require this distance to prevent temporary blindness. When following another car, dim your headlights at 200 to 300 feet to avoid blinding the driver ahead through their mirrors.
Never use high beams in fog, rain, or snow. The light reflects back, reducing your visibility considerably. In well-lit urban areas, keep your low beams on unless you need extra visibility. Understanding color temperature and brightness helps drivers select appropriate lighting for different driving conditions. Modern vehicles with adaptive driving beams technology can automatically adjust beam intensity to prevent glare for oncoming drivers.
If you’re facing glare from another driver’s headlights, don’t flash your high beams in retaliation. Instead, look toward the right edge of the road and reduce your speed until they pass. Some states like Georgia permit high beams only in rural areas, prohibiting their use on lighted roads. This headlight etiquette promotes glare reduction and safer travels for everyone.
Checking and Adjusting Headlight Alignment
Even perfectly functional headlights won’t keep you safe if they’re pointing in the wrong direction. To check your headlight aim, park your unloaded vehicle on level ground 25 feet from a flat wall. Confirm tires are properly inflated and your fuel tank is at normal level. Turn on your low beams and mark each headlight’s center height on the wall with tape. Draw vertical and horizontal reference lines to create your target.
The top of your beam pattern’s cutoff should sit approximately 2 inches below the horizontal line to prevent blinding oncoming drivers. Misalignment can result in losing up to 85 ft of forward visibility, significantly reducing your ability to spot hazards in time. For more advanced alignment needs, laser alignment systems offer greater precision than manual adjustment methods. Locate the adjustment screws under your hood and turn them to raise, lower, or shift the beams. Cover one headlight while adjusting the other for accuracy. After making adjustments, test the alignment during a night drive to confirm even illumination without creating glare for other drivers. Always consult your manufacturer’s specifications for precise measurements.

KIT CONTENTS: Each headlight restoration kit includes (8) Step 1 Oxidation Removing Wipes, (1) Step 2 Sanding Kit, and (2) Step 3 Ceramic Coating Wipes

KIT INCLUDES: 1 - 3M Trizact Refining Disc 1000 grit, 3 in/7.6 cm 1 - 3M Trizact Refining Disc 3000 grit, 3 in/7.6 cm 2 - 3M Quick Headlight Clear Coat Wipes 1 - Foam Pad with 3M Hookit Attachment, 3 in/7.6 cm 1- Disposable Glove

Instructions for Use: The first yellow drill attachment installed on the drill, cushion pad white surface and drill attachment black surface paste, use the first in the lamps on the spray water and then use the cleaning pad to dry in a circle, and then according to the grain size from small to large in order to use the waterproof abrasive disc on the lamps for polishing, and finally use the sponge polishing pad for polishing
Replacing and Maintaining Headlight Bulbs
When your headlights begin to dim or fail completely, you’ll need to replace the bulbs quickly to maintain safe nighttime driving conditions. Start by turning off your vehicle and disconnecting the battery to prevent electrical hazards. Always wear safety gloves and avoid touching halogen bulbs with bare hands, as oils can reduce their lifespan.
Locate the headlight housing through your engine bay or wheel well. Release the electrical connector and twist the bulb counterclockwise to remove it. Identify the correct bulb types using your vehicle’s manual or online finders, noting that high and low beams often differ. For some vehicles like the Chevy Silverado, you may need to remove trim panels or partially disassemble components to access the headlight assembly. Before installation, clean the headlight housing to ensure optimal performance and prevent contamination or corrosion. Consider the color temperature and brightness of replacement bulbs to match your vehicle’s specifications and driving preferences.
Follow these installation tips: replace bulbs in pairs for even brightness, align locking tabs properly, and twist clockwise until you hear a click. Test both beams before reassembling components.

Lights Dim Over Time, Replace In Pairs: Your lights are a pair, one is never turned on without the other. If one bulb burns out, the other isn't far behind. Replace your 9003 XtraVision Halogen bulbs in pairs for optimum performance.

Lights Dim Over Time, Replace In Pairs: Your lights are a pair, one is never turned on without the other. If one bulb burns out, the other isn't far behind. Replace your 9006 XtraVision Halogen bulbs in pairs for optimum performance
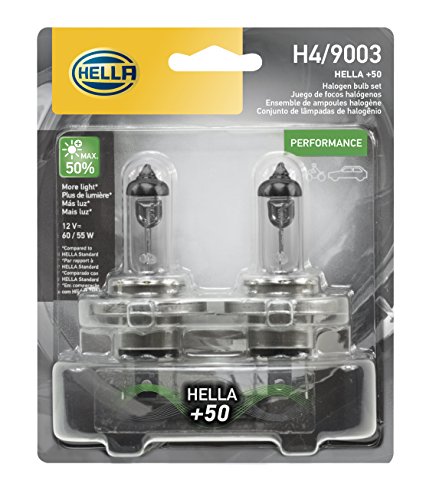
Up to 50% more light output than standard bulbs which provides you the best lighting performance, giving performance-oriented drivers additional safety time and comfort on the road.
Cleaning Cloudy or Oxidized Headlight Lenses
Beyond maintaining the bulbs themselves, you’ll need to address the headlight lenses, which gradually become cloudy and yellowed from UV exposure and oxidation. Start by trying DIY methods like toothpaste or baking soda with vinegar—both work as mild abrasives to remove surface oxidation without scratching. To protect surrounding surfaces during this process, apply masking tape around the headlight area before beginning treatment. For deeper restoration, wet-sand the lenses beginning with 1000-grit sandpaper, progressing to finer grits. Apply polishing compound with a drill pad at low speed, increasing gradually until the haze disappears. Wipe with isopropyl alcohol to remove residue. Finally, apply protective coatings like urethane clear coat or automotive sealant to shield against UV damage. Don’t touch the lenses for several hours while the coating cures. These protective coatings prevent rapid re-oxidation, extending your restoration results. For optimal curing of the clear coat, place the car in direct sunlight for approximately three days while keeping it dry. Regular maintenance tips like periodic washing and parking in shade will help prolong the clarity of your restored headlights.

Easy Headlight Restoration Kit: The Sylvania Headlight Restoration Kit is easy to use and includes everything needed to repair two headlight lenses and restore light output with no tools needed

RESTORES FOGGY HEADLIGHTS: Quickly restore and eliminate oxidized and yellowed lenses for a crystal clear, like-new appearance

KIT INCLUDES: 1 - Disc Pad Holder, 3.25 in (8,2 cm) 6 - 3M Gold Sanding Discs 500 Grit, 3 in (7,6 cm) each 4 - 3M White Finishing Discs 800 Grit, 3 in (7,6 cm) each 1 - 3M Trizact Refining Disc 3000 Grit, 3 in (7,6 cm) 2 - 3M Quick Headlight Clear Co
Understanding Adaptive Headlight Technology
As you explore modern vehicle safety features, adaptive headlights represent a considerable advancement over traditional fixed-beam systems. These intelligent headlamps automatically adjust their direction and intensity based on your driving conditions. When you turn the steering wheel, sensor technology detects the angle and speed, pivoting the headlight beams up to 15 degrees to illuminate curves ahead. The system uses steering angle sensors, speed sensors, and ambient light detectors to process real-time data through a headlight control module. Actuators then mechanically adjust the beam direction both horizontally and vertically, compensating for terrain changes and vehicle load. Advanced adaptive headlight features include automatic high-beam switching and selective dimming to prevent blinding oncoming drivers, with many modern systems incorporating LED headlight technology for superior brightness and efficiency. For optimal performance, it’s important to maintain your headlight bulbs properly by replacing bulbs in pairs to ensure consistent brightness across both sides of your vehicle. This technology considerably enhances your nighttime visibility while maintaining safety for other road users. The incorporation of adaptive headlights is associated with reduced road accidents, demonstrating their measurable impact on overall driving safety.
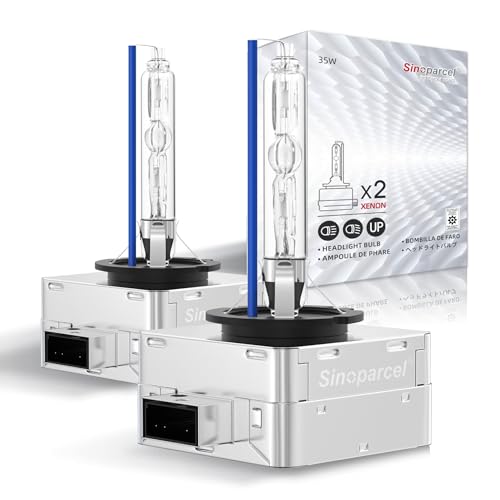
Life time support,2pcs packaged; Replacement part number: 66144 66140 85140 85415 (If there is any problem in the product, please contact us via Account Center,we will reply you within 24 hours)

Fit Ford F-150 F150 2004 2005 2006 2007 2008 2009 2010 2011 2012 2013 2014, 9008/H13 for both High Beam and Low Beam,

Lights Dim Over Time, Replace In Pairs: Your lights are a pair, one is never turned on without the other. If one bulb burns out, the other isn't far behind. Replace your 9007 XtraVision Halogen bulbs in pairs for optimum performance.
Legal Requirements and Safety Best Practices
While adaptive headlight technology enhances your nighttime driving experience, you must guarantee your vehicle’s lighting system complies with federal and state regulations. Your headlights should emit white or selective yellow light with color temperatures between 2500K and 6000K. Verify they’re DOT or SAE certified, meeting FMVSS 108 safety standards for brightness (500-3,000 candelas) and beam patterns.
For ideal safety, activate your headlights from dusk until dawn and during poor weather conditions. Regularly inspect them for proper alignment to prevent blinding oncoming drivers. Don’t use high beams in traffic or when approaching vehicles. Replace bulbs in pairs to maintain consistent illumination. Many aftermarket LED bulbs are not DOT-approved and thus illegal for on-road use. Improper installation of LED bulbs into halogen housings can cause dangerous glare that increases accident risks. Avoid installing off-color roof lights or under-glow that could be confused with emergency vehicle signals.