Park your F-150 on level ground 25 feet from a flat wall, then locate the adjustment screws—typically two per headlight accessible from the engine compartment on most models. Turn the vertical adjuster clockwise to lower or counterclockwise to raise the beam until the low-beam cutoff line sits 2 inches below your marked headlight centerline. Use the horizontal adjuster in quarter-turn increments to center the pattern. The sections below provide model-specific screw locations, proper measuring techniques, and solutions for stubborn alignment issues.
Gather Your Tools and Prepare Your F-150
Before adjusting your F-150’s headlights, you’ll need to gather specific tools and position your truck correctly. Your tool selection should include a Phillips screwdriver for adjustment screws, masking tape for wall marking, and a measuring tape for height measurements. Some models may require a ratchet or wrench. Additionally, bring a flashlight for nighttime visibility checks. Keep your owner’s manual nearby to reference the specific location of adjustment screws for your F-150 model year.
For ideal location stability, park your F-150 exactly 25 feet from a flat wall or garage door. Make sure you’re on level, stable ground—avoid slopes or uneven surfaces that’ll compromise accuracy. Face the wall directly, engage your parking brake, and verify tire pressure matches specifications. If you regularly tow, load your truck to normal operating weight before proceeding with adjustments. Before beginning, ensure proper alignment by checking that your headlight bulbs and wiring connections are secure and functioning correctly.
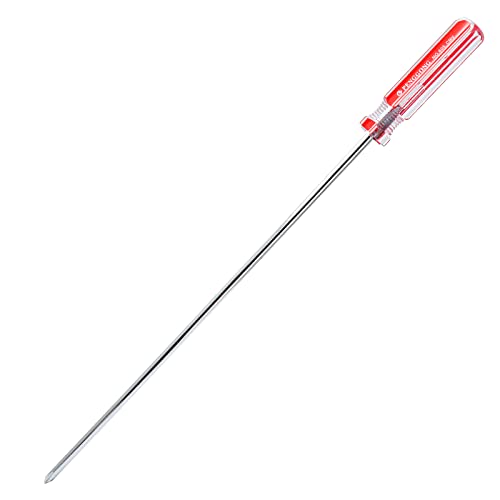
Package Content: 1 x Extra Long Phillips Screwdriver 10 Inch, which is the ideal size and length for the job. The longer length allows you to easily enter the place.
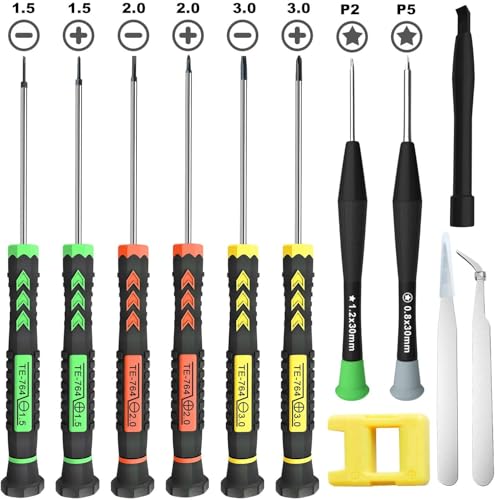
[Package Includes] – 1 x 3.0 Flathead Screwdriver, 1 x 2.0 Flathead Screwdriver, 1 x 1.5 Flathead Screwdriver, 1 x 3.0 Phillips Screwdriver, 1 x 2.0 Phillips Screwdriver, 1 x 1.5 Phillips Screwdriver, 1 x Pentalobe 2 Screwdriver, 1 x Pentalobe 5 Screwdriver, 1 x Helper Stick, 2 x Tweezers, 1 x Magnetizer & Demagnetizer Tool

STRENGTH AND DURABILITY: Made of heat-treated alloy steel
Find the Headlight Adjustment Screws on Your Model
Locating your F-150’s headlight adjustment screws requires understanding your specific model year, as Ford’s engineering teams have repositioned these components across different generations. For 1997-2004 models, you’ll find two screws per headlight on the assembly’s backside, accessible from the engine compartment. The 2015-2020 variants utilize a small hole positioned at the top of the headlight housing, requiring Phillips screwdriver insertion for vertical adjustment. Your 2018 F-150 features driver’s side access below the panel with a thin screwdriver, while 2024 XL models employ a 10mm bolt covered by a plastic half-dome with chimney vent top. Each screw location dictates your adjustment method—consult your owner’s manual for model-specific diagrams showing precise vertical and horizontal adjuster positions before beginning any modifications. The Lisle Tool 14540 provides easier access to these adjustment screws when working within tight engine compartment spaces.
Set Up Your Aiming Wall and Measurements
Once you’ve identified your adjustment screws, proper headlight aiming demands meticulous wall setup and measurement protocols. Position your F-150 on completely level ground, exactly 25 feet from your aiming wall—both surfaces must form a perfect plane to prevent pattern distortion. Measure from ground to headlight center (typically 39-40 inches on stock F-150s, 44.5 inches on lifted models). Transfer this measurement to the wall using masking tape, marking both vertical centerlines and horizontal reference strips. Your target beam position requires the sharp cutoff line 2 inches below the marked height to prevent oncoming traffic glare. This measurement accuracy directly determines alignment precision. Verify consistent distance throughout adjustment—even minor variations compromise beam pattern evaluation and road safety. To maintain optimal headlight performance, ensure bulb holder terminals are in good condition before beginning alignment work. Adjust one direction at a time, starting with horizontal alignment followed by vertical adjustments for optimal results. Begin this adjustment process when external lighting is low, ideally at dusk or after dark, to clearly observe the headlight beam patterns against the wall.

Compatible With: This H13 / 9008 headlight connector pigtail wire harness fits Ford F-150 / F150 models from 2004 to 2019, designed to restore proper headlamp connectivity and eliminate issues caused by worn or corroded connectors.

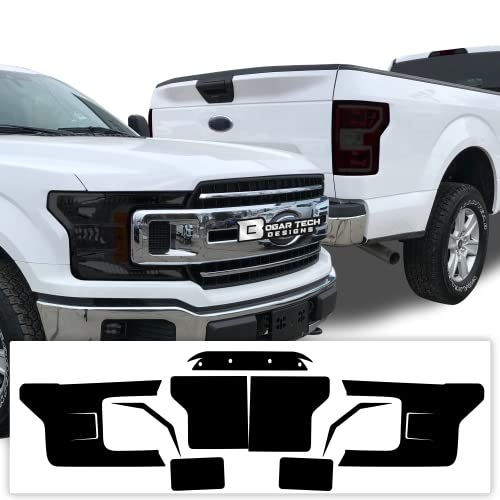
FITMENT: Compatible with Ford F-150 2021, 2022, 2023. Precut pieces sized for factory headlights.

FITMENT: Compatible with Ford F-150 2021, 2022, 2023. Precut pieces sized for factory headlights.
Adjust the Vertical Beam Height
With your aiming wall marked and vehicle positioned, locate the vertical adjuster on the rear or top of each headlamp housing through the engine bay. Most F-150s use a #2 Phillips screw, though some years feature a 10 mm bolt hidden beneath a plastic cover. Insert your screwdriver and turn slowly—clockwise typically lowers the beam pattern, counterclockwise raises it, but verify by watching the wall. Use small incremental clicks; expect 25–30 partial turns for significant movement after lift or leveling modifications. These adjustment techniques require patience—make symmetric changes on both sides to keep the cutoff line level. Aim the low-beam cutoff slightly below your headlight centerline marks to prevent oncoming glare while maintaining forward visibility. Signs of misaligned headlights include reduced visibility on dark roads and complaints from other drivers about excessive glare. Proper aiming adjustments ensure optimal performance whether you have factory OEM headlights or upgraded LED projector units installed on your F-150.

RLB-HILON Headlamp Adjuster Kits including 4pcs screws and 4pcs nuts and 2pcs springs

Package includes: 8 Long Screws 、8 Housing Nuts、4 Correct Springs

RLB-HILON Headlamp Adjuster Kits including 4pcs screws and 4pcs nuts and 2pcs springs
Fine-Tune the Horizontal Alignment
After completing vertical adjustment, you’ll refine the left-right beam positioning to center each headlamp pattern on your aiming wall. Locate the horizontal adjuster screw or bolt—typically a Phillips head, slotted screw, or 10 mm fastener accessible from the rear or top of the assembly. Some models require grille or trim removal for clear access. Turn the adjuster in quarter-turn increments, observing beam movement on your reference marks. These adjustment techniques demand patience: clockwise or counterclockwise rotation shifts the pattern left or right depending on orientation. Modern F-150 models may feature adaptive headlight systems that automatically adjust beam direction based on steering input, so verify your manual to understand whether your vehicle has these advanced lighting features. Verify movement slowly to prevent overshoot. Adjust both driver and passenger sides to achieve symmetrical alignment accuracy centered on the vehicle centerline. After lateral adjustment, confirm the cutoff remains level between sides, ensuring horizontal shifts haven’t introduced vertical misalignment. Testing headlights against a wall at night provides the most accurate visibility of beam patterns and alignment precision.

Package Dimensions: 2.794 L x 11.43 H x 3.81 W (centimeters)

Other Names: Headlight Adjusting Nut, Adjust Screw Nut

𝗦𝗟𝗘𝗘𝗞 𝗙𝗜𝗡𝗜𝗦𝗛: White nylon nuts pair with precision-threaded black automotive bolts for a clean look, blending easily with external hex bolts and other car repair components.
Verify and Test Your Headlight Aim
When you’ve completed both vertical and horizontal adjustments, conduct a systematic verification sequence to confirm legal compliance and safe on-road performance. Re-mark wall positions with painter’s tape and measure beam hot-spot locations at your test distance—commonly 25 feet for F-150 OEM aiming techniques. Compare headlight brightness and cutoff symmetry between sides; variations exceeding 1–2 inches indicate further correction is needed. Document adjustment screw turns for reproducibility. Perform a road test with an assistant to verify no oncoming-driver glare occurs and that pavement illumination matches expected patterns. To maintain proper reflector function and beam pattern, ensure your LED bulbs match the factory bulb type specified for your F-150 model. LED technology offers superior illumination compared to traditional halogen bulbs, which is especially important when verifying your adjusted beam patterns during road tests. If your F-150 features adaptive or auto-leveling systems, confirm they’re functioning per service manual procedures. Record final measurements and date for future reference, ensuring compliance with DOT/SAE specifications where applicable.
Troubleshoot Common Adjustment Issues
Even correctly adjusted F-150 headlights can drift out of alignment due to mechanical wear, component failure, or electrical malfunctions that demand systematic troubleshooting. If your adjuster mechanism resists movement, apply silicone lubricant to threads and stop turning when resistance increases to prevent stripped plastic threads or broken rods. LED compatibility issues arise when aftermarket bulbs scatter light improperly through halogen housings—reverting to OEM halogens resolves blinding and visibility problems. Dynamic headlights that drift downward monthly indicate faulty auto-leveling systems requiring manual recalibration. Replacement headlight assemblies often disable adaptive functions; verify new units include bending capabilities before installation, as Forscan resets won’t restore missing hardware features. Installing lift kits or larger tires requires headlight realignment to maintain proper beam positioning and prevent glare for oncoming drivers. For precise alignment during these modifications, park your truck on a level surface approximately 25 feet from a flat wall to verify beam height adjustments. Voltage fluctuations from your vehicle’s alternator can cause LED flickering issues that may be mistaken for misalignment problems. For fog light adjustments, use a 1/2-inch wrench on halogen adjusters to optimize side projection and corner illumination.

✔️ FITMENT: Compatible with Ford F150 1997-2003 Models Only. 2004 Ford F150 Heritage Models Only. 1997-2002 Ford Expedition Models Only (Doesn't Fit On 1997 F150 Production Dates Between 06/01/1996 To 07/01/1996).
FITMENT: Compatible with Ford F150 2018, 2019, 2020. Precut pieces sized for factory headlights and taillights.

【SUITABLE MODELS】Headlights Assembly Compatible With 2015-2017 Ford F-150. Do not fit models with LED or HID headlights. Bulbs are not included. High beam bulb type: 9005; low beam bulb type: H11; signal light: 3157A; side marker light: W5W.