To replace your GMC Yukon’s headlight bulb, first open the hood and locate the bulb assembly behind the headlight housing. Disconnect the electrical connector by pressing the release tab, then twist the bulb counterclockwise to remove it from the socket. Install the new bulb—9005 for high beam or H11 for low beam halogen—by aligning the tabs and rotating clockwise until it locks. Reconnect the wiring harness until you hear a click, then test both beam functions. This guide provides thorough details on accessing assemblies, proper handling techniques, and adjustment procedures.
Preparation and Safety Measures
Before replacing a GMC Yukon headlight bulb, you must establish a safe working environment to prevent injury and component damage. Start by wearing appropriate safety gear, including gloves to prevent skin oils from contaminating the bulb glass and safety glasses to protect against debris. Park your vehicle on a level surface, engage the parking brake, and disconnect the battery if specified in your owner’s manual to eliminate electrical shock risks.
Proper workspace organization is critical for efficient bulb replacement. Secure the hood fully and arrange necessary tools—flat-blade screwdrivers, Phillips drivers, Torx bits, and socket wrenches (typically 7mm and 10mm)—within easy reach. Make certain adequate lighting to see components clearly. Turn the steering wheel if needed to access fender liner fasteners. Keep trim removal tools available to prevent damage when removing clips or panels. To avoid scratching delicate surfaces, use a microfiber towel when handling components during the replacement process. Most headlight bulb replacements can be completed in under 15 minutes by releasing electrical connectors and twisting out the old bulb. Consult your owner’s manual for factory bulb specifications to confirm the correct replacement type before beginning the procedure.
Accessing the Headlight Assembly
With your safety measures in place and tools organized, locate the headlight assembly by opening the hood and identifying the front corner housing mounted in the engine compartment. The assembly design varies by model year—1999-2006, 2007-2014, and 2015+ configurations differ in securing points and access requirements. Begin headlight maintenance by removing protective covers or grills obstructing the mounting bolts, using flathead or Phillips screwdrivers as needed. Some models require pulling back the inner fender liner by turning the front tire for bolt access. Identify and remove securing bolts—typically 7mm and 10mm hex bolts located on top, sides, and within the fender well. Once the bolts are removed, twist the pins securing the headlight to release it from the mounting bracket. Disconnect wiring harnesses by pressing release tabs on connectors for low and high beams. For halogen bulbs, avoid touching the glass during removal and installation to prevent shortened bulb life. Gently pull the assembly forward, adjusting angles to clear mounting tabs. After replacement, consider applying protective coating or wax to maintain headlight clarity and prevent future yellowing and oxidation.
Removing the Old Headlight Bulb
Once you’ve accessed the headlight assembly, turn your attention to the bulb socket at the rear of the housing. Locate the electrical connector and disconnect it by pressing the release tab, pulling straight out—never tug on wires directly. Identify the retaining mechanism, typically a twist-lock ring or metal clip. Rotate counterclockwise or depress the clip to release the bulb. Once freed, carefully extract the bulb straight from the socket using proper removal techniques. Inspect the socket for corrosion or debris before proceeding. Handle the old bulb by its base only to prevent glass contamination. Note your bulb’s specifications to guarantee bulb compatibility when selecting a replacement. Some models may require removing components like a washer spout or inner fender liner for better access to the headlight assembly. For high beam upgrades, consider HIR bulbs which offer improved brightness over standard halogen options. Projector headlights with HID or LED bulbs provide superior light output and beam control compared to traditional reflector housings. Verify the socket and connector are clean and undamaged, preparing for seamless installation of the new headlight bulb.

1.5X brightness up new 6k d3s hid bulbs upgrade for 2015 2016 2017 2018 2019 2020 gmc yukon xl headlight dipped low beam position original with 35w xenon bulb models only (note: not fit any halogen bulbs)

【Applicable Models】: Compatible with GMC Yukon 2007-2014 | Yukon XL 1500 2007-2014 | Yukon XL 2500 2007-2013.

PACKAGE: 2PCS female 9008 H13 wiring sockets in the package。
Installing the New Headlight Bulb
Proper installation of your replacement headlight bulb begins with meticulous preparation and handling techniques that protect both the component and the electrical system. Use protective gloves when handling the new bulb to prevent skin oils from contaminating the glass envelope, which can cause premature failure. Verify the replacement matches your Yukon’s specifications before proceeding.
Align the bulb base with the socket grooves and insert carefully without excessive force. Rotate clockwise approximately one-quarter turn until the locking mechanism engages. Reconnect the wiring harness until you hear an audible click confirming secure attachment. Confirm proper bulb placement by checking that the assembly sits flush without gaps.
Route wiring away from heat sources and moving components. Test both low and high beam functions to confirm correct operation before closing the hood. When selecting replacement bulbs, consider the color temperature and brightness options available to match your preferences for visibility and safety. Consider upgrading to LED headlight bulbs for improved visibility and longer lifespan compared to traditional halogen options.

【64PCS Latest Chips】Engineered with 64 high-power LED chips, the ZonCar H13 bulb delivers 60,000 lumens per set – 1000% brighter than stock halogens. Drive with daytime clarity, even in total darkness

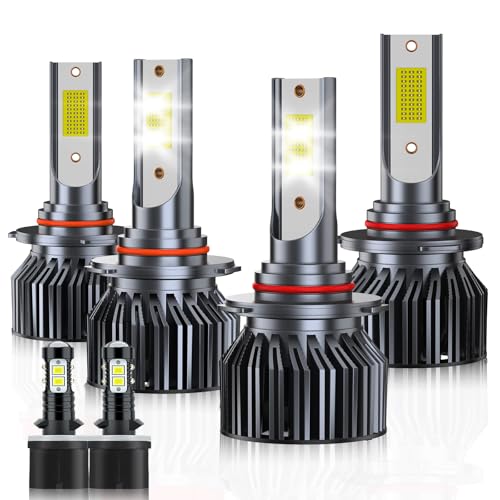
Perfect Fit: This High low beam and Fog light LED combo fits for theGMC Yukon XL 1500 2500 2007 2008 2009 2010 2011 2012 2013 2014 all models, ensuring a perfect fit and easy installation. (Please check you models before purchasing.)
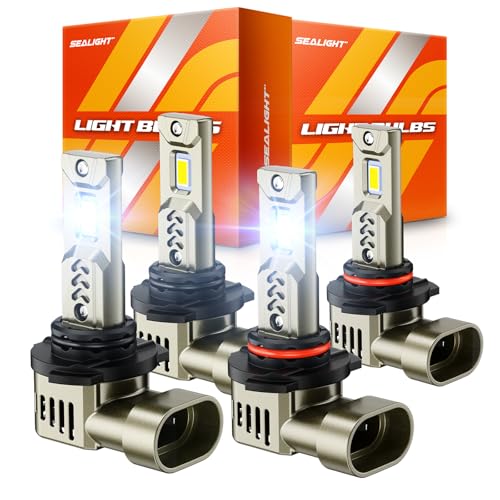
10X Ultimate Brightness: SEALIGHT 9005 9006 bulbs combo use high-end 16 CSP chips to deliver up to 1000% brighter light than original bulbs. With 6500K cool white colour temperature, HB3 HB4 bulbs combo allows you to see further and clearer on the road at night, improving driver safety
Reassembling Components and Testing
After installing the replacement bulb, you’ll need to secure the headlight assembly back into its mounting position to restore structural integrity and proper alignment. Align the assembly tabs with their corresponding slots and push until fully seated. Reinstall all bolts using 7mm or 10mm sockets, tightening securely without overdoing it. Reconnect the wiring harness until it clicks, then reinstall dust caps and protective covers. Replace fender liner clips and grill fasteners methodically.
Reassembling components requires verifying all hardware is tight and properly positioned. Inspect connections for secure attachment and check that the assembly sits flush with body panels. Ensure the weather-tight gasket fits snugly against the housing to prevent moisture intrusion.
Testing procedures involve switching on headlights to confirm electrical function. Operate high beams, low beams, and integrated signals. Check for flickering, dimming, or improper beam patterns indicating connection issues.
Verifying Headlight Function and Alignment
Successfully installing the replacement bulb completes only half the repair process—you must now verify the headlight operates correctly and projects its beam pattern at the proper angle. Park your Yukon 25 feet from a wall on level ground, activate the low beams, and mark the vehicle centerline. The hot spot should align horizontally with or fall 2-4 inches below the bulb’s height reference line, ensuring minimal glare for oncoming traffic. Check for symmetrical beam patterns without exceeding 4 inches of horizontal offset. If headlight alignment requires adjustment, locate the vertical and horizontal adjustment screws on the housing. Use an E8 socket to make incremental turns, verifying beam position after each adjustment. For optimal results, perform this adjustment at night so you can directly observe the beam pattern on the wall as you make each adjustment. Confirm consistent brightness, proper automatic functions, and lens clarity. Consider nighttime testing on actual roads to ensure the headlight performs effectively under real driving conditions, as wall alignment alone may not reveal all visibility issues.
Bulb Specifications and Maintenance Tips
Selecting the correct replacement bulb for your GMC Yukon requires understanding both OEM specifications and aftermarket alternatives. Your high beam uses 9005 (HB3) bulbs, while low beam requires H11 for halogen systems or D3S/D3R for HID-equipped models. When comparing bulb types, LED replacements deliver superior performance with up to 14,000 lumens per pair versus halogen’s standard output, offering significant brightness comparison advantages. LED bulbs operate at 6000K color temperature with 21-watt power consumption, while OEM halogens use 15-20 watts at 12.8 volts. For ideal maintenance, always replace bulbs in pairs to guarantee uniform output. Handle halogen bulbs with gloves to prevent skin oils from causing premature failure. Inspect bulb sockets for corrosion and verify wattage ratings match your vehicle’s electrical system specifications before installation. It is important to consider legal requirements for headlight brightness in your jurisdiction before selecting aftermarket options. Different bulb technologies offer distinct benefits in terms of light output and beam pattern quality for enhanced nighttime driving safety. Premium LED options feature Advanced Thermal Separation Technology to improve heat management and extend bulb lifespan.

【Experience a 10X Brighter Night】 Transform your drive with our advanced 9008/H13 light bulbs. Each 9008 light bulbs combo, equipped with 12 high-performance chips, delivers a blinding 50,000 lumens per set. Powered by latest upgraded Z10 technology which provide unparalleled road illumination—turning night into day for a safer, more confident, and utterly superior driving journey.
Nighttime Safety Enhancement: Designed for 2000-2006 gmc yukon SLE SLT XL1500/2500, this bulb set delivers a wider, longer-range illumination while preventing glare for oncoming traffic. It clearly illuminates road curves, road signs, and potential hazards, minimizing glare and visual interference for safer

【FOR 2007-2014 GMC Yukon & Yukon XL】AYGZRUB light bulb combo perfectly for 2007-2014 GMC Yukon & Yukon XL.Built-in smart driver and close to the wattage of halogen bulbs, reduce the risk of error warnings, radio static or flickering.