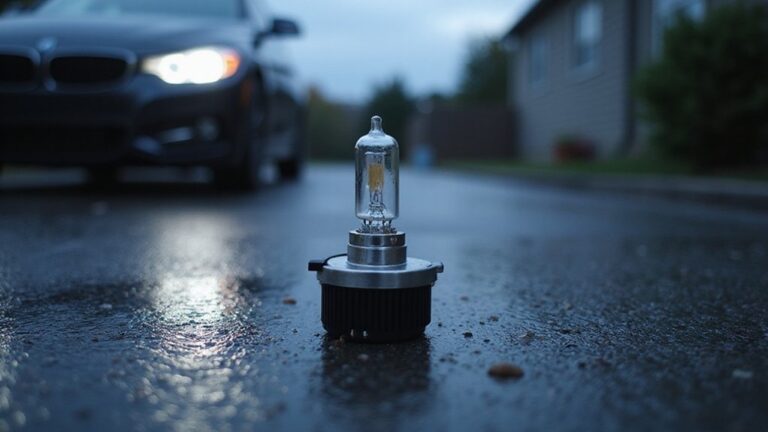
To replace your Ford F-150’s headlight bulb, you’ll first disconnect the battery for safety. Open the hood and locate the headlight assembly behind the bulb. For 2009-2014 models, remove the protective cover and twist the bulb socket counterclockwise. For 2015-2020 models, you may need to remove the fender liner for access. Install the new bulb without touching the glass, reconnect everything, and test both high and low beams. The complete process includes additional steps for proper alignment and model-specific considerations.
Preparation and Tools Required
Before you begin replacing your Ford F-150 headlight bulbs, gather the essential tools to complete the job efficiently and safely. You’ll need a ratchet wrench with a 10mm socket for retaining bolts, and a Phillips head screwdriver for plastic rivets. Check your owner’s manual for tool compatibility with your specific model year, as some variants require specialized sockets like 7mm or 7/32 inch sizes.
Park your truck on level ground, engage the parking brake, and open the hood. Maximize workspace efficiency by organizing tools in magnetic trays and labeled containers to prevent losing small parts. Ascertain adequate lighting and keep your replacement bulbs—H13 for 2009-2014 models or H11 for 2021-2023—within reach. For optimal results, consider performing this work at night or in low-light conditions so you can directly observe the beam pattern on a wall to verify proper alignment after installation. For added safety and longevity, apply dielectric grease on connections to protect electrical contacts from corrosion. Use gloves when handling new bulbs to avoid transferring oils onto the glass. A thin layer of grease from your fingers can cause bulbs to weaken over time, potentially leading to premature failure.

【Sutiable For Ford F-150 (2015-2023)】: Package include 1x Pair 9005 hi beam light bulbs, 1x Pair H11 lo beam lights bulbs , 1x Pair 9145 fog light bulb, 6500K cool white, 12000 lms/pcs lumen. 9005+H11+9145 lights bubs can provide a stable bright light with warm up time less then 0.01s, reduces light delay, and slowly go out, maximize the reaction time to avoid accidents when emergency.

Package Include : A pair of high light bulbs, a pair of low light bulbs, and a pair of fog light bulbs. Fits for the 2015-2023 Ford F-150, ensuring a perfect fit and easy installation. (Please check your F150 models before purchasing)

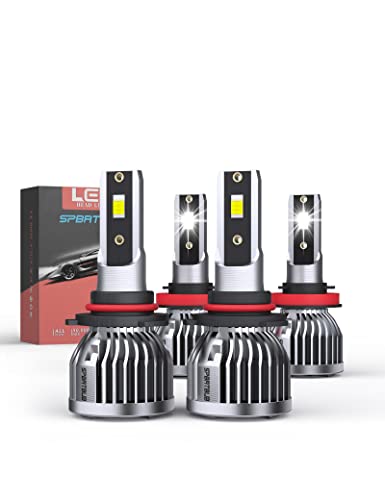
Unmatched Brightness & Clarity: Upgrade your lighting with the H13 H10 LED Bulb Combo—delivering 68,000 Lumens (6500K) of pure white light. 10X brighter than halogen bulbs, these h10/9145 led fog light bulbs use dual-row 7035 CSP chips for superior brightness and durability
Safety Precautions and Bulb Handling
When working with headlight bulbs, you must prioritize electrical safety to prevent shock or damage to your F-150’s lighting system. Disconnect the battery before starting, and guarantee your vehicle’s parked on level ground with headlights off.
Different bulb types require specific handling techniques. Never touch halogen glass surfaces with bare fingers—oils cause hot spots and premature failure. Use gloves or clean cloth when handling new bulbs. Hold them by the base or plastic components only. For LED bulb types, verify proper orientation since they’re polarity sensitive. Ensure the bulb is correctly seated in the housing before securing any covers or components. The replacement process typically requires only basic tools and hands-on work, making this a manageable DIY task.
Before installation, inspect bulbs for cracks or damage. Apply dielectric grease to electrical connectors to prevent corrosion. These installation tips provide reliable performance: confirm connector locking tabs engage properly, test functionality before reassembly, and verify correct bulb alignment for optimal beam patterns. Applying dielectric grease on connectors is especially vital in wet climates where corrosion protection becomes critical.
Accessing the Headlight Assembly on 2009-2014 Models
Accessing the headlight assembly on 2009-2014 F-150 models requires removing three primary mounting bolts and disconnecting multiple electrical connectors from the engine compartment. Begin by opening the hood and locating the headlight assembly. Remove any protective covers behind the headlight using a Phillips screwdriver to expose the mounting bolts. Use a 10mm socket with a ratchet to remove two top bolts and one middle bolt securing the assembly. Carefully disconnect all electrical connectors by pressing down on their release tabs—these include high beam, low beam, parking light, and turn signal connections. Keep all removed screws organized during removal to ensure proper reassembly. Once the mounting bolts are removed and wiring is disconnected, pull the headlight assembly straight forward to release the locating pins from the fender housing.
Accessing the Headlight Assembly on 2015-2020 Models
The 2015-2020 F-150 models use a different mounting system that requires accessing fasteners from both the engine bay and wheel well. Start by removing the fender liner using trim tools and appropriate sockets (7mm, 8mm, or 10mm). Locate and remove all mounting bolts securing the headlight assembly—some fasteners hide behind the liner, requiring you to reach through the wheel well. The passenger side presents additional challenges due to the air box location; you’ll need to loosen or partially remove it for adequate access. Disconnect electrical connectors by pressing locking tabs, gripping the housing rather than pulling wires. Gently wiggle the headlight assembly to disengage mounting tabs without damaging surrounding components. Once loosened, you can access the back panel for bulb replacement, and it’s important to test the bulb before reassembling to ensure functionality. When installing new bulbs, remember to avoid touching them with bare fingers, as skin oils can damage halogen bulbs and reduce their lifespan. After completing the bulb change, replace the dust cover before reassembling the fender liner components.
Removing the Old Headlight Bulb
Before touching any components, turn off your F-150’s ignition and headlight switch to prevent electrical shorts or accidental activation. Start by peeling back the rubber dust cap covering the bulb housing—work it loose gradually with your fingertips to avoid tearing. Next, disconnect the electrical connector by pressing the retaining tab and gently pulling it away from the bulb. If the tab’s stubborn, use a small flathead screwdriver.
Now identify the bulb retention mechanisms. Most F-150 models use a twist-lock system requiring a counterclockwise quarter-turn to release. Once rotated, pull the old bulb straight out without forcing it. Wear gloves during old bulb removal to prevent skin oils from contaminating the new bulb, as direct contact can cause premature burnout. For optimal results, consider replacing bulbs in pairs to ensure even light output across both headlights. Keep all removed components organized for reassembly.
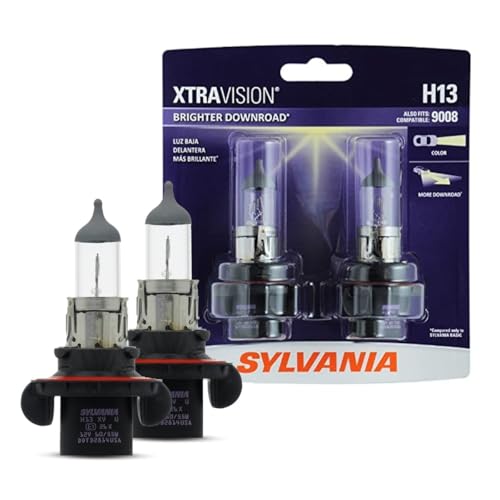
Lights Dim Over Time, Replace In Pairs: Your lights are a pair, one is never turned on without the other. If one bulb burns out, the other isn't far behind. Replace your H11 XtraVision Halogen bulbs in pairs for optimum performance.

[Perfectly Matched Set | Important Notice]: This set includes: 2 high-beam bulbs, 2 low-beam bulbs and 2 fog light bulbs, totaling 6 bulbs. It is suitable for 2015-2023 Ford F150. To ensure the accuracy of the selected bulb model, it is recommended that you check the vehicle user manual or the part number on the bulbs. If you have any questions about purchase or installation, please feel free to contact us at any time. We will answer your questions within 24 hours.
🚗【4 Pack 24000 Lumens Fit For Ford F-150(2015-2020)】9005 is usually used in high beams and h11 in low beams fit for Ford F-150 headlight bulbs. So you can buy a set of them to instead of your old halogen ones. Ridiculously bright, but not to the extent that illicit angry high beams from oncoming drivers.
Installing the New Headlight Bulb
Grasp your new headlight bulb by its base—never the glass envelope—to maintain the pristine surface required for peak performance and longevity. Follow these bulb orientation tips: align the bulb with socket tabs, noting the larger tab guarantees correct fit. Insert carefully without force, then twist clockwise until you hear a click. Gently tug to confirm it’s secure.
Press the electrical connector onto the socket until it clicks, checking for corrosion beforehand. Avoid excessive force to prevent damage. Replace the rubber dust cap immediately, pressing firmly to create a waterproof seal. Inspect for cracks that could compromise protection. Using appropriate tools like socket wrenches will help ensure you don’t accidentally damage the connector or surrounding components during installation. LED headlight upgrades offer improved visibility and energy efficiency compared to traditional halogen bulbs.
Finally, turn on your headlights to verify proper illumination. These installation challenges require attention to detail—check beam alignment and dashboard warning lights before completing the job. Consider connecting the new bulb before fully installing it into the housing to prevent any potential damage during the installation process.

Fit Ford F-150 F150 2004 2005 2006 2007 2008 2009 2010 2011 2012 2013 2014, 9008/H13 for both High Beam and Low Beam,
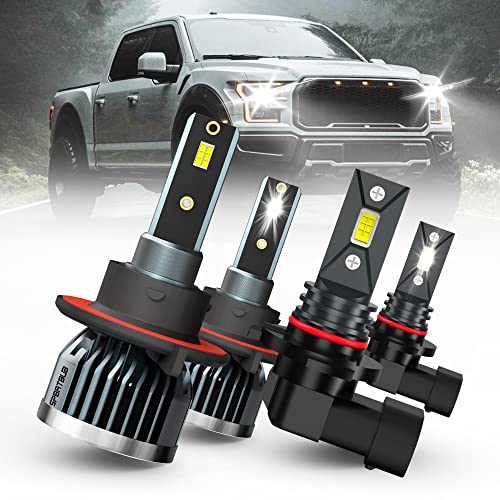
🚗【Upgrade your Ford F-150 2004-2014 with this 4-pack of 24000 Lumens LED headlight bulbs】 The 9008 bulbs are compatible with both high and low beams, while the 9145 bulbs are perfect for fog lights compatible with Ford F-150 2004 2005 2006 2007 2008 2009 2010 2011 2012 2013 2014 led headlights. These headlights LED bulbs are incredibly bright, but not excessively blinding to oncoming drivers, so you can replace your old halogen bulbs without worrying about angry high beam reactions.

【VEHICLE COMPATIBILITY】Headlights Assembly Compatible with 2009-2014 Ford F-150 Pickup. Only for Factory Halogen Headlight Models. Not compatible with Factory Xenon HID Headlight Models. High / Low beam bulbs are included. High / Low beam bulb type: H13 (INCLUDED); signal light: 3157A (NOT INCLUDED); side marker light: 194 (NOT INCLUDED). OEM Part Number: DL3Z13008B, DL3Z13008A, DL3Z13008EB, DL3Z13008EC; Partslink Number: FO2502287 ,FO2502289, FO2503287, FO2503289.
Reassembling the Headlight Assembly
With your new headlight bulb installed, proper reassembly of the headlight assembly guarantees reliable operation and prevents moisture intrusion. Position the assembly so locating pins align with corresponding holes in the fender, then push firmly until it sits flush against the body panel. Reinstall the three mounting bolts—two at the top and one lower—using a 10mm socket. Tighten incrementally to avoid warping without over-torquing.
Reconnect all electrical connections to the high beam, low beam, turn signal, and parking lights, ensuring each connector snaps securely into place. Route wiring to prevent pinching. Replace the protective rear cover and any removed trim panels with original fasteners. Ensure your replacement bulbs meet DOT compliance standards to maintain proper beam pattern quality and avoid blinding oncoming drivers.
Check headlight alignment using adjustment screws if necessary, and verify all functions operate correctly before road use. Verify headlight functionality before closing the hood to ensure proper installation.
Testing Your New Headlight Bulbs
After completing the reassembly, confirm your new headlight bulbs function correctly before returning your F-150 to service. Start your engine and activate the headlights to test both low and high beam functions. Observe the light output carefully for flickering or dimness that indicates installation issues or faulty bulbs. If problems occur, disconnect the bulb and perform bulb testing using a multimeter set to resistance mode. Probe both electrical contacts on the bulb base to check filament integrity—low resistance near zero ohms confirms an intact filament, while infinite resistance indicates a broken filament. Test the socket voltage with your multimeter; you should read approximately 12 volts with the headlights activated. Wear protective gloves when handling electrical components to prevent risk of shock or injury. LED headlights offer improved night-time visibility compared to traditional halogen options while consuming less energy. Consider comparing your results against halogen, LED, and HID options to ensure you’ve selected the appropriate bulb technology for your vehicle’s electrical system. Finally, confirm proper beam alignment to guarantee safe road illumination.
Common Bulb Sizes for Ford F-150 Models
Understanding the correct bulb specifications for your F-150’s model year prevents installation errors and guarantees peak lighting performance. For 2019-2024 models, you’ll need H11 bulbs for low beams and 9005 (HB3) for high beams. Earlier 2015-2017 trucks use the same combination, while 2009-2014 models typically require H13 (9008) dual-filament bulbs for halogen systems or D3S for factory HID setups.
Common replacement mistakes include purchasing incorrect bulb types for your specific trim level, as higher-end packages often feature factory LED assemblies starting in 2018. You can’t simply swap bulbs in LED housings without complications. Verify your exact bulb size through your owner’s manual or by checking your existing bulb before purchasing replacements. Bulb compatibility issues frequently arise when owners assume all F-150s from the same generation use identical specifications. Choosing the right color temperature can also impact your nighttime visibility and driving safety. Most headlight replacements can be completed in 10-15 minutes with basic tools like socket wrenches and screwdrivers. If your truck has factory LED lights, you cannot change or upgrade them yourself and must seek authorized dealer service for any repairs.

Perfect Fit: These headlight bulbs fit for Ford F-150 F150 2015 2016 2017 2018 2019 2020 2021 2022 high beam and low beam

Lights Dim Over Time, Replace In Pairs: Your lights are a pair, one is never turned on without the other. If one bulb burns out, the other isn't far behind. Replace your H11 XtraVision Halogen bulbs in pairs for optimum performance.

【Compatible with 2015-2022 Ford F-150 F150 Halogen Headlight Bulbs】9005/HB3/H10 is used in high beams and H11/H8/H9 in low beams.Compatible with 2015 2016 2017 2018 2019 2020 2021 2022 Ford F-150 F150 headlight,Pack of 4.
Upgrading to LED Headlight Bulbs
Once you’ve confirmed your stock bulb specifications, LED upgrades represent the most popular performance modification for F-150 headlights. LED brightness comparison shows these units deliver remarkably whiter, more intense illumination than halogen bulbs while consuming less electrical power. LED lifespan advantages are substantial—you’ll replace bulbs far less frequently than traditional options.
For 2015–2020 models, you’ll typically need H11 (low beam) and 9005 (high beam) sizes, though this varies by trim. Be aware that factory LED-equipped trucks (2019+ premium trims) can’t accept aftermarket upgrades. When selecting replacement bulbs, color temperature ratings significantly impact both visibility and aesthetics, with most LED options ranging between 5000K and 6500K for optimal nighttime performance.
Installation requires CANbus decoders to prevent error codes, and you may need extended dust covers for bulbs with larger heat sinks. These bulbs are polarity sensitive—if they don’t illuminate initially, reverse the connector. Proper headlight alignment techniques should be performed after installation to ensure you don’t blind oncoming traffic. High-quality options include built-in cooling fans and IP68 water resistance ratings. Premium LED bulbs can deliver 5,000 lumens per bulb, representing a substantial technological leap over the dim yellowish output of factory halogen lights.

Perfect Fit: UNIONLUX F150 High low beam Fog lights Bulbs Combo fits for Ford F150 Accessories 2015 2016 2017 2018 2019 2020 2021 2022 2023 all models, ensuring a perfect fit and easy installation. (Please check your F150 models before purchasing.)

Enhanced Night Visibility: Our 2025 upgraded fog lights feature a powerful 16-lamp bead array that outputs an impressive 62,000 lumens. This high-output design ensures a minimum irradiation distance of 1600 feet, providing you with clearer visibility and a safer driving experience during nighttime conditions.

【Experience a 10X Brighter Night】 Transform your drive with our advanced 9008/H13 light bulbs. Each 9008 light bulbs combo, equipped with 12 high-performance chips, delivers a blinding 50,000 lumens per set. Powered by latest upgraded Z10 technology which provide unparalleled road illumination—turning night into day for a safer, more confident, and utterly superior driving journey.