To replace your Nissan Rogue headlight bulb, you’ll need to park on level ground, disconnect the battery’s negative terminal, and gather a 10mm socket wrench and gloves. Access the bulb by removing splash shields and plastic trim, then locate the socket behind the headlight assembly. Turn the socket counterclockwise 90 degrees, remove the old bulb without touching the glass, and insert the new bulb—typically H11 for low beams or H9 for high beams. The following sections cover each step’s technical details and safety protocols.
Identifying the Correct Bulb Type and Location
Before removing or replacing any headlight bulb in your Nissan Rogue, you must identify the exact bulb types specified for your vehicle’s model year and trim level. For 2014-2020 models, low beams typically use H11 bulbs, while high beams require H9 types. Fog lights commonly use H8 bulbs across multiple years. From 2021 onward, exterior bulbs like turn signals utilize 7443 and 921 LED sizes.
Understanding location specifics is equally critical. Low beam bulbs mount behind the main headlight lens, while high beams occupy a distinct fixture within the same assembly. Fog lights reside in lower front bumper mounts, separate from the headlight cluster. Always cross-reference your owner’s manual and confirm factory lighting type—halogen, LED, or HID—before purchasing replacements to verify proper fitment and functionality. LED upgrades for H11/H8/H9 applications operate on 9-30V systems, ensuring compatibility with your Rogue’s electrical architecture.

10X Breakthrough Brightness: H11 bulbs use 16 advanced high-power chips,delivering 1000% brightness increase. With the latest technology, H8/H9 bulbs provide stable, high-efficiency illumination for enhanced visibility and maximum road safety

⭐【Super Bright H11 Bulbs】Our H11 headlight bulbs deliver over 1000LM brightness and a 3800K color temperature, ensuring optimal visibility in foggy and rainy conditions. Upgrade your automotive headlight bulbs for safer nighttime driving.
Gathering Necessary Tools and Materials
To successfully replace a headlight bulb in your Nissan Rogue, you’ll need a specific set of tools and materials before starting the procedure. Essential items include a 10mm socket wrench, flat blade screwdriver, and trim tool set for accessing the headlight assembly. Gloves are critical to prevent skin oils from contaminating halogen bulb glass, which causes premature failure. Safety glasses protect your eyes from debris during removal.
Ensure proper tool organization by using magnetic trays to prevent fastener loss in the engine bay. Verify your replacement bulb matches manufacturer specifications—typically H11 for low beams. Park on level ground and engage the parking brake to maintain vehicle safety. Keep a flashlight available for adequate visibility, and have replacement clips ready since originals may break during removal. Consider downloading the 1A Diagnostic App to help troubleshoot any electrical issues you may encounter during the replacement process.
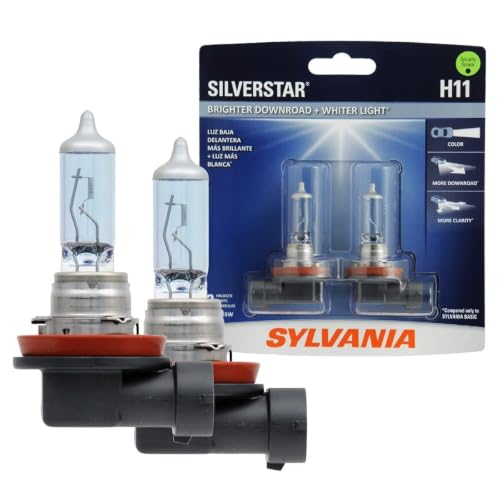
Lights Dim Over Time, Replace In Pairs: Your lights are a pair, one is never turned on without the other. If one bulb burns out, the other isn't far behind. Replace your H11 SilverStar Halogen bulbs in pairs for optimum performance.

Lights Dim Over Time, Replace In Pairs: Your lights are a pair, one is never turned on without the other. If one bulb burns out, the other isn't far behind. Replace your H11 XtraVision Halogen bulbs in pairs for optimum performance.

🚗【Compatibility Check Before Purchase】: Halogen Headlight Bulbs compatible with Nissan Rogue (2008-2013). The Halogen headlight bulb combo includes 9005/HB3 high beam and H11 low beam and H11 Fog Light bulbs, totaling 6 in the package.
Preparing Your Vehicle for Bulb Replacement
Successfully replacing your Nissan Rogue’s headlight bulb requires proper vehicle preparation to affirm both your safety and the quality of the repair. Park on level ground away from traffic and engage the parking brake to affirm vehicle stability. Turn off the engine, remove the key, and allow components to cool completely. Locate the hood release lever near the driver’s footwell and open the hood, securing it with the prop rod. Disconnect the battery’s negative terminal to eliminate electrical hazards. Put on safety gear including protective gloves and goggles before proceeding. Work in a well-lit environment, using portable lighting if necessary. Clean the headlight assembly area and organize your workspace, keeping replacement bulbs and tools within reach for efficient execution. Have a screwdriver and ratchet ready as these are the basic tools required for headlight bulb replacement. Avoid touching the bulb glass directly, as oils from your skin can damage the bulb and reduce its lifespan.
Accessing the Headlight Assembly
Accessing your Nissan Rogue’s headlight assembly requires methodical disassembly of protective trim components and precise removal of mounting hardware. Begin by using a trim tool to carefully pry off plastic pieces surrounding the headlight, ensuring trim piece protection by avoiding excessive force on retaining clips. Remove push pins securing splash shields and identify all mounting bolts—typically located on top, sides, and bottom of the assembly. You’ll need a 10mm socket to remove these fasteners. For complete headlight assembly removal, disconnect the wiring harness by depressing locking tabs on connectors. Turn the connectors counterclockwise to disconnect the wiring from the assembly. Some models may require removing components like a washer spout or inner fender liner for better access to the assembly. Once all bolts and electrical connections are released, grasp the assembly firmly and pull forward. If clearance is limited, partially reposition the bumper cover to create adequate workspace for bulb access. Most Nissan Rogue models use H11 or 194 bulbs that should be handled carefully to avoid touching the glass surface.

KIT CONTENTS - Each headlight restoration kit includes (8) Step 1 Oxidation Removing Wipes, (1) Step 2 Sanding Kit, and (2) Step 3 Ceramic Coating Wipes.

KIT INCLUDES: 1 - Disc Pad Holder, 3.25 in (8,2 cm) 6 - 3M Gold Sanding Discs 500 Grit, 3 in (7,6 cm) each 4 - 3M White Finishing Discs 800 Grit, 3 in (7,6 cm) each 1 - 3M Trizact Refining Disc 3000 Grit, 3 in (7,6 cm) 2 - 3M Quick Headlight Clear Co
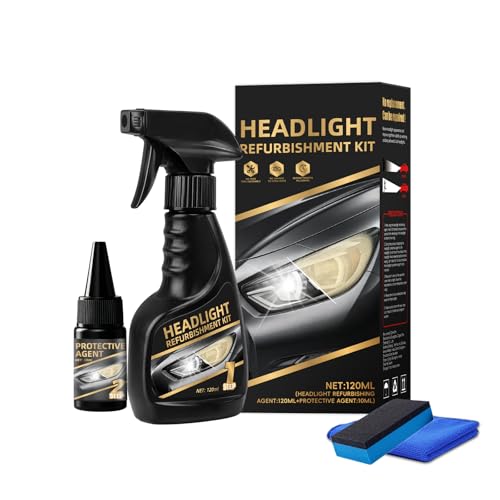
Make Your Vision Brighter:This 2026 New Automotive Headlight Restoration Kits effectively clears up yellowing and cloudiness, shine your car headlamp in just minutes, instantly improving brightness and visibility
Removing the Old Headlight Bulb
Begin the bulb removal process by locating the electrical connector at the rear of the headlight assembly. Push the tab or clip to release it, then pull the plug straight out while gripping only the housing—never the wires. Some connectors require a slight twist before removal.
Once disconnected, turn the bulb socket counterclockwise approximately 90 degrees to release it from the housing. Gently pull the bulb straight out without forcing. For proper bulb safety, avoid touching the glass surface with bare fingers; oil contamination causes premature failure. Handle only the base or plastic portion during removal.
Note that driver-side removal techniques may require removing air ducts for adequate access, while the passenger side typically offers more clearance. The tight space behind the driver side headlight makes it necessary to carefully insert your arm to reach the bulb plug. Inspect socket contacts for corrosion before proceeding with replacement. When selecting a replacement bulb, consider both halogen and LED upgrade options to determine which offers the brightness and longevity best suited to your needs.

Lights Dim Over Time, Replace In Pairs: Your lights are a pair, one is never turned on without the other. If one bulb burns out, the other isn't far behind

【Huge Improvement in Visibility】-AUTOONE H11 led bulbs are equipped with high luminous efficacy CSP chips. And 1:1 halogen h11 bulbs’ beam pattern, spread out the light more to help in the side and front vision but no endangering other drivers. Safer and bright upgrade for fog lights or drl

Lights Dim Over Time, Replace In Pairs: Your lights are a pair, one is never turned on without the other. If one bulb burns out, the other isn't far behind. Replace your 9007 XtraVision Halogen bulbs in pairs for optimum performance.
Handling and Preparing the New Bulb
Why does proper bulb handling matter so critically for headlight replacement? Your skin’s oils can cause halogen bulbs to fail prematurely when transferred to the glass surface. Always wear clean gloves or use a lint-free cloth during bulb handling. If you accidentally touch the glass, clean it immediately with isopropyl alcohol.
Before installation, verify your replacement bulb matches Nissan Rogue specifications—H9 for high beam, H11 for low beam. Remove protective caps carefully and inspect for cracks or damage. For LED upgrades, confirm polarity orientation and can-bus compatibility to prevent dashboard warning lights. The T3 series LED bulbs feature built-in micro ceramic resistors for advanced Can-Bus decoding, eliminating common compatibility issues. Upgrading to LED or HID conversions can significantly improve brightness and color temperature compared to factory halogen bulbs.
Test-fit the bulb without forcing it, checking alignment tabs for correct orientation. Following proper safety precautions during installation prevents electrical hazards and ensures secure connections. This bulb preparation guarantees ideal beam pattern and electrical connection, maximizing both safety and longevity.
Installing the Replacement Bulb
With your new bulb properly prepared, you’re ready to secure it into the headlight assembly. Proper bulb alignment techniques require matching the bulb’s tabs with the socket slots precisely. Insert the bulb firmly—never force it—then rotate clockwise approximately 90° until it locks. Gently wiggle the bulb to confirm it’s seated securely, avoiding bulb damage through careful handling in tight spaces.
Next, connect the electrical plug by pushing it onto the bulb’s base until fully seated. Align the plug’s tab correctly, then rotate clockwise to lock. Verify the connection is tight to prevent flickering. Consider selecting LED conversion kits or other aftermarket alternatives if you’re upgrading beyond standard halogen replacements.
Test functionality by switching on your headlights, checking both low and high beams. Inspect the beam pattern from outside. If the bulb doesn’t illuminate, recheck connections and seating immediately. Ensure the bulb is securely in place after completing the replacement to prevent any issues during operation.
Securing the Bulb Socket and Assembly
After confirming proper bulb installation and electrical connection, secure the bulb socket back into the headlight assembly to complete the replacement process. Carefully insert the socket, ensuring proper socket alignment with the housing’s pins or tabs. Twist clockwise until you hear or feel it lock into place. The socket should sit flush against the assembly, indicating full engagement. Gently wiggle the socket to verify assembly stability—any looseness indicates improper seating. Reinstall protective covers by twisting or snapping them securely to prevent moisture intrusion. Replace all fasteners using the appropriate tools, typically a 10 mm socket wrench. Before tightening completely, confirm the headlight assembly aligns correctly within the vehicle’s mounting points. Check that no wiring is pinched or exposed, then test assembly stability by gently pressing the housing. Once the assembly is secured, make adjustments to the headlights using a number two Phillips head screwdriver to ensure proper beam alignment, which is critical for legal compliance and optimal visibility. When selecting your replacement bulb, consider the lumens output and color temperature of different bulb technologies to maximize safety and performance. Verify that your replacement bulb meets the specifications for your vehicle model, such as H11 or 9005 bulbs commonly used in Nissan Rogues.
Testing the New Headlight Bulb
Before reconnecting the vehicle’s battery, perform a thorough pre-installation inspection of the replacement bulb to prevent immediate failure or safety hazards. Confirm the bulb type matches your Nissan Rogue’s specifications (typically H11 for low beams). Inspect for broken filaments, damaged glass, or manufacturing defects. Avoid touching the bulb’s glass surface, as oil from fingerprints reduces bulb lifespan.
For bulb verification, use a digital multimeter in continuity mode. Touch the leads to the bulb’s terminals; a beep confirms circuit integrity. Measure resistance—readings near zero ohms indicate proper function, while infinite resistance signals a faulty filament. Consider upgrading to premium replacement bulbs for enhanced brightness and visibility compared to standard options. Understanding beam pattern quality ensures your replacement bulb delivers optimal light distribution for safe driving.
After installation, reconnect the battery and perform illumination testing. Activate low and high beams, verifying stable brightness without flickering. Check the beam pattern on a flat surface to ascertain proper alignment and consistent light output. For accurate beam assessment, conduct testing in a controlled environment (0 lumens) to properly evaluate output and pattern distribution.

See the Road in a New Light: Get 900% the brightness of halogens with a powerful 50,000-lumen beam. The AUXITO H11 light bulbs illuminate more road ahead, giving you the clarity to spot hazards sooner.

Fit for 99% of vehicles - SYJIIP Halogen headlamp are close to the wattage of the stock halogen headlamp bulb, which can reduce the occurrence of CANBUS problems, avoid erroneous and flickering. As long as your stock light bulb model is the same as ours, then SYJIIP's light bulb will be suitable for your car.

【9X Brighter Illumination】: Experience exceptional visibility with OXILAM H11 H8 H9 bulbs, featuring 16 upgraded high-power chips that deliver a staggering 900% increase in brightness. These high-performance bulbs allow you to see further on the road.
Troubleshooting Common Installation Issues
Even when you’ve followed installation procedures correctly, headlight bulb replacement can present unexpected challenges that require systematic diagnosis. If your new bulb doesn’t illuminate, verify electrical connections are fully seated and secure. Use a multimeter to measure voltage at the connector, guaranteeing adequate power supply reaches the bulb. Inspect wiring harnesses for looseness or corrosion that disrupts current flow.
Flickering indicates unstable electrical connections—tighten all connectors and clean corroded terminals with a wire brush. Dim output suggests poor contact points; remove and reseat the bulb to guarantee proper alignment. Check relevant fuses in your vehicle’s fuse panel, replacing any blown components. Examine battery terminals for corrosion affecting overall electrical performance. For optimal results, apply dielectric grease to bulb bases to ensure better electrical contact and reduce future connection issues. Modern vehicles may benefit from adaptive lighting technology that automatically adjusts beam patterns to optimize visibility and safety. If problems persist after completing these basic troubleshooting steps, professional diagnosis may be necessary to identify deeper electrical system issues. These installation challenges typically resolve through methodical inspection of each connection point in the headlight circuit.