
To replace your Honda Accord headlights, first identify your model year to determine the correct bulb type: 2008-2012 models use 9006/9005 bulbs, while 2013-2017 require H11/9005. Access the bulb housing through your engine bay, disconnect the electrical connector by pressing the retention tab, then twist the old bulb counterclockwise. Install the new bulb by twisting clockwise until secure, reconnect the harness, and test functionality. Older models like 1998-2002 require complete assembly replacement involving bumper removal for proper access to mounting bolts and adjustment mechanisms.
Getting Started: Opening Your Hood and Gathering Tools
Before replacing your Honda Accord headlights, you’ll need to access the engine compartment by properly opening the hood. Park on level ground and engage the parking brake. Locate the interior release lever under the driver’s side dashboard, left of the brake pedal. Pull it fully until you hear a click. Next, slide your hand under the hood’s front edge, above the Honda emblem, to find the secondary safety latch. Push or pull this lever while lifting the hood. Remove the support rod from its side clamp and insert it into the designated hood hole. When handling the support rod, use the foam grip to avoid burns from engine heat. Essential hood maintenance tips include allowing the engine to cool before opening and verifying secure closure after completing repairs. For headlights that have become cloudy or discolored over time, consider UV-protective clear coat treatments as a preventative maintenance step. To ensure you have the correct replacement bulb for both low-beam and high-beam lights, consult your vehicle’s manual before beginning work. Tool essentials for headlight replacement include replacement bulbs, clean gloves, and proper lighting.
Understanding Your Accord Model and Required Bulb Types
Determining which headlight bulb your Honda Accord requires depends primarily on the model year and generation. For 2008-2012 models, you’ll need 9006 (HB4) low beams and 9005 (HB3) high beams. The 2013-2017 generation switched to H11 low beams while retaining 9005 high beams. Models from 2018-2022 feature factory LED low beams requiring dealer replacement, though high beams remain 9005 or upgrade to LED.
Bulb compatibility extends across trim levels—EX, EX-L, and LX-S variants share identical headlight specifications within each generation. Trim differences don’t affect bulb selection for sedans, coupes, or hybrid models. Verify your exact requirements through your owner’s manual or cross-reference tools like Sylvania’s bulb finder, especially for 2006-2007 models where low beam specifications vary across documentation sources. When comparing options, consider factors like brightness levels measured in lumens and color temperature ranges to ensure optimal nighttime visibility. Keep in mind that aftermarket headlight assemblies may use different bulb sizes than the original factory components. For headlights that have become cloudy or yellowed over time, UV sealant protection can help maintain clarity after restoration and prevent future oxidation.
Replacing Bulbs on 2008-2012 Honda Accord Models
Replacing headlight bulbs on 2008-2012 Honda Accord models requires accessing the bulb assemblies through one of two primary routes: from under the hood or via the wheel well liner. The wheel-well approach typically offers better access—turn the wheel fully inward, remove plastic push-clips with a trim tool, and pull back the liner to expose the bulb housing. Press the retention tab on the electrical connector and pull straight off, noting bulb orientation before twisting counterclockwise to remove. The correct replacement bulb is size 906. Installation tips include aligning the three twist-lock tabs precisely and rotating clockwise until seated. Avoid touching halogen glass with bare hands; use nitrile gloves. Test the new bulb before reassembling clips and fasteners. Consider selecting bulbs based on brightness and color temperature options to match your driving needs and preferences, as different bulb technologies such as halogen, LED, and HID conversions offer varying levels of visibility and energy efficiency. Replace bulbs in pairs for matched brightness and color consistency across both headlamps.
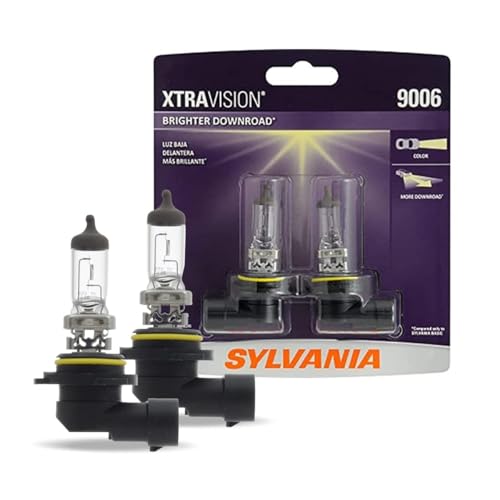
Lights Dim Over Time, Replace In Pairs: Your lights are a pair, one is never turned on without the other. If one bulb burns out, the other isn't far behind. Replace your 9006 XtraVision Halogen bulbs in pairs for optimum performance

Lights Dim Over Time, Replace In Pairs: Your lights are a pair, one is never turned on without the other. If one bulb burns out, the other isn't far behind. Replace your 9003 XtraVision Halogen bulbs in pairs for optimum performance.
Replacing Bulbs on 2013-2017 Honda Accord Models
The 2013-2017 Honda Accord headlight bulb replacement process differs considerably from earlier models, offering improved accessibility through the engine bay without requiring wheel well liner removal. Understanding bulb compatibility is essential—2013-2015 models use H11 low beams and 9005 high beams, while 2016-2017 factory LED-equipped variants require Honda dealer service.
Before starting, engage your parking brake and turn off the vehicle. Access the bulb housing from behind the headlight assembly. Push the connector tab down to disconnect the electrical harness. Twist the bulb counterclockwise for removal, then install the new bulb by twisting clockwise until secure. Reconnect the harness until you hear an audible click. Test headlight functionality by turning on headlights after completing the installation. When handling your bulb, carefully avoid touching the glass surface to prevent damage and ensure optimal performance. The halogen bulb glass is particularly sensitive to skin oils that can cause premature burnout.
Key replacement tips: wear gloves to prevent finger oils from contaminating bulb glass, replace both bulbs simultaneously for consistent brightness, and verify aftermarket assembly compatibility if applicable.

Fit for 99% of vehicles - SYJIIP Halogen headlamp are close to the wattage of the stock halogen headlamp bulb, which can reduce the occurrence of CANBUS problems, avoid erroneous and flickering. As long as your stock light bulb model is the same as ours, then SYJIIP's light bulb will be suitable for your car.

【Package Include】: This product includes a pair of 9005/HB3 High halogen light bulbs and a pair of H11 low halogen light bulbs. If you have any questions? TXBILMOO customer support team is at your service

Halogen Headlight Bulbs for Honda Accord 2013 2014 2015 2016 2017 2018,High Beam 9005/Hb3, Low Beam H11 Lights 6000k White
Removing and Installing Complete Headlight Assembly (1998-2002)
Complete headlight assembly replacement on 1998-2002 Honda Accords requires removing the front bumper cover—a departure from the bulb-only service procedures used on newer models. Start by accessing the engine bay through the hood release. Remove bumper mounting hardware: Phillips or 8mm bolts in wheel wells, 8mm fasteners at bottom corners, and plastic push pins along the lower edge. Lift the bumper to disengage top clips. Next, remove four 10mm bolts securing the headlight bracket—three underneath and one on top. Disconnect the front marker light by turning counterclockwise, then separate low and high beam wiring harnesses. For easier access on the passenger side, you may optionally disconnect the air intake. Using a 10mm socket and ratchet will streamline the removal process for all fasteners on this assembly. During installation, align mounting pins with fender holes before starting bolts. When securing the new headlight assembly, make sure to twist and secure all connections until they click into place for proper fit. Common issues include stripped bolt threads and broken clips. Following proper headlight maintenance tips guarantees reliable performance and prevents future electrical problems.

【OEM-Exact Fitment】Fits 1998-2002 Honda Accord Factory Halogen Type. OEM# 33151-S84-A01/ 33101-S84-A01.ABPA PARTSLINK: HO2502111, HO2503111. Crafted via in-house full process (molding, die-casting, polishing, encapsulation, aging testing) with no middlemen.Seamlessly aligns with vehicle’s electrical system/mounts—no mods/adapters. Meets DOT/SAE/EMC standards, avoids ECU damage, exceeds OEM specs.

Vehicle Compatibility: precisely modeled to fit your original car model, head light assembly compatible with OE type 1998 1999 2000 2001 2002 Honda Accord (2 Door /4 Door) Driver and Passenger Side.(Bulbs are 𝐧𝐨𝐭 𝐢𝐧𝐜𝐥𝐮𝐝𝐞𝐝) HB4(W/O) ,HB3(W/O) ,1157A(W/O) ,W5W(W/O).OEM#33151-S84-A01/ 33101-S84-A01,partslink:HO2502117/HO2503117.

【100% OE Fitment】Perfect fitment for OE Type 1998 1999 2000 2001 2002 Honda Accord 2/4Dr.high beam: 9005; low beam: 9006; bulbs are not included,𝐎𝐄𝐌:𝟑𝟑𝟏𝟓𝟏-𝐒𝟖𝟒-𝐀𝟎𝟏/ 𝟑𝟑𝟏𝟎𝟏-𝐒𝟖𝟒-𝐀𝟎𝟏
Removing and Installing Complete Headlight Assembly (2008-2012)
Unlike earlier models, 2008-2012 Honda Accords streamline headlight assembly replacement by minimizing bumper disassembly while still requiring partial cover removal for proper access.
Start by popping push clips from the under-bumper cover and removing the Phillips screw where bumper meets fender. Disconnect fog light wiring if equipped. Remove three 10mm bolts securing the bumper, then walk it out carefully. For headlight maintenance tips, wear gloves to prevent fingerprints on new assemblies, as oil contamination from bare hands can damage the components.
Remove three bolts securing the headlight—top, inside, and additional location. Squeeze clip bases to disconnect electrical harnesses. Push the headlight back near the fender for clearance. When troubleshooting headlight issues, lift the coolant reservoir aside on the driver side for better access.
Install the new assembly by aligning mounting holes, reconnecting harnesses, and adjusting beam height using Phillips adjusters. A 10mm wrench or drill is recommended for efficiently removing the mounting bolts during the installation process.

【Vehicle Compatibility】Headlights Assembly Compatible with 2008 2009 2010 2011 2012 Honda Accord Sedan 4-Door Halogen Models Only. Not compatible with coupe models or crosstour models

【Vehicle Compatibility】Headlights Assembly Compatible with 2008 2009 2010 2011 2012 Honda Accord Sedan 4-Door Halogen Models Only. Not compatible with coupe models or crosstour models

🚗【FITMENT】Headlight Assembly Fit for 2008 2009 2010 2011 2012 Honda Accord 4-Door Sedan models only. Bulbs are NOT included. High beam bulb type: 9005; low beam bulb type: 9006;Signal light:7528;Parking Light: 7528. OEM Part Number: 33150TA0A01, 33100TA0A01, HO2502130, HO2503130
Adjusting Headlight Aim for Optimal Visibility
After replacing your Honda Accord’s headlight assembly, proper beam alignment guarantees maximum road visibility while preventing glare that blinds oncoming drivers. Park facing a flat wall and activate your headlights to observe beam patterns. Insert a Phillips screwdriver into the vertical adjustment gear behind each assembly—clockwise rotation lowers the beam angle, counterclockwise raises it. For 2008-2012 models, use a 10mm wrench on the vertical bolt and a flathead screwdriver for horizontal teeth engagement. Position beam centers two inches above your marked wall reference point. The process is easiest to perform at night so you can directly observe the beam pattern on the wall as you adjust. Load your trunk with weight simulating passenger capacity to simulate real-world conditions. Monitor headlight brightness changes on the wall while adjusting, ensuring both driver and passenger beams align evenly. Use proper adjustment tools to prevent stripped gears during the alignment process. Consider upgrading to LED or HID options for improved illumination and reduced energy consumption during the replacement process.

OEM: Left Headlight Bracket: 71190-TVA-A00; Right Headlight Bracket: 71140-TVA-A00; Left Bumper Bracket: 71198-TVA-A01; Right Bumper Bracket: 71193-TVA-A01
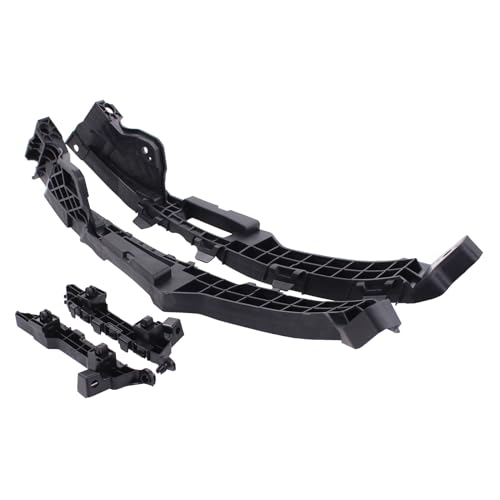
Replaces part numbers: 71190-TVA-A00, 71140-TVA-A00, 71198-TVA-A01, 71193-TVA-A01

Applicable for Honda Accord 2013-2017
Testing Your New Headlights
With alignment complete, verify your new headlights function correctly before returning your Honda Accord to regular operation. Begin bulb testing by activating each circuit systematically: engage low beams through the first top-row pin, test turn signals via the second pin, and confirm daytime running lights operate in both low-power mode (third pin) and full mode (bottom-right pin). All functions share the bottom-left ground connection. Conduct voltage verification using a multimeter at the headlight connector—you’ll need 12 volts present at the brown hot wire. Test the black wire for proper ground continuity. If circuits fail, inspect fuses with a test light while headlights are switched on. Check component ground location G201 behind the dashboard and examine the wiring harness under the hood for breaks. Like the process of removing the front bumper and grille on other vehicles, accessing your Honda’s electrical connections requires careful handling of clips and screws. The 8-pin connector layout at the back of the headlight assembly has empty spaces at the 1st and 7th positions, making it essential to identify the correct pins before testing.