To replace your Chevy Express headlight bulb, you’ll need to park on level ground, allow the engine to cool for 30 minutes, and remove either two Phillips screws or 10mm bolts securing the assembly. Pull the assembly forward, disconnect the electrical connector by pressing the tab, then twist the bulb counterclockwise to remove it. Install the new bulb wearing gloves to prevent oil contamination, reconnect the wiring, and reinstall the assembly. The complete process requires specific knowledge of your model year’s configuration and proper alignment techniques.
Tools and Materials You’ll Need
A successful Chevy Express headlight bulb replacement starts with gathering the right tools before you begin. You’ll need a 10mm socket with 3/8″ drive ratchet and extension set (1-1/2″ to 12″ lengths) for accessing headlight assembly bolts. Include both flat head and Phillips screwdrivers for removing plastic covers and retaining rings. A trim removal tool prevents damage to clips and panels during disassembly.
For safety precautions, wear gloves to avoid touching halogen bulb glass, which can cause premature failure. Proper tool organization guarantees your 20-30 minute installation proceeds smoothly. Keep your socket set, extensions, and screwdrivers within easy reach. Have your replacement bulb ready—typically H6054 (65/35 watt) or 9006 halogen models. LED options with plug-and-play connectors simplify installation, offering improved energy efficiency compared to traditional halogen lights. The installation includes an adjustable collar for proper bulb positioning in angled factory housings.

Package: 1 pair. Wire length: 5.19". For use with 12 - 24V. Easy install.

Professional appearance - this electrical pigtail is designed for a clean, professional look when installed

Ideal replacement - this headlight socket matches the fit and terminal count of the original equipment socket
Understanding Your Chevy Express Headlight Bulbs
Your Chevy Express uses specific bulb configurations that vary by model year and trim level. Models from 2003-2020 utilize 6052 sealed beam units for combined high/low functions, while 2015-2023 variants employ separate 9005 high beams and H11/H8/H9 low beams. You’ll find 9006 bulbs across multiple trims for low beam applications.
Standard halogen bulbs offer baseline performance, but LED replacements greatly enhance bulb brightness and bulb longevity. The SL2 LED delivers 1400 lumens at 14 watts, while Pro versions output 2400 lumens at 21 watts. Both operate at 6000K color temperature for improved nighttime visibility. When installing new bulbs, avoid touching the glass bulb to prevent premature burnout and ensure proper bulb alignment with the housing grooves.
LED upgrades replace halogen systems only—never attempt installation on factory HID-equipped models. Plug-and-play connectors guarantee polarity-specific fitment, maintaining compatibility across 2000-2025 Express models without modifications. Consider choosing between OEM replacements and aftermarket upgrades based on your budget and desired performance level. The license plate lights consistently use T10/194/168 bulbs across all model years from 2000 to 2023.
Preparing Your Vehicle for the Replacement
Before beginning any headlight bulb replacement, park your Express on level ground and engage the parking brake firmly. Turn off the engine completely and switch off your headlights. These safety precautions prevent accidental movement and electrical hazards during the procedure.
Allow adequate time for engine cooling—at least 30 minutes after operation. The engine bay reaches extreme temperatures that can cause burns.
Pull the interior hood release lever, then locate and release the front latch manually. Install the hood prop rod securely and verify stability before proceeding.
Clear any debris from the engine bay and position your tools nearby for easy access. Put on latex gloves to protect your hands from residual heat and prevent oil contamination on the replacement bulb’s glass surface. Gather your 10 mm socket or wrench along with any other necessary equipment before starting the replacement process.
Accessing the Headlight Assembly
Once you’ve completed the preparation steps, locate the fasteners securing the headlight assembly to determine your access method. For 2010-2017 models, you’ll find two Phillips screws on the metal ring above the headlight—remove only these top two screws from the four-screw configuration. Model variations from 2003-2021 typically use two 10mm bolts at the top bracket instead. Use a Phillips screwdriver for screw-type fasteners or a ratchet with 10mm socket for bolt-type assemblies.
After removing the appropriate fasteners, lean the metal ring forward on screw-equipped models or pull the entire headlight assembly away from the chassis on bolt-equipped versions. You may need to adjust positioning slightly to clear guide pins. Once loosened, the assembly will slide out, revealing the rear harness connections for bulb access. To protect the bulb and your hands from oils and dirt, consider wearing gloves during the removal and installation process. When selecting replacement bulbs, you’ll want to verify whether your model requires H11 or 9005 bulb types to ensure proper fit and performance. This replacement can be completed without opening the hood, making it a convenient roadside repair if necessary.

【Visual Enhancement】: The OKOENIEO H11 headlight bulb are 200% brighter than other halogen bulbs, providing drivers with a wider and farther field of vision. Offering a greater visibility, they allow drivers to spot deer, wildlife, falling rocks, or obstacles ahead of time, ensuring safer nighttime driving.

100% New & Genuine Osram Made in Germany - Pack of 2 bulbs.

⭐【Super Bright H11 Bulbs】Our H11 headlight bulbs deliver over 1000LM brightness and a 3800K color temperature, ensuring optimal visibility in foggy and rainy conditions. Upgrade your automotive headlight bulbs for safer nighttime driving.
Removing the Old Headlight Bulb
Start by disconnecting the electrical power to the headlight bulb to prevent accidental shorts or electrical shock. Press the tab on the connector and pull straight off the bulb base. The gray connector is for the low beam bulb, while the black connector is for the high beam to avoid blinding errors. Once disconnected, turn the bulb counterclockwise to free it from the housing. For passenger-side bulbs, line up the groove and press the release tab before extraction. Pull the bulb straight out, avoiding contact with any surrounding components.
Exercise proper bulb safety by never touching the glass portion of the new bulb—oils from your skin reduce bulb lifespan. Handle only the base during installation. Depending on your vehicle’s model year, you may need to remove the air filter box for better access to the headlight assembly. Store the old bulb in protective packaging for bulb disposal at designated recycling centers, as headlight bulbs contain materials requiring proper environmental handling. Replace bulbs in pairs since existing bulbs dim approximately 20% over their service life. After installation, test the lights to ensure both high and low beams are functioning properly before driving.

✔ Legal and safe on the road.Easy to install,just plug and play. KASLIGHT 5x7 7x6inch LED headlights yj headlights are designed to upgrade any sealed beam truck headlight to LED lights; provide more light,a whiter light,and ensure you do not have to deal with burn out headlights, ensuring driver's safety; bright 5inch x 7inch 6054 led head light provide you with both low and high beam technology with no modifications required.
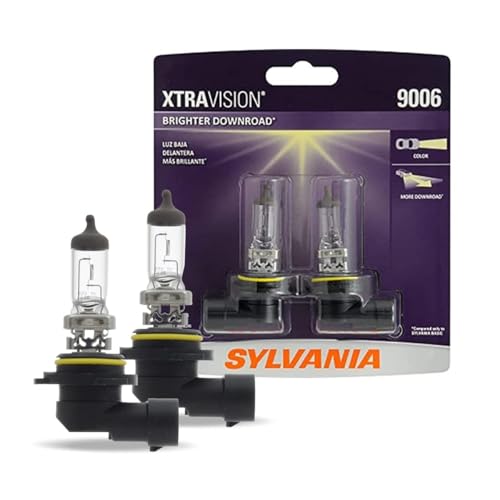
Lights Dim Over Time, Replace In Pairs: Your lights are a pair, one is never turned on without the other. If one bulb burns out, the other isn't far behind. Replace your 9006 XtraVision Halogen bulbs in pairs for optimum performance

Lights Dim Over Time, Replace In Pairs: Your lights are a pair, one is never turned on without the other. If one bulb burns out, the other isn't far behind. Replace your 9007 XtraVision Halogen bulbs in pairs for optimum performance.
Installing the New Headlight Bulb
With the old bulb removed and properly stored, you’re ready to install the replacement. Position your new 9006 bulb nearby before starting. Examine the bulb base to identify the small alignment tab on top. For proper bulb alignment, match this tab with the corresponding slot in the housing. Push the bulb in firmly until it seats completely, then twist clockwise until it locks. You’ll feel it click into position.
Now attach the connector—gray for low beam, black for high beam. Never mix these, as incorrect pairing causes blinding issues. Press the tab button on the connector and slide it onto the bulb base until you hear an audible click, securing connection properly. Wear gloves to prevent skin oils from contacting the new bulb during installation. Similar to electrical connector procedures found in full headlight assembly replacements, ensure all connections are fully seated before proceeding. Repeat this process for both low and high beam bulbs before testing operation.

Lights Dim Over Time, Replace In Pairs: Your lights are a pair, one is never turned on without the other. If one bulb burns out, the other isn't far behind. Replace your 9006 SilverStar Halogen bulbs in pairs for optimum performance.

Lights Dim Over Time, Replace In Pairs: Your lights are a pair, one is never turned on without the other. If one bulb burns out, the other isn't far behind. Replace your 9006 Halogen bulbs in pairs for optimum performance.

[Ultra Bright White Light]: 9006/HB4 Halogen headlight bulb, filled with 25% xenon which lead to 80% more light output than standard bulbs. 4300K warm white light provides perfect light pattern and excellent performance.
Reassembling the Headlight Components
After confirming both bulbs operate correctly, begin reassembling the headlight assembly by sliding it underneath the radiator support at an upward angle. Match the guide pins with their corresponding holes, then align the two top bolt holes using a screwdriver for verification. Press the assembly firmly into the frame, ensuring it sits securely behind the support structure. Check horn clearance and verify the wiring harness won’t pinch during securing assembly.
Insert the two 10mm mounting bolts by hand to prevent cross-threading, then snug them evenly with a 10mm socket. Reconnect the electrical connectors—gray for low beam, black for high beam—by lifting both tabs simultaneously while pushing down. Install the retaining ring and secure all perimeter screws. Route the harness properly behind the frame to complete reassembling components. Consider selecting premium bulb brands that offer superior visibility and longevity for optimal headlight performance. Before final assembly, test the lights to ensure everything functions as expected.
Testing Your New Headlights
Once you’ve secured the headlight assembly back in place, verify proper operation before closing the hood. Turn on your headlights and check both low and high beams for consistent brightness. If either beam fails to illuminate, employ troubleshooting techniques starting with voltage measurement at the connector—you’ll need approximately 12V DC. Use your multimeter’s continuity mode to test the new bulb by touching probes to terminals; a beep confirms proper function. Verify bulb compatibility by comparing resistance readings between both sides—they should measure near zero ohms. If you’re experiencing persistent issues, inspect fuses in the panel and swap relays to isolate electrical problems. If the new fuse blows immediately after replacement, further electrical diagnosis by a professional may be necessary. Check for adequate bulb seating and ascertain no oils from handling compromised the installation. Before assuming a malfunction, ensure the electrical wiring harness is fully connected to eliminate connection-related issues. Regular headlight testing enhances the longevity of your vehicle’s lighting system and prevents costly repairs down the road.

Compatible with 1996-2021 Chevy Express 1500 2500 3500 4500: XFLHEHD express halogen headlights bulbs are 1:1 same designed as original stcok bulbs, can perfect fit for 1996 1997 1998 1999 2000 2001 2002 2003 2004 2005 2006 2007 2008 2009 2010 2011 2012 2013 2014 2015 2016 2017 2018 2019 2020 2021 chevy express 1500 2500 3500 4500 all models (Please check your express models before purchasing.)
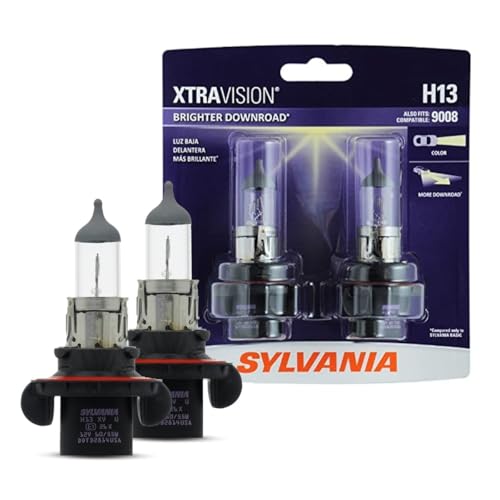
Lights Dim Over Time, Replace In Pairs: Your lights are a pair, one is never turned on without the other. If one bulb burns out, the other isn't far behind. Replace your H11 XtraVision Halogen bulbs in pairs for optimum performance.

Lights Dim Over Time, Replace In Pairs: Your lights are a pair, one is never turned on without the other. If one bulb burns out, the other isn't far behind. Replace your H7 XtraVision Halogen bulbs in pairs for optimum performance.