
To replace your Kia Soul headlight bulb, first disconnect the battery’s negative terminal and pop the hood. Locate the bulb assembly behind the headlight housing, twist the dust cap counterclockwise, and disconnect the electrical connector by squeezing its tabs. Release the retaining clip, pull the old bulb straight out, and insert the new H11 or 9005 bulb using gloves to avoid skin oils. Reconnect the connector until it clicks, secure the dust cap, and test all functions. The following sections provide detailed troubleshooting and alignment procedures.
Tools and Materials You’ll Need
Before you begin replacing your Kia Soul’s headlight bulb, gather a 10mm socket or wrench to remove the headlight assembly bolts, along with a flathead or Phillips screwdriver for accessing any clips or protective covers. You’ll need needle-nose pliers for loosening bulb holders and safety gloves to protect against sharp edges. For bulb compatibility concerns, verify whether your model requires H11 (low beam) or 9005 (high beam) bulbs by consulting your owner’s manual. Handle new bulbs with a clean cloth to prevent skin oils from damaging the glass. Tool selection tips include using plastic trim removal tools to avoid damaging clips and keeping a flashlight handy for visibility. Have a tissue available to grip and pull bulbs without directly touching them during installation. Organize small parts in containers, and consider electrical cleaner spray if connectors show corrosion. When upgrading beyond factory bulbs, research halogen, LED, and HID bulbs to understand which options best suit your visibility needs and budget.

Lights Dim Over Time, Replace In Pairs: Your lights are a pair, one is never turned on without the other. If one bulb burns out, the other isn't far behind. Replace your H7 XtraVision Halogen bulbs in pairs for optimum performance.

Perfect fit: For Kia Soul 2009, 2010, 2011, 2012, 2013, 2014, 2015, 2016, 2017, 2018, 2019, 2020 models specifically, guaranteeing a perfect fit and easy installation.
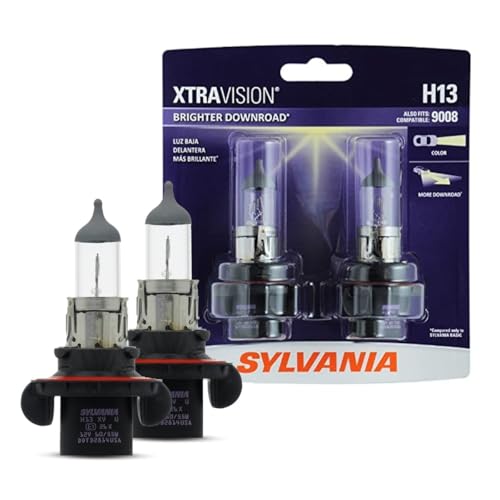
Lights Dim Over Time, Replace In Pairs: Your lights are a pair, one is never turned on without the other. If one bulb burns out, the other isn't far behind. Replace your H11 XtraVision Halogen bulbs in pairs for optimum performance.
Preparing Your Vehicle for Bulb Replacement
Proper vehicle preparation requires three critical safety steps to protect both you and your Kia Soul’s electrical system. First, turn off the ignition completely and remove the key to prevent electrical shock during bulb handling. Second, engage the parking brake on a flat, level surface to maintain stability. Third, pop the hood and secure it with the prop rod for unobstructed workspace organization.
Before beginning replacement, conduct a vehicle checkup by turning on the headlights to confirm which bulb requires replacement. Inspect the headlight assembly for cracked lenses or corroded connectors that need attention. Allow hot engine components to cool completely to prevent burns. Clear debris around the headlight housing to minimize contamination when accessing internal components. When handling the new bulb, avoid touching it with bare hands as oils can cause damage to the bulb’s surface. On the driver’s side low beam, you can loosen the fuse box without needing to unplug it for easier access to the bulb housing. To ensure consistent brightness, consider replacing bulbs in pairs during your maintenance. Disconnect the battery if your owner’s manual recommends it for enhanced electrical safety.
Accessing the Headlight Assembly
Once you’ve completed vehicle preparation, accessing the Kia Soul’s headlight assembly requires removing fasteners and disconnecting electrical connections in a specific sequence. Begin by locating two or three 10mm bolts securing the assembly, potentially accompanied by a single 12mm bolt at higher mounting points. Use a 10mm socket to remove side bolts first, then address the top 12mm bolt if present. For improved headlight access, you may need to loosen bumper clips or fender liner screws using trim removal tools and a Phillips screwdriver. Before assembly removal, disconnect the main electrical connector at the rear of the housing by pressing the release clip and pulling gently. To ensure optimal performance after replacement, avoid touching the bulb glass with bare fingers as this can cause premature burnout. Finally, depress plastic retention tabs while pulling the assembly forward to disengage it from body brackets. When disconnecting the connector, ensure you’ve identified the correct bulb type for your Kia Soul to guarantee proper replacement once the assembly is removed.

Lights Dim Over Time, Replace In Pairs: Your lights are a pair, one is never turned on without the other. If one bulb burns out, the other isn't far behind. Replace your 9003 XtraVision Halogen bulbs in pairs for optimum performance.
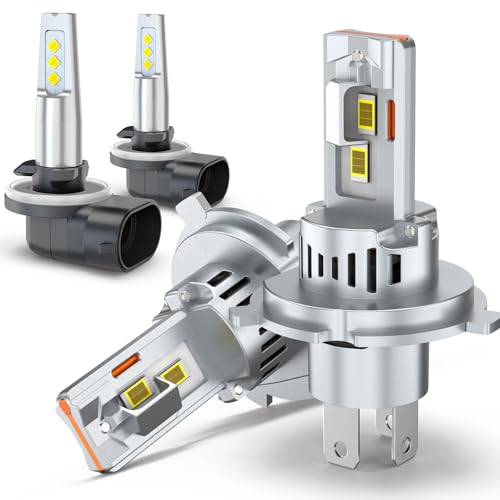
1:1 Halogen Replacement Design: CSMEVOO Lights engineered with an exact 1:1 size, base, and filament position of original halogen bulbs, this light kit achieves a perfect fit for your factory light housing and socket. No modifications, drilling, extra wiring, or professional tools are required for most vehicles – simply plug into your original socket and finish the installation within 10 minutes, making it a hassle-free halogen replacement solution.

High Power: Our car H7 bulb has a power of 55W, with good brightness expression, effectively extend the front lighting range and depth of illumination, in the night, curved roads, suburban areas or road sections without street lights, to enhance your field of vision
Removing the Old Bulb
With the headlight assembly freed from its mounting position, you’ll now work directly with the bulb housing at the rear of the unit. Twist the black round dust cap counterclockwise and set it aside. Locate the electrical connector and squeeze the locking tabs to disconnect it—pull straight away without tugging on wires. Identify the retaining clip or bracket; press down to release and lift it clear. Pull the bulb straight outward from the housing, noting any alignment tabs for identifying bulb types. Avoid touching the glass with bare fingers. Driver’s side bulbs may require retracting fender liners for clearance. Inspect the socket for corrosion and look for signs of oxidation that could affect beam pattern quality. Use gentle wiggling on stubborn components, ensuring proper alignment when handling replacement bulbs. Consider wearing safety gloves for handling to protect both the bulb and your hands during removal.

Get the best lighting performance and an increased visibility and comfort on the road compared to basic bulbs

Excellent Brightness: Equiped with filament from Austria, high purity quartz , and 28% more xenon , which lead to 20% more light output than original bulbs. The brightness even higher than Internation Standard.
Installing the New Bulb
Before handling the replacement bulb, slip on clean cotton or nitrile gloves to prevent skin oils from depositing on the glass envelope—these oils create hot spots that’ll greatly shorten bulb life or cause premature failure. Verify the new bulb matches your Kia Soul’s specifications. Orient the bulb by aligning its tabs and flat spots with the housing slots—proper bulb alignment guarantees correct seating. Insert the bulb gently into the socket without forcing it, then rotate clockwise until it locks. You’ll notice this bulb is larger than standard sizes used in some other vehicles. Push the electrical connector onto the bulb’s terminals firmly until you hear or feel a click, confirming secure socket connection. Install the dust cap by twisting clockwise or snapping it into position. Test functionality by activating your headlights before closing the hood.

✅ 【SUITABLE MODELS】Headlight assembly is compatible with 2010 2011 Kia Soul. Bulbs are not included. High/Low beam bulb type: H4*1; Signal Light: H21W*1; Side Marker...
Understanding Bulb Types for Your Kia Soul
Selecting the correct bulb type for your Kia Soul requires identifying your vehicle’s model year and headlight assembly configuration. Earlier models (2010-2011) typically use 9003/H4 bulbs, while 2012-2013 versions employ H7 types. Models from 2019 onward with projector assemblies commonly utilize H7 or 9005 bulbs for low and high beams.
Verify bulb compatibility by checking your owner’s manual or existing bulb markings. LED options like the 9005 SL2 Pro deliver 1400-2400 lumens output at 6000K color temperature, providing superior visibility compared to standard halogens. Ascertain your replacement meets SAE or DOT standards and matches connector type specifications. For projector headlights, confirm polarity orientation during installation. When evaluating aftermarket replacements, consider factors like light output measured in lumens, color temperature, durability, and ease of installation to ensure optimal performance. Some installations require anti-flicker modules or adapters for proper electrical system integration. Manufacturers like Sylvania, Philips, and HIKARI offer top-rated replacement bulbs designed for optimal beam pattern quality and ease of installation. Models from 2014 to 2019 offer LED options for enhancements that improve both visibility and energy efficiency.

Super Brightness: This light bulb adopts a 100-watt high-power design, which can provide stronger brightness and lighting effects. It produces a stronger beam than ordinary light bulbs, giving drivers better visibility at night or in adverse weather conditions.

Lights Dim Over Time, Replace In Pairs: Your lights are a pair, one is never turned on without the other. If one bulb burns out, the other isn't far behind. Replace your H7 SilverStar Halogen bulbs in pairs for optimum performance.

【Experience a 1200% Brighter Night】 Transform your drive with our advanced H7 light bulbs. Each H7 light bulb combo, equipped with 12 high-performance chips, delivers a blinding 70,000 lumens per set. Powered by the latest upgraded Z10 technology, it provides unparalleled road illumination—turning night into day for a safer, more confident, and utterly superior driving journey.
Proper Handling and Safety Precautions
Because working with automotive electrical systems and glass bulbs involves inherent risks, you must follow specific safety protocols before attempting headlight bulb replacement on your Kia Soul. First, engage the parking brake, turn off the engine, and disconnect the battery’s negative terminal to prevent electrical shock. These safety measures are non-negotiable when handling automotive lighting components.
For proper bulb handling, never touch halogen glass surfaces with bare fingers—skin oils cause overheating and potential explosion. Always allow existing bulbs to cool completely before removal and wear eye protection against glass fragments. Use only Kia-specified wattage ratings to prevent wiring damage or fuse failure. Ascertain all securing components lock fully to prevent moisture ingress, which damages headlamp assemblies. H7 bulbs feature a distinctive two-pronged plug fitting that must be properly aligned during installation. If you lack appropriate tools or experience, consult authorized Kia dealers immediately.
Additionally, avoid cleaning the headlamp lens with chemical solvents or strong detergents, as these substances can damage the lens surface and compromise visibility.
Reassembling and Testing Your Headlights
After completing all safety checks and installing your new bulb, you’ll now reassemble the headlight components in reverse order of disassembly. Secure dust caps by twisting clockwise until seated. Reconnect electrical connections firmly until you hear a definitive click, confirming proper harness engagement. Align the headlight assembly by positioning bottom push clips into bumper slots, then snap the unit into place. Insert mounting bolts and hand-tighten before torquing evenly with a 10mm socket. Verify headlight alignment by checking beam pattern against a flat surface—adjust using headlight adjusters if necessary. Before making any adjustments, ensure you’ve identified your vehicle’s lighting package type, as HID and halogen systems may have different alignment requirements. Test all functions: low beams, high beams, parking lights, and turn signals. Confirm no dashboard warning lights illuminate. Complete final inspection, ensuring flush fitment and secure fasteners before road testing. Before making any adjustments, check tire pressure and vehicle weight to ensure accurate headlight aiming. Proper beam pattern quality is essential for nighttime visibility and road safety during operation.
Troubleshooting Common Issues
Even with proper bulb installation, you’ll occasionally encounter headlight malfunctions that stem from underlying electrical or mechanical problems rather than simple bulb failure. Inspect the bulb connector for melting near the assembly—internal damage causes poor electrical contact and intermittent operation. Turn the bulb assembly counterclockwise, unlatch the clip, and examine the connector’s internal condition without damaging wire insulation. Check for crushed wires caused by pushing connectors too far during installation, which crimps insulation and creates intermittent faults.
Test relays controlling low beam circuits and verify fuse integrity, though some Soul models lack clearly documented headlight fuses. Use a multimeter to confirm voltage and continuity at connector pins. Corroded or loose pins represent common connector issues, while blown relays indicate electrical failures requiring component replacement rather than bulb changes. For optimal performance, ensure your bulb’s color temperature matches manufacturer specifications to avoid potential compatibility issues. For a more durable and waterproof connection, consider using crimp connectors and heat shrink to replace damaged wiring sections. If low beams fail while high beams function, a faulty relay is often the culprit and represents an easy replacement fix.


