To replace your Subaru’s headlights, you’ll need to access the headlight assembly by removing push clips and using a 10mm socket to detach mounting bolts. Once exposed, disconnect the electrical connector, release the spring retainer, and remove the old bulb by its plastic base to avoid contamination. Install the new bulb by aligning it with housing slots, secure the connector, and test functionality. Finally, adjust beam alignment on level ground 25 feet from a wall to guarantee proper cutoff lines and safety compliance. Model-specific variations and detailed calibration procedures follow below.
Gather Your Tools and Prepare Your Workspace
Before you begin replacing your Subaru’s headlights, you’ll need to assemble the proper tools and establish a safe working environment. Your tool selection should include a pocket screwdriver, 10mm socket with ratchet, trim tool set, safety glasses, and gloves. Position your vehicle on level ground, engage the parking brake, and apply wheel chocks for stability. Turn the steering wheel away from your working side to improve wheel well access. Proper workspace organization is critical—arrange adequate lighting to illuminate recessed components, clear surrounding obstacles, and prepare a clean surface for removed parts. Place a container nearby to collect screws and clips. Disconnect the battery if you’re working with electrical connections. Additionally, gather rubbing alcohol and a soft cloth to clean any bulbs you may touch during the replacement process. Handle plastic grommets and bulb glass with care to prevent damage during the removal and installation process. Avoid touching the glass surface of the bulb as oils from your skin can damage the xenon bulb and reduce its lifespan. Review your model’s specific procedures before starting work.

Fits Common Bulb Types: Works with H11、H9、H8、886、889、892、893、PG13、PGJ13、880、890、862、881、884、885、894、898、899 sockets. A direct fix for...
Access the Headlight Assembly
Accessing your Subaru’s headlight assembly requires systematic removal of several exterior components that obstruct direct access to the mounting hardware. Begin by identifying push clips along the bumper cover‘s top and bottom edges. Use a trim tool to release clip centers, then extract the outer clips. Remove plastic fasteners securing splash shields and any grille pieces blocking the headlight bay. Grasp the bumper cover at the fender edges and pull gently to dislodge it, exercising wiring precautions by disconnecting fog lamp connectors before full removal. Locate and remove mounting bolts using a 10mm socket, including those in the wheel well area. Wiggle the assembly to loosen it from the frame, then pull forward to access wiring connectors. Once exposed, you can disconnect the harness and locking ring to fully separate the assembly from the vehicle. For most Subaru Outback model years, you can access the bulbs through the inner fender or behind access doors without removing the entire headlight assembly. This methodical approach to headlight maintenance guarantees proper access without damaging components.
Locate and Expose the Bulb Socket
With the headlight assembly accessible, you’ll find the bulb socket positioned directly at the rear of the housing, visible from inside the engine bay. Align your view with the bulb’s front position to locate it precisely. Some models feature protective plastic or rubber covers that require counterclockwise rotation or unscrewing for removal.
Before proceeding with connector removal, verify the engine and lights are off. Depress the small clip or tab on the electrical connector while pulling it straight away from the socket. Note the connector’s orientation for proper reinstallation. To avoid oil contamination, wear gloves when handling bulbs and prevent direct contact with the glass surface.
Once disconnected, locate the socket’s locking clip. Depress or squeeze this clip carefully to release the socket from the assembly. Some configurations require counterclockwise rotation after releasing. Wear gloves to prevent bulb contamination during handling. Push down on the socket while removing it to ensure proper clip release.
Remove the Old Headlight Bulb
After exposing and disconnecting the bulb socket, you’re ready to extract the old headlight bulb from the assembly. Identify the spring retainer or locking clip securing the bulb. Push the spring clamp down and pivot it off its catch. Some bulb types require counterclockwise rotation of approximately 45 degrees to release from the housing. Grasp the bulb firmly by its plastic base—never touch the glass, as oil contamination reduces bulb longevity. Pull the bulb straight out with gentle wiggling if resistance occurs. Inspect the socket and connector for corrosion or damage before proceeding. Check retaining clips for wear and verify the housing is moisture-free. Different bulb types such as H7 and H11 may have varying removal procedures, so consult your model year specifications. To ensure consistent brightness and optimal performance, consider replacing bulbs in pairs so both headlights maintain uniform illumination. This inspection prevents premature failure and maintains ideal performance when installing the replacement bulb. Work in a well-lit area to ensure better visibility during the removal process.

Lights Dim Over Time, Replace In Pairs: Your lights are a pair, one is never turned on without the other. If one bulb burns out, the other isn't far behind. Replace your H7 XtraVision Halogen bulbs in pairs for optimum performance.

【Visual Enhancement】: The OKOENIEO H7 halogen bulbs are 200% brighter than other halogen bulbs, providing drivers with a wider and farther field of vision. Offering a greater visibility, they allow drivers to spot deer, wildlife, falling rocks, or obstacles ahead of time, ensuring safer nighttime driving.

800% Brighter Night Vision Powered by advanced chip technology, Marsauto H7 bulbs deliver 8x the brightness of standard halogen bulbs, producing crisp 6500K white light for enhanced visibility and faster reaction time—whether driving at night or in low-light conditions.
Install the New Bulb Properly
Proper bulb installation begins with careful alignment of the replacement component to prevent damage and guarantee peak performance. Match the bulb’s tabs or notches with the housing slots, then push straight into the socket without forcing. Rotate the base 45 to 90 degrees until it locks securely. Always handle bulbs by their plastic connector—never touch the glass, as skin oils cause premature failure. Use gloves or a clean cloth during installation.
Engage spring clips or locking tabs to secure the bulb, ensuring the retainer sits flush against the base. Slide the electrical connector onto the bulb until it clicks, verifying proper orientation for reliable electrical connection. Confirm bulb fitment by checking that it doesn’t wiggle in the socket. Test headlight function before reassembling access covers. Different bulb types like H7 and D1S serve various headlight systems and model years. Consider replacing headlight bulbs in pairs to maintain consistent light output and color temperature across both sides of your vehicle.

Lights Dim Over Time, Replace In Pairs: Your lights are a pair, one is never turned on without the other. If one bulb burns out, the other isn't far behind. Replace your 9003 XtraVision Halogen bulbs in pairs for optimum performance.

⭐【Super Bright H11 Bulbs】Our H11 headlight bulbs deliver over 1000LM brightness and a 3800K color temperature, ensuring optimal visibility in foggy and rainy conditions. Upgrade your automotive headlight bulbs for safer nighttime driving.

Reassemble the Headlight Components
Once you’ve installed the new bulb, reassembly requires methodical attention to component alignment and fastener sequencing. Align the headlight assembly with mounting points, positioning plastic guides into corresponding holes. Confirm the bottom edge slides into the bumper cover channel to prevent gaps. Hand-thread bolts initially to avoid cross-threading, then tighten the four main bolts with a 10mm socket wrench. Install push clips sequentially—outer clip first, then lock the center. Reattach the bumper bracket, aligning plastic studs with frame holes. Tuck the inner fender liner behind the bumper cover, securing it with original fasteners. Reinstall windshield washer tubes and air intake components, confirming no pinching occurs. Handle the bulb by its base only during any final adjustments to avoid reducing bulb life from glass contact. Before reconnecting the battery, ensure you reconnect wiring harnesses to restore electrical function to the headlight assembly. Verify headlight compatibility by confirming stable fitment without movement. Check all reassembly techniques by validating proper bolt torque and clip engagement before reconnecting the battery. After completing reassembly, turn on headlights to confirm the new bulb is functioning properly.
Test Your New Headlights
Testing your newly installed headlights requires systematic verification across multiple operational modes to ascertain proper function and safety compliance. Begin with a visual inspection in a dark environment to assess headlight brightness and beam pattern clarity. Switch between low and high beams while stationary, checking for flickering, dimming, or irregular emission that indicates installation issues. Verify all wiring connections are secure and free from corrosion. Project the beam onto a flat vertical surface to confirm sharp cutoff lines without excessive glare. A simple brightness comparison test can demonstrate the significant improvement between your new LED bulbs and the old halogen bulbs, even in daylight conditions. Consider checking your vehicle’s color temperature to ensure optimal visibility and aesthetic consistency. To verify proper alignment, the brightest part of the beam should sit slightly below the horizontal reference line when projected onto a wall. If your Subaru features adaptive headlights, test pivot response during turns. Access diagnostic tools to scan for trouble codes and verify steering-responsive features are properly calibrated. Document all test results to validate repair completeness.
![True Mods H6054 H4 LED Headlight Wiring Harness [Negative Switched Conversion] [Fused] Universal H4 Head Light Relay Harness Kit for 9003 H6024 5x7 7x6 4x6 Subaru Toyota Jeep Sealed Beam Headlamp](https://m.media-amazon.com/images/I/51+wV9S2Q4L._SL500_.jpg)
YOUR VEHICLE NEEDS THIS - Swapping out old headlights for LED conversions on negative switched vehicles like Toyota, Subaru, Mitsubishi, or Suzuki, is not a simple job. But with our plug-and-play universal dual H4 headlight relay harness kit for high/low beam it can be! The compatible sockets include: 7x6 5x7 H6024 (2D1 H6054 H5054 H6054LL 6014 6052 6053)|H6024 (2D1)|4x6 6x4 (H4651, H4652, H4656, H4666, H6545)|H5006 (2C1) sealed beam headlights and more!

FIX DIM HEADLIGHTS & IMPROVE LIGHT OUTPUT: Upgrade your old factory headlight wiring with this H4 LED headlight relay harness kit. Fix common issues including dim headlights, flickering headlights, voltage drop, weak high beam/low beam performance and insufficient power supply. This fused relay wiring harness delivers stable battery power directly to your H6054 LED headlights, improving brightness and reliability during night driving.

【NO GLARE PERFECT BEAM PATTERN】Engineered to precisely match the OEM halogen filament position with a sharp cutoff line. These 9005 H11 LED bulbs deliver a focused, ultra-wide illumination range without creating dark spots or blinding oncoming traffic, ensuring compliant road safety for daily night driving.
Adjust Beam Alignment for Safety
After confirming your new headlights function correctly, you must calibrate beam alignment to meet safety standards and prevent hazardous glare for oncoming traffic. Park your Subaru on level ground 25 feet from a wall, guaranteeing parallel positioning. Measure and mark the centerline height of each headlight projector onto the wall using painter’s tape. Create a horizontal reference line, then mark a second line 3 inches below for target beam placement—this guarantees beam safety compliance.
Locate the vertical adjustment bolt (typically 8mm or 10mm) on each headlight assembly. Turn clockwise to raise or counterclockwise to lower the beam cutoff. Adjust until the top edge aligns just below your lower reference mark. For horizontal centering, access the lateral adjustment screw and align the beam pattern with your vertical tape marks, maximizing alignment accuracy and road illumination. For improved precision during this process, consider using headlight aiming tools to verify your adjustments meet professional standards. Ensure proper tire pressure and maintain a full gas tank during adjustments to keep your vehicle level for precise beam calibration. Using an impact wrench can help speed up the adjustment process when working with the adjustment bolts.
Model-Specific Tips for Subaru Vehicles
Different Subaru models require distinct approaches to headlight replacement, with component accessibility and bulb retention mechanisms varying considerably across model lines and production years.
On the Crosstrek, you’ll twist a bulb cover counterclockwise and release the connector by pushing a side tab. The 2006 Forester’s driver’s side demands battery repositioning—loosen 10mm bolts to shift components without full removal. For 2014-2018 Outback and Legacy Limited/Touring trims with HID systems, rotate the silver motor control 90 degrees, then manipulate two spring clips by pushing in and sliding upward.
Model variations extend to bulb compatibility: H11/H8/H9 halogens serve most applications, while D1S/D2S HIDs equip premium trims. Confirm exact specifications before purchasing, as socket designs and retention clips differ between generations, preventing universal fitment across the Subaru lineup. Proper headlight beam alignment ensures optimal visibility and safety on night drives after replacement. When upgrading between different model years, compatibility solutions like the 15-17 Headlight Adapter Harness can simplify installation by addressing connector differences.

KIT CONTENTS: Each headlight restoration kit includes (8) Step 1 Oxidation Removing Wipes, (1) Step 2 Sanding Kit, and (2) Step 3 Ceramic Coating Wipes
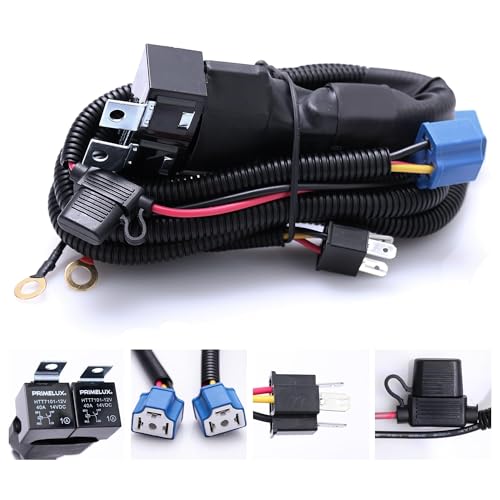
Universal Compatibility: Our h4 headlight harness is designed to work with both positive and negative switched headlight systems. The included adapter harness pack ensures compatibility with non-standard H4 sockets, seamlessly fitting our H4 plug
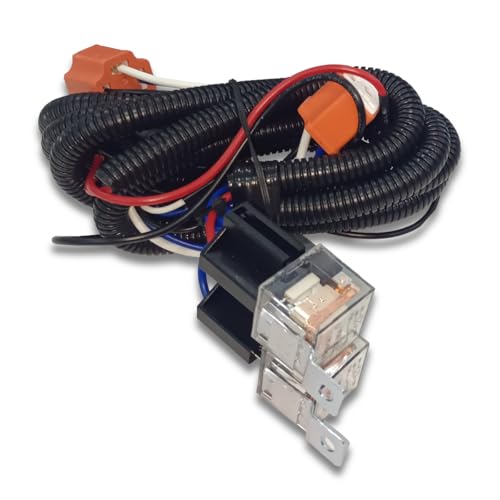
【Function】:This headlight relay harness is designed to fix dim headlights, flashing headlights, feedback power, headlight failures when using far/low lights, etc.