
To replace your Chrysler 300 headlight bulb, you’ll first disconnect the negative battery terminal for safety. On the passenger side, you can access the bulb directly by twisting off the dust cover counterclockwise behind the headlight assembly. The driver side requires removing the air filter housing using an 8mm socket before accessing the bulb. Disconnect the wiring harness, rotate the bulb counterclockwise to remove it, then install your new bulb by handling only the base. For thorough guidance on bulb types, testing procedures, and model-specific variations, explore the complete process below.
Tools and Materials You’ll Need
Before you begin replacing your Chrysler 300 headlight bulb, gather the essential hand tools to guarantee efficient work without interruptions. You’ll need a 10mm socket with ratchet wrench for removing headlight assembly bolts, plus 8mm and 7mm socket sizes for bumper components and grille fasteners. Include socket extensions to reach recessed bolts effectively. A trim tool set prevents damage when removing clips and panels, while a flat blade screwdriver helps disengage stubborn clips.
Don’t overlook safety equipment: wear gloves to protect bulbs from skin oils and your hands during work, plus safety glasses to shield eyes from debris. Have the correct replacement bulb—typically 9012 for low beams—and consider keeping replacement clips, dielectric grease, and a microfiber cloth on hand for proper installation. You’ll also need a flathead screwdriver for loosening the intake hose clamp to access the headlamp assembly.

DURABLE CR-V STEEL: Made of forged and heat-treated chrome vanadium steel for lasting strength and extra service life. Polished and chrome plated finish provides strong corrosion resistance, grease or stain can easily cleaned on it. Lettering marks are convenient for you to identify 10mm wrench quickly.

SMALL BUT ENOUGH FOR YOU - Mini socket set Includes 10 Cr-V 1/4" Metric Sockets 4mm, 5mm, 6mm, 7mm, 8mm, 9mm, 10mm, 11mm, 12mm, 13mm on 10 collecting holders, each socket is labeled with the size which makes organizing easy. 1pcs 1/4" 24-teeth ratchet handle; 1pcs 4'' Extension bars.

❤Practical Size and Packaging: Each purchase includes 1 Pcs of 10mm socket screwdriver. The shaft length is 84mm/3.31 inches, and the handle length is 109mm/4.29 inches. Before purchasing, please measure the diameter of the nut to select the appropriate size.
Preparing Your Vehicle for Bulb Replacement
With your tools assembled, you’re ready to prepare the workspace and vehicle for safe bulb replacement. Position your Chrysler 300 on level ground and engage the parking brake. Turn off the ignition and remove the key to guarantee vehicle safety. If you’ve recently used the headlights, allow them to cool completely before proceeding.
For electrical preparation, disconnect the negative battery terminal to prevent electrical shorts. Verify all electrical systems are off, including interior lights and accessories. Put on safety gloves and glasses to protect against sharp edges.
Clear debris around the headlight assembly using a clean cloth. Guarantee adequate workspace lighting to see components clearly. Keep replacement bulbs in their original packaging until installation, and never touch the glass surface with bare hands—oils reduce bulb lifespan. Most headlight bulb replacements can be completed in 10-15 minutes with the proper preparation and tools. Be gentle during the removal process to avoid damaging clips or bumper parts that may be encountered during access. The right side headlight bulb is accessible without removing parts, while the left side requires airbox removal for proper access.
Accessing the Passenger Side Headlight Bulb
Accessing the passenger side headlight bulb requires considerably less effort than the driver side, as you won’t need to remove the air filter housing or disconnect multiple components. You’ll find direct access to the bulb from behind the headlight assembly. Start by locating the round plastic dust cover at the rear of the housing. Twist it counterclockwise to remove, exposing the bulb socket. No specialized tools are necessary for this process. Before beginning removal techniques, verify the engine has cooled and headlights are off to prevent burns. Wear gloves during the entire procedure—this bulb safety practice prevents skin oils from contaminating the bulb’s glass surface, which would cause premature failure and reduced lifespan. When selecting a replacement bulb, consider the differences in brightness, longevity, and color temperature between various bulb options to ensure optimal visibility and safety. Most modern vehicles, including the Chrysler 300, typically use an H11 bulb type for low beam headlights, so verify your vehicle’s specifications before purchasing a replacement.

Lights Dim Over Time, Replace In Pairs: Your lights are a pair, one is never turned on without the other. If one bulb burns out, the other isn't far behind. Replace your H11 XtraVision Halogen bulbs in pairs for optimum performance.

100% New & Genuine Osram Made in Germany - Pack of 2 bulbs.

【Visual Enhancement】: The OKOENIEO H11 headlight bulb are 200% brighter than other halogen bulbs, providing drivers with a wider and farther field of vision. Offering a greater visibility, they allow drivers to spot deer, wildlife, falling rocks, or obstacles ahead of time, ensuring safer nighttime driving.
Accessing the Driver Side Headlight Bulb
Unlike the passenger side, reaching the driver side headlight bulb demands removal of the air filter housing, which obstructs direct access to the bulb assembly. Use an 8mm socket and ratchet to unscrew the bolts securing the air box cover. Set the housing aside temporarily to clear workspace. Once removed, you’ll access the headlight assembly’s rear section. Twist off the dust cover to expose the bulb socket. Disconnect the wiring harness, then remove the bulb by twisting counterclockwise. Handle the replacement bulb with gloves to prevent oil contamination. Align the socket tabs correctly—they fit only one way. Reinstall the dust cover, then reposition the air filter housing. Secure all fasteners and test headlight function before finishing. Consider upgrading to LED headlight technology for improved visibility and longer-lasting performance compared to standard halogen bulbs. After completing the bulb replacement, consider applying a protective coating to maintain your headlights’ clarity and prevent oxidation over time. You may need to disconnect hoses to create additional clearance while working in the confined engine bay space.
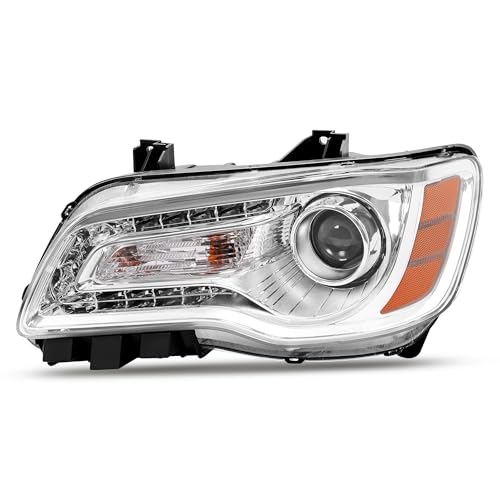
FITMENT: Headlights Assembly Compatible With 2011-2023 Chrysler 300. Bulb are included. Replacement for 68085417AF CH2502235 CH2502231.

Fit for: VLINCAR Headlight Assembly compatible with Chrysler 300C 2015 2016 2017 2018. Please ensure your vehicle’s model and year before purchasing in order to avoid errors.

💡【VEHICLE COMPATIBILITY】Headlights Assembly Compatible With 11-23 Chrysler 300. High/Low beam bulb type: 9012 (Included); Signal light:PSY24 (Included).
Removing the Old Bulb
Begin by twisting the plastic dust cover counterclockwise to release and remove it from the headlight assembly’s rear section. Set it aside to prevent loss. Locate the electrical connector attached to the bulb base and press the release tab to disconnect it—never pull on the wiring itself, as this damages the harness. Rotate the bulb assembly counterclockwise approximately 1/4 turn to detach it from the socket. For spring clip-retained bulbs, press the clip to release. Pull the bulb straight out without twisting. Common mistakes include forcing the bulb at an angle, which cracks the socket, and touching the glass with bare hands. For bulb safety, verify the headlight has cooled completely before handling and wear gloves to prevent skin oil contamination. Avoid direct contact with the bulb glass, as skin oils can cause premature failure of the headlight bulb. To maintain consistent lighting performance, remember to replace bulbs in pairs so both headlights provide equal brightness. When removing the old bulb, pull it straight out from the socket without twisting to avoid damaging the assembly.
Installing the New Bulb
With the old bulb removed, you’re ready to install the replacement. Handle the new bulb by its base only—oils from your fingers will shorten bulb life. Match the bulb tabs to the housing slots, ensuring correct bulb orientation; only one position fits. Insert the bulb straight into the socket without forcing, then turn or push until it locks. Confirm it’s seating securely with gentle pressure. Attach the electrical connector until it clicks, verifying locking tabs engage completely. Replace the dust cover by aligning it over the socket, then turn clockwise to seal against moisture. If you removed components like air filter housing, reinstall using your 8mm ratchet. Consider whether your vehicle requires DOT compliance when selecting replacement bulbs for your specific model. Different bulb types such as halogen, LED, and HID varieties offer varying brightness levels and lifespans to match your driving needs. Test both high and low beams, checking for proper illumination and alignment.

Lights Dim Over Time, Replace In Pairs: Your lights are a pair, one is never turned on without the other. If one bulb burns out, the other isn't far behind. Replace your H7 XtraVision Halogen bulbs in pairs for optimum performance.
Life time support,2pcs packaged; Replacement part number: 66340 42403 42302 (If there is any problem in the product,please contact us via Account Center,we will reply you within 24 hours)

10X Exceptional Brightness: 9012 bulb featuring 16 advanced chips per bulb and an incredible 45,000LM brightness per set. Powered by the latest technology, these headlights efficient illumination, ensuring optimal visibility and safety during nighttime drives
Choosing the Right Bulb Type for Your Chrysler 300
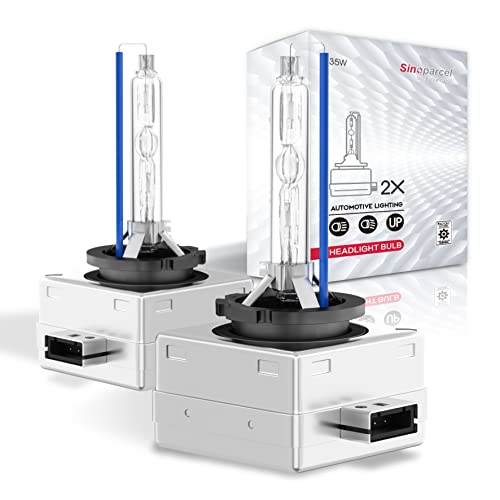
Selecting the correct replacement bulb for your Chrysler 300 requires identifying your vehicle’s year, trim level, and current headlight system. Models from 2005-2010 typically use D1S HID bulbs for low beams and 9005 for high beams in performance trims, while 2016-2023 versions often feature D3S/D3R HIDs. Base models across years commonly use 9006 halogen bulbs for low beams and 9005 for high beams.
To avoid bulb compatibility issues, remove your existing bulb first to verify the exact type and connector style. HID bulbs won’t fit halogen housings without modification. Consider color temperature choices ranging from 4300K (warm white) to 6000K (ice white) for HIDs, balancing appearance against light output. Proper beam patterns are essential to avoid blinding other drivers while maintaining optimal visibility for your Chrysler 300. Quality replacement HID bulbs are manufactured with German quartz and American salts to ensure reliable performance and longevity. LED replacements must match OEM voltage specifications and physical dimensions for proper fitment. When upgrading your lighting system, ensure any modifications comply with legal regulations regarding headlight modifications to maintain road safety and avoid potential violations.

Wider Visibility: The fog lights emit white light at the same point as the bulb, replacing the dim bulb.
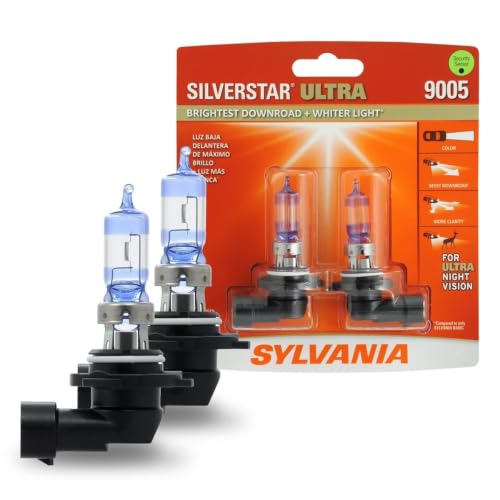
Lights Dim Over Time, Replace In Pairs: Be sure to replace both 9005 headlights at the same time for optimum performance. If one bulb burns out, the other isn't far behind. Replacing in pairs allows for premium visibility

Crisp 6500K Cool White Light: Enjoy bright, daylight-like clarity with the 6500K cool white 9005/HB3 light, perfect for both high beams and fog lights. This light enhances road visibility, helping drivers see obstacles and road signs more clearly, whether on dark highways or through thick fog
Testing and Final Checks
After installing your new headlight bulb, proper verification guarantees the replacement functions correctly and meets safety standards. Reconnect the wiring harness securely without forcing connections, then power on the headlights immediately. Observe the light beam pattern and brightness for consistency with OEM specifications. Check both low and high beam modes if applicable.
Wear gloves when handling the bulb—finger oils cause premature failure. Use a multimeter to confirm proper voltage at the connector. Ascertain the bulb retainer mechanism engages firmly to prevent movement during operation. Replace all dust covers to maintain housing integrity. Verify that the lumens output of your replacement bulb aligns with manufacturer recommendations for optimal visibility.
Conduct a nighttime road test to confirm proper illumination and beam alignment. Monitor for flickering during vehicle vibration. Check your dashboard for warning lights indicating electrical issues. Follow safety precautions throughout testing. Verify that the replacement bulb matches the original bulb style and wattage specifications for your Chrysler 300 model.


