
To replace your Chevy Cruze headlight bulb, first turn off the engine and engage the parking brake. Open the hood and locate the bulb socket at the rear of the headlight assembly. Disconnect the electrical connector by releasing the tabs, then twist the socket counterclockwise to remove it. Install the new H13 bulb using gloves to avoid oil contamination, rotate clockwise to lock, reconnect the wiring, and test both beams. The following sections cover troubleshooting and proper alignment techniques.
Preparing Your Vehicle for Headlight Replacement
Before working on your Chevy Cruze headlights, you must prioritize safety to prevent injury and vehicle damage. Turn off the engine completely and engage the parking brake on level ground. Allow the engine to cool down, preventing potential burns during the procedure. Verify headlights are switched off via the dashboard before beginning.
Locate the hood release lever inside your vehicle and pull until the hood pops. Find the secondary lever along the hood edge, lift it, and raise the hood fully. Secure it with the prop rod in the designated hole.
Complete your tool checklist by gathering rubber gloves, flat blade screwdriver, 7mm and 10mm sockets, trim tools, and a pick. Having a flashlight for visibility can be especially helpful when working in the engine compartment. For your Chevy Cruze, stock low beams use H11 bulb type while high beams use 9005 bulbs. When selecting replacement bulbs, ensure they meet DOT compliance standards to maintain safe and legal operation. These safety precautions and preparations guarantee efficient, injury-free headlight replacement.
Identifying the Correct H13 Bulb for Your Cruze
Your Chevy Cruze headlight system requires an H13 dual-filament bulb, also designated as 9008 in cross-reference catalogs. This bulb handles both high and low beam functions through separate filaments. For 2011-2015 models, H13 specifications remain consistent across all trim levels with standard halogen technology.
Verify bulb compatibility by checking your owner’s manual or inspecting the existing bulb’s base marking. Model years 2016-2019 also use H13/9008 bulbs, though headlamp configurations may vary between projector and non-projector housings. If your Cruze features a separate LED daytime running light cavity, this doesn’t affect your main H13 high/low beam requirement.
When selecting replacements, German-manufactured variants offer superior quality. LED upgrades are available in H13 format, with CANBUS-compatible options preventing dashboard error messages. Consider brightness levels and longevity when comparing halogen, LED, and HID bulb options to match your driving conditions and safety needs. Always confirm fitment before purchasing. Important factors such as color temperature preferences and beam pattern quality should guide your selection of replacement bulbs. Consult the bulb size chart for your specific model year to ensure you select the correct replacement specifications.

Lights Dim Over Time, Replace In Pairs: Your lights are a pair, one is never turned on without the other. If one bulb burns out, the other isn't far behind. Replace your H13 Halogen bulbs in pairs for optimum performance.

【Visual Enhancement】: The OKOENIEO 9008/H13 halogen bulbs are 200% brighter than other halogen bulbs, providing drivers with a wider and farther field of vision. Offering a greater visibility, they allow drivers to spot deer, wildlife, falling rocks, or obstacles ahead of time, ensuring safer nighttime driving.
Accessing the Headlight Socket From Under the Hood
Once you’ve confirmed the correct H13 bulb replacement, park your Cruze on level ground and engage the parking brake. Turn off the engine completely before beginning this headlight maintenance procedure. Lift the hood using the latch positioned to the right side, then secure it with the prop rod.
For troubleshooting tips, the passenger side offers considerably more working space than the driver side, where the washer fluid filler neck restricts hand entry. Locate the green or white connector plug on the headlight assembly’s rear. Pull the gray slide piece backward, then press the center tab to release. You won’t need to remove the entire headlight assembly—simply reach behind the housing and twist the bulb socket counterclockwise to access it directly.
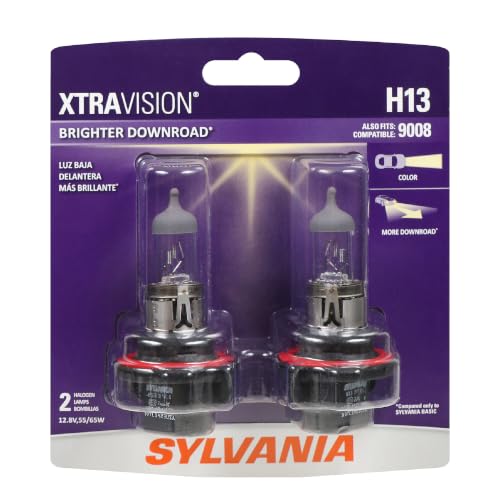
Lights Dim Over Time, Replace In Pairs: Your lights are a pair, one is never turned on without the other. If one bulb burns out, the other isn't far behind. Replace your H11 XtraVision Halogen bulbs in pairs for optimum performance.

AUXITO 9008 LED bulbs let you achieve unparalleled nighttime safety with 9 times the brightness of halogen bulbs—provides a wider and farther view, helping you detect hazards like rocks or deer earlier on dark country roads
Removing the Old Headlight Bulb
Grasp the bulb socket firmly and rotate it counterclockwise approximately one quarter turn until it stops. Pull the entire socket assembly straight out from the headlight housing. Once extracted, disconnect the electrical connector by pulling the white tab backward to release it, then press the green tab to detach. If resistance occurs, use a small screwdriver to press the locking tab. Remove the old H13 bulb by pulling it straight out from the socket, verifying that the gasket detaches with it. Safety precautions require handling the bulb with clean hands or gloves to prevent oil contamination on the glass surface. If you accidentally touch the bulb, clean it immediately to avoid premature failure. Proper bulb handling protects both the component and guarantees peak performance of your replacement. After removal, check the bulb for any serial numbers or specs that may be needed when purchasing a replacement at a parts store. Consider comparing color temperature options to determine whether you prefer standard halogen output or a different light appearance for your replacement bulb. To maintain long-term headlight clarity, you may also want to perform protective clear coat maintenance on the lens to prevent oxidation and yellowing over time.

Standard Style, 5500K Warm White, lumens is 2 times higher than ordinary halogen bulbs, get up to 250% more light on the road compared to stock halogen lamp bulb, without...
Installing the New H13 Bulb Properly
Before inserting the new H13 bulb, verify its compatibility by checking your owner’s manual or comparing it against the old bulb’s markings—you’ll find either H13 or 9008 designations, which are interchangeable. Handle the bulb carefully using gloves or clean cloth to prevent oil transfer from your fingers, which causes premature burnout. Clean with an alcohol wipe if skin contact occurs.
Proper bulb orientation is critical for correct beam patterns. Line up the three alignment points on the socket with the headlight assembly slots, ensuring the notch faces upward. Insert the bulb straight until fully seated, then rotate 30 degrees clockwise for a secure installation. Push the lock tab flush and verify the bulb doesn’t wiggle. Test both high and low beam functions immediately to confirm proper operation. For optimal visibility and longevity, ensure your replacement bulb meets DOT compliance standards to maintain safe driving performance.

Lights Dim Over Time, Replace In Pairs: Be sure to replace both H13 headlights at the same time for optimum performance. If one bulb burns out, the other isn't far behind. Replacing in pairs allows for premium visibility.

1500% Brighter:SEALIGHT H13/9008 bulbs for using the advanced chip technology with 90,000LM,deliver an 1500% brightness boost. Together, they output 90,000LM per pair in 6500K cool white. light bulbs super focused beam lights up the road 15 times brighter than bulbs, greatly improving nighttime visibility
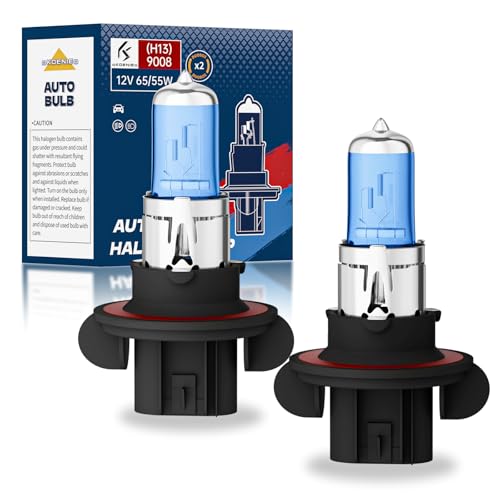
【Visual Enhancement】: The OKOENIEO 9008/H13 halogen bulbs are 200% brighter than other halogen bulbs, providing drivers with a wider and farther field of vision. Offering a greater visibility, they allow drivers to spot wildlife, falling rocks, or obstacles ahead of time, ensuring safer driving in all conditions.
Reconnecting the Wiring Harness
With the new H13 bulb securely locked into the headlight assembly, you’re ready to restore electrical power by reconnecting the wiring harness. First, verify correct orientation by aligning the connector’s keying features with the bulb socket—never force the connection. Inspect the pins for corrosion, bending, or melting before proceeding. If defects exist, clean with electrical contact cleaner or replace the connector.
Push the harness connector firmly onto the bulb base until you hear or feel the retention tab click into place. Confirm the insulating boot seats completely around the connection to maintain the moisture seal. During reconnection, ensure the connector alignment features match properly to prevent damage to the electrical components. Test functionality by cycling through low beam, high beam, and flash-to-pass modes. Check for stable operation and verify no heat or unusual odors develop at the electrical connections during the first few minutes of use. For optimal nighttime visibility and consistent illumination, consider replacing both headlight bulbs simultaneously to ensure matched brightness levels measured in lumens.
Reassembling the Headlight Socket
After confirming electrical functionality, you’ll now secure the new bulb within the headlight assembly housing. Position the bulb tabs into matching slots within the socket, then twist clockwise until it stops rotating. Avoid touching the glass portion during insertion. Make certain the bulb seal seats properly in the housing groove for best socket sealing.
Engage the retaining clip or lock tab on the bulb socket. Push down on the connector lock with your thumb or a straight blade screwdriver until you hear an audible snap. Confirm the bulb doesn’t wiggle after securing clips engage. Applying dielectric grease on connections will help protect against corrosion and ensure a reliable electrical connection.
Align the socket cover over the bulb and housing, twisting clockwise to lock. Check for even seating around the perimeter, making sure the cover seals tightly against dust and moisture infiltration. Start all screws before tightening to ensure proper alignment of the socket cover with the housing. Verify that your replacement bulb features two filaments for proper low and high beam functionality.
Testing Your New Headlight Bulbs
Once you’ve installed the replacement bulb and secured all components, verify proper operation through systematic testing procedures. Turn on your ignition and activate the headlights to assess bulb performance. Test both low and high beam functions individually, confirming bright, steady illumination without flickering. If your Cruze features daytime running lights, verify they operate at reduced voltage settings.
Should issues persist, apply troubleshooting tips: use a multimeter to measure socket voltage (should read near 12 volts), check headlight fuses for continuity, and inspect the wiring harness for damage. Test the old bulb’s continuity to confirm failure. If the new bulb doesn’t illuminate despite proper installation, examine relays by swapping with known good ones. Understanding adaptive headlight systems can help you determine if your vehicle has additional components affecting bulb operation. Labor costs and parts availability may vary depending on your vehicle model year and whether you’re replacing just the bulb or considering a full headlight assembly replacement. Always turn off the engine during troubleshooting to prevent electrical hazards. When working with electrical components, wear protective gloves to prevent injury from sharp edges or accidental contact with live circuits.

Easy Installation: 1:1 design, no external driver or connector required, plug and play

Compatible for Chevy Cruze 2011-2015:This bulb set is engineered to match Fit for Chevy Cruze models from 2011 to 2015, including 2 high/low beams. The package contains 2 units for direct replacement. Verify your vehicle’s model year before installation to ensure correct fit and seamless integration

Perfect Beam Pattern – The OXILAM H13 bulbs feature an ultra-thin 0.03-inch chip spacing that emulates halogen filament positioning, providing a 360° uniform beam with no dark spots, enhancing road visibility while minimizing glare for a safer driving experience