To restore headlights with toothpaste, you’ll need white toothpaste containing mild abrasives like silica or baking soda—avoid gel formulas. First, clean the lens thoroughly with automotive soap and water, then dry completely. Apply a quarter-sized amount of toothpaste to a microfiber cloth or toothbrush, spread it evenly across the headlight surface, and scrub in circular motions for 3-5 minutes. Rinse with clean water and dry. While this method offers temporary clarity improvement, the results typically last only 1-2 months without UV-protective sealant application, and there are important limitations you should understand.
Why Toothpaste Works for Headlight Restoration
When headlight lenses develop oxidation and yellowing, toothpaste serves as an effective restoration agent due to its engineered abrasive composition. The toothpaste ingredients—including silica and baking soda—function as mild abrasives that mechanically remove the degraded surface layer without damaging the underlying polycarbonate plastic. These abrasive properties enable the physical elimination of oxidized material through controlled polishing action.
Whitening formulations enhance effectiveness by incorporating peroxide, which chemically breaks down discoloration while the abrasives simultaneously buff the lens surface. This dual-action mechanism addresses both physical contamination and chemical degradation. The baking soda component provides additional cleaning functionality beyond simple abrasion, contributing to grime dissolution. When you apply toothpaste with circular buffing motions, you’re fundamentally replicating professional polishing techniques, restoring light transmission by creating a smoother, clearer surface finish. However, it’s important to note that UV-protective coating should be applied after toothpaste restoration to prevent rapid re-oxidation and maintain the improved headlight clarity over time. While toothpaste provides a quick restoration method, professional approaches using progressively finer grit sandpapers offer more durable results that resist future oxidation more effectively.
Materials and Tools You’ll Need
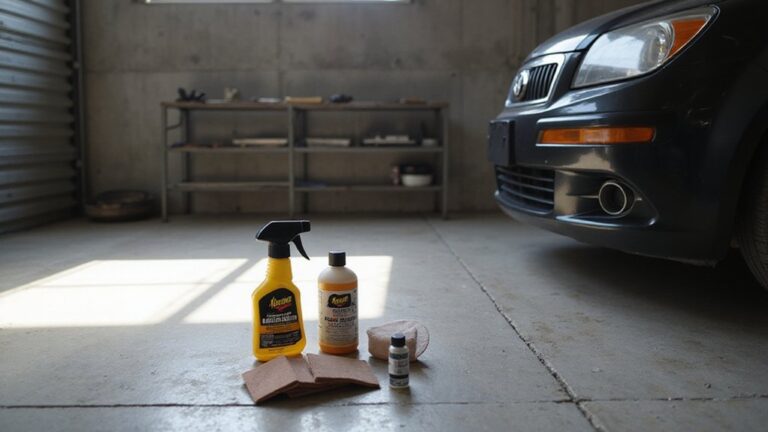
Successful headlight restoration requires six essential categories of materials: toothpaste formulations, application implements, preparation supplies, optional enhancement products, and finishing materials. For toothpaste, you’ll need white paste containing abrasives like baking soda and peroxide—typically $1 per tube. Your basic tools include an old toothbrush for scrubbing, soft microfiber cloths for buffing, and optionally a rotary polisher with buffing pad for enhanced results. Cleaning supplies consist of warm water, mild detergent or dish soap, a bucket or spray bottle, and additional water for rinsing. Optional enhancements include supplemental baking soda for increased grit, masking tape for protecting painted surfaces, and gloves for hand protection. Finishing materials require clean microfiber towels and optionally automotive wax or UV sealant for post-restoration protection and longevity. While toothpaste can provide a temporary solution, dedicated restoration products are recommended for effective, lasting results.

KIT INCLUDES: 1 - Disc Pad Holder, 3.25 in (8,2 cm) 6 - 3M Gold Sanding Discs 500 Grit, 3 in (7,6 cm) each 4 - 3M White Finishing Discs 800 Grit, 3 in (7,6 cm) each 1 - 3M Trizact Refining Disc 3000 Grit, 3 in (7,6 cm) 2 - 3M Quick Headlight Clear Co

KIT CONTENTS - Each headlight restoration kit includes (8) Step 1 Oxidation Removing Wipes, (1) Step 2 Sanding Kit, and (2) Step 3 Ceramic Coating Wipes.

KIT INCLUDES: 1 - 3M Trizact Refining Disc 1000 grit, 3 in/7.6 cm 1 - 3M Trizact Refining Disc 3000 grit, 3 in/7.6 cm 2 - 3M Quick Headlight Clear Coat Wipes 1 - Foam Pad with 3M Hookit Attachment, 3 in/7.6 cm 1- Disposable Glove
Preparing Your Headlights for Treatment
Proper surface preparation determines the effectiveness and longevity of toothpaste-based headlight restoration. Begin by cleaning lens surfaces thoroughly with automotive soap and water, removing all dirt, grime, and contaminants. Use a microfiber cloth to eliminate residue that could interfere with treatment adhesion. Dry the headlight completely, as moisture compromises restoration results.
Next, focus on masking edges by applying automotive masking tape around the headlight perimeter. This protects paint and trim from accidental abrasion during the toothpaste application process. Make certain tape adheres firmly to prevent seepage underneath. For best results, consider using purpose-built restoration kits alongside toothpaste methods to enhance your restoration outcomes.
Work in a shaded area with adequate lighting, avoiding direct sunlight that causes premature drying. Temperatures should remain above 32°F for peak material performance. Choose a location with ample sunlight for curing once the restoration process is complete. Inspect the prepared surface for cleanliness before proceeding with toothpaste application, making sure of uniform restoration outcomes.

DELIVERS SHARP PAINT LINES: Adhesive resists lifting and curling, prevents bleed through, helping to maintain sharp paint lines

TOUGH: Durable crepe paper backing helps resist solvents and moisture while minimizing bleed through
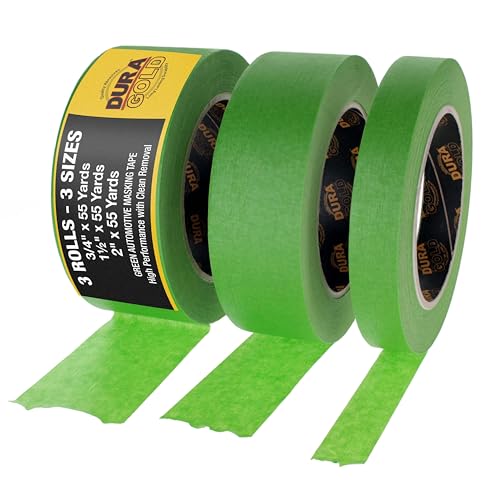
Professional-Grade Performance: This versatile, high-performance green automotive masking tape is made in Italy and built for the toughest jobs. It is designed for the collision repair industry, but is also suitable as a workhorse masking tape for a wide range of industries and applications. Ideal for use in body shops for auto refinishing and car detailing, for industrial metalworking and woodworking shops, DIY projects, and as a household painter's tape.
Applying Toothpaste to Your Headlights
After completing surface preparation, dispense a quarter-sized amount of regular white toothpaste onto a clean microfiber cloth or soft-bristled brush. Select whitening or abrasive toothpaste types for ideal oxidation removal—avoid gel formulas lacking abrasive particles. Spread the toothpaste evenly across the entire headlight lens, ensuring complete coverage of yellowed and foggy areas.
Apply moderate pressure using systematic application techniques, working the abrasive compound into the oxidized plastic layer. Focus on heavily degraded sections while maintaining consistent coverage. Scrub for three to five minutes minimum, allowing the mild abrasive to break down surface contamination. For severely oxidized headlights, extend scrubbing duration or prepare for a second application cycle. While toothpaste can provide temporary results, following up with clear coat protection offers more durable long-term clarity.
Avoid contact with surrounding paint and rubber trim during application to prevent unintended abrasion damage. You’ll notice grime removal is rapid, with immediate visual improvement appearing as you work the toothpaste across the lens surface.

KIT INCLUDES: 1 - Disc Pad Holder, 3.25 in (8,2 cm) 6 - 3M Gold Sanding Discs 500 Grit, 3 in (7,6 cm) each 4 - 3M White Finishing Discs 800 Grit, 3 in (7,6 cm) each 1 - 3M Trizact Refining Disc, 3 in (7,6 cm) 1 - 3M Rubbing Compound, 1 US fl oz (29 m

Instructions for Use: The first yellow drill attachment installed on the drill, cushion pad white surface and drill attachment black surface paste, use the first in the lamps on the spray water and then use the cleaning pad to dry in a circle, and then according to the grain size from small to large in order to use the waterproof abrasive disc on the lamps for polishing, and finally use the sponge polishing pad for polishing

The headlight repair kit can effectively eliminate scratches/cracks of car headlights and solve the problems of yellowing, blurring, oxidation, stains, aging, etc, makes it easy for you to bring back the crystal-clear shine of your vehicle's headlights, restore headlight clarity, increase visibility and safety. No need to replace the headlight, Cost Savings
How Long Will the Results Last?
Toothpaste’s mild abrasiveness removes surface contamination but lacks UV-protective sealants essential for sustained clarity. Without protective coatings, your headlights re-oxidize rapidly, necessitating frequent reapplication every few weeks. Professional restoration systems incorporating wet sanding, machine polishing, and UV-blocking sealants extend clarity for 1-3 years compared to toothpaste’s brief improvement window.
Consider toothpaste a short-term cosmetic intervention rather than permanent restoration. Hazy headlights block up to 80% of light output, significantly compromising nighttime driving safety. For extended performance and enhanced safety visibility, invest in professional-grade restoration kits with protective topcoats.
Risks and Drawbacks of the Toothpaste Method
While toothpaste offers a convenient household solution for headlight restoration, its abrasive formulation poses significant risks to polycarbonate lens surfaces. Toothpaste abrasiveness stems from uncalibrated particles (1-4 μm) that create micro-scratches, accelerating UV oxidation and degrading clarity faster than natural aging. These surface imperfections increase roughness, leading to patchy restoration and potentially permanent haze with repeated applications.
Chemical interactions between fluoride compounds and polycarbonate can cause discoloration, brittleness, and material degradation. Without UV-protective sealants, results typically last only 1-2 months before re-oxidation occurs. The method proves inadequate for severe yellowing or deep oxidation. Improper application techniques risk uneven results and adjacent paint damage. To minimize these risks, always wear protective gloves and safety glasses when attempting toothpaste restoration to avoid skin irritation and eye injury. For more durable results, consider applying UV headlight sealant after cleaning to help maintain clarity and prevent future yellowing. Toothpaste residues attract contaminants, while lack of post-treatment protection necessitates frequent reapplication, ultimately increasing labor costs beyond professional restoration kits.
Alternative Headlight Restoration Options
Beyond toothpaste’s limitations, several restoration methodologies deliver superior optical clarity and extended protection for oxidized polycarbonate headlight assemblies. Professional services employ specialized equipment and multi-step processes—inspection, sanding, polishing, UV-protective sealant application—yielding durable results with service guarantees. DIY restoration kits utilize graduated-grit sanding pads (P400-P2000) and polishing compounds, effectively addressing mild-to-moderate oxidation at lower cost points. Advanced ceramic coating kits, including brands like Cerakote, combine surface activators with high-durability protective layers extending clarity beyond 18 months while resisting UV degradation. Wet sanding methods require sequential abrasive progression followed by compound polishing and clear coat application, producing professional-grade finishes when executed properly. These alternatives consistently outperform quick-fix remedies like WD-40, which temporarily enhance appearance without removing oxidation or providing substantive UV resistance. Professional headlight restoration services in Northern Virginia and surrounding areas offer quick, high-quality restoration with service guarantees and customer perks that DIY methods cannot match. Turtle Wax’s lens restorer kits offer comprehensive solutions designed to remove surface degradation while restoring headlights to original clarity. Regular cleaning with appropriate products helps prevent future oxidation and maintains headlight clarity between restoration treatments.

Full-Cycle Sanding Support - The car drill polishing kit featuring 3 inch sanding discs range 60/80/120/240/400/800/1000/1500/2000/3000/5000/10000 grit sandpaper for dry and wet use, with orbital sander pads, imitation wool buffing pad, and upgraded backing pads for 1/4 and 1/8 inch shank. Seamlessly transition from sanding to polishing.

Complete Sanding & Polishing Kit: This 3 inch hook and loop sanding disc set master every project stage with 12 included grits (80/120/180/240/400/800/1000/1500/2000/3000/5000/10000 grit). Effortlessly tackle scratches and imperfections on cars, metal, wood, epoxy resin, and shower glass—from coarse grinding to mirror polishing. Ideal for auto shops, furniture makers, and DIYers

Comprehensive 130-Piece Kit: Contains A Variety Of Tools Including 3-Inch Wet Dry Sanding Discs (800, 1000, 1500, 2000, 3000, 5000 Grit, 20 pcs Each), Foam Pads*2, Disc Pad Holder*1, 2pcs Connecting Rods (1/4'' Shank, Cylindrical And Hexagonal), 3.3''Face Buffing Polishing Pads(Yellow*1and Red*1), Fiber Cloth*1, Manual Sanding Block*1, Masking Tape*1