To clean car headlight glass, you’ll first wash the lens with car soap and water, then apply a mild abrasive like toothpaste or baking soda paste using circular motions to remove light oxidation. For heavier yellowing, wet-sand progressively from 800 to 3000-grit sandpaper, keeping the surface wet throughout. Follow with a polishing compound applied in small circles using a microfiber cloth, then immediately seal with a UV-resistant clear coat to prevent future degradation. Understanding the complete restoration process guarantees long-lasting clarity and peak nighttime visibility.
Understanding Headlight Lens Materials and Damage Types
Modern vehicle headlights use one of two primary lens materials—glass or plastic—each with distinct performance characteristics that directly affect cleaning methods and maintenance requirements. Glass lenses deliver superior scratch resistance and optical clarity but are heavier and more fragile. Plastic lenses, mainly polycarbonate and acrylic, dominate modern vehicles due to lightweight construction and impact resistance.
You’ll encounter specific damage types depending on your lens materials. Plastic lenses commonly suffer from scratches, UV degradation causing yellowing, and chemical corrosion from automotive fluids. Glass lenses resist scratches effectively but crack more severely upon impact. Polycarbonate withstands thermal stress better than acrylic, which shows lower heat resistance. PMMA acrylic maintains over 92% light transmittance while resisting chemical corrosion under long-term outdoor exposure. Modern vehicles increasingly pair plastic lenses with projector headlight design to optimize light distribution and maintain brightness despite material limitations. To restore clarity to oxidized plastic lenses, progressive wet sanding with increasingly finer grits followed by polishing compounds can effectively remove yellowing and haziness. Understanding these material properties and their corresponding vulnerabilities allows you to select appropriate cleaning products and techniques that restore clarity without causing additional damage.
Essential Supplies and Tools for Headlight Cleaning
Before you begin any headlight restoration project, you’ll need to assemble the right combination of abrasives, cleaners, and protective coatings specific to your lens material. Professional kits typically include multi-grit sanding discs ranging from coarse (400-grit) to fine (3000-grit), paired with foam backing pads for progressive oxidation removal. You’ll require surface cleaning solutions to eliminate contaminants, masking tape to protect surrounding paint, and isopropyl alcohol for final prep. Essential supplies also include microfiber towels for buffing, water for wet-sanding heat reduction, and UV-blocking clear coats or ceramic sealants. Optional tools like electric palm sanders improve efficiency for high-volume work, while UV curing lamps accelerate coating hardness. Understanding UV exposure and oxidation helps you recognize why proper protective coatings are essential for long-term headlight clarity. Applying a clear coat or UV sealant after polishing protects the headlights from future oxidation and yellowing. These kits work effectively on various vehicle applications, making them versatile solutions for different headlight types. Assemble all materials before starting to guarantee uninterrupted workflow from preparation through protection.

Full-Cycle Sanding Support - The car drill polishing kit featuring 3 inch sanding discs range 60/80/120/240/400/800/1000/1500/2000/3000/5000/10000 grit sandpaper for dry and wet use, with orbital sander pads, imitation wool buffing pad, and upgraded backing pads for 1/4 and 1/8 inch shank. Seamlessly transition from sanding to polishing.

Restores Clarity & Enhances Visibility:This headlight restoration kit effectively removes yellowing, haze, and oxidation from headlight lenses. Helps improve nighttime visibility, giving your headlights a clearer and brighter appearance without the need for sanding or power tools.

KIT INCLUDES: 1 - Disc Pad Holder, 3.25 in (8,2 cm) 6 - 3M Gold Sanding Discs 500 Grit, 3 in (7,6 cm) each 4 - 3M White Finishing Discs 800 Grit, 3 in (7,6 cm) each 1 - 3M Trizact Refining Disc 3000 Grit, 3 in (7,6 cm) 2 - 3M Quick Headlight Clear Co
Basic Cleaning With Household Products
While professional restoration kits deliver thorough results, several household products can tackle light to moderate headlight haze without specialized equipment. Homemade cleaners like baking soda paste work effectively—mix more powder than water, then scrub in cross-hatch patterns to remove oxidation. WD-40 dissolves grease and fog after you’ve washed lenses with soap and water; spray evenly and wipe clean repeatedly for heavily clouded surfaces. Coca-Cola’s phosphoric acid breaks down dirt buildup when applied for five minutes before wiping. DEET-containing bug spray dissolves oily films on slightly cloudy lenses. Magic Eraser sponges offer another convenient option when wetted and scrubbed across headlight surfaces to remove markers and stains. These eco-friendly options provide temporary improvements and require multiple applications for best clarity. Always rinse thoroughly between treatments, protect surrounding paint with masking tape, and start with basic soapy water scrubbing to maximize each product’s effectiveness.
Using Toothpaste and Mild Abrasives for Light Oxidation
Toothpaste offers a practical starting point for removing light oxidation from headlight lenses due to its mild abrasive particles, which typically measure 1 to 4 microns in size. Apply a generous amount onto a premium wash mitt, then scrub the lens in circular motions to work the abrasives into the oxidized layer. Rinse frequently with water to remove loosened residue. Repeat until yellowing visibly reduces, then dry completely.
For enhanced toothpaste effectiveness, mix with baking soda to increase abrasion against tougher oxidation. However, understand that these mild abrasives aren’t automotive-graded, potentially causing micro-scratches that accelerate future degradation. Results typically last 1 to 2 months since toothpaste lacks UV-resistant properties. This DIY method improves headlight clarity without the expense of commercial restoration kits. Finish by applying protective coating or wax to prolong clarity and delay re-oxidation, which will maintain headlight transparency more effectively than toothpaste alone. If the fogginess persists after multiple cleaning applications, consider consulting a professional for more advanced restoration methods.
Wet Sanding Technique for Heavy Yellowing and Haze
When toothpaste and mild abrasives can’t penetrate heavy oxidation, wet sanding removes the degraded polycarbonate layer through controlled abrasion. You’ll need wet/dry sandpaper in progressive grits—800, 1000, 1500, 2000, and 3000—along with water or a water-isopropyl alcohol mixture for lubrication. Cut your sanding materials into quarters for ideal handling and tape off surrounding paint to prevent damage.
Sand in one consistent direction with light, even pressure, keeping both the headlight and paper continuously wet. Progress through each grit sequentially, rinsing frequently to remove debris. The surface will appear increasingly cloudy as you remove oxidation, then gradually clearer with finer grits. Spend a longer time on the finest grit to achieve the best results. Different headlight bulb technologies produce varying levels of brightness that can be affected by haze on the lens surface. Replace sandpaper after each headlight to maintain effectiveness. After wet sanding is complete, polishing with compounds will further refine and restore clarity to the headlight surface. Apply UV-resistant clear coat immediately after finishing to protect the exposed plastic from rapid re-oxidation.

Complete Restoration Kit: Package includes 100 pcs of 3 inch sanding discs with an assortment of grits (800, 1000, 2000, 3000, 5000, 20 pcs of each grit), a 1/4-inch shank, a backing plate, a foam buffing pad, a synthetic wool pad, 2 sponge pads.

【MEETS ALL YOUR NEEDS】Atosun high grit sand paper set contains 45pcs wet dry sand paper assortment in grit 120, 150, 180, 240, 320, 400, 600, 800, 1000, 1200, 1500, 2000, 2500, 3000, 5000, 3 sheets of each grit. Variety of sandpaper grit can meet most of your daily usage.

PERFORMANCE FOAM SANDPAPER ASSORTMENT PACK: Light scratch & mirror finish sand paper set (2000/3000/5000 Grit:1 sheets of each). Perfect for minor scratches, water spots, clear coat and paint refinement, or restore shine on auto body.
Polishing and Buffing for Crystal Clear Results
After removing oxidation through sanding or chemical treatments, you’ll transform the cloudy surface into crystal clarity through strategic polishing and buffing. Start by masking surrounding paint with painter’s tape to prevent accidental damage. Apply a plastic-formulated polishing compound sparingly to a microfiber cloth or buffing pad—excess product causes scratches. Use small, circular motions with steady pressure, continuously moving across the lens surface.
For mechanical buffing techniques, maintain consistent speed and flat pad contact. Begin slowly to spread compound, then increase speed for effective oxidation removal. Execute overlapping horizontal and vertical passes for uniform coverage. Keep the pad moving to avoid burning or grinding marks. Using progressively finer grit sandpaper before polishing ensures an even, smooth foundation for the buffing process.
After buffing, wipe residue completely with a fresh microfiber towel. Professional-quality results can be achieved at home by applying UV sealant immediately to lock in clarity and prevent future yellowing. Allow adequate curing time for maximum protection. This sealing step is critical, as headlight performance can decline by over 20% within three years without proper protection.
PLASTIC RESTORER FOR CARS: Tiny abrasives remove yellowing, oxidation, and light scratches to bring back the original shine and clarity of headlights, taillights, instrument clusters, and more

SEE CLEARLY: Renew your plastic without replacement with Meguiar's PlastX Plastic Cleaner. This clear plastic scratch remover quickly improves long-term wear and tear on a variety of uncoated plastics, leaving behind water-resistant polymers

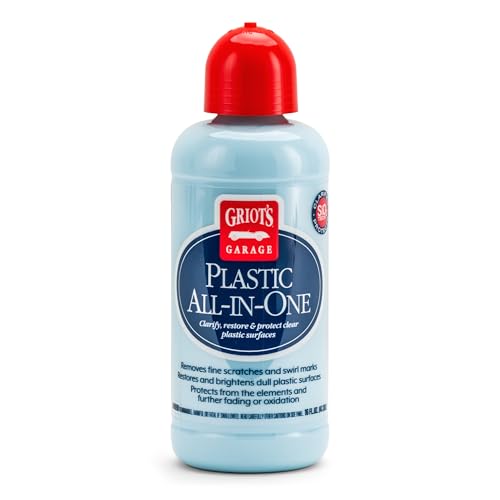
HEADLIGHT RESTORATION AND PROTECTION (GAP11516) – All-in-one formula cleans, restores, and protects plastic headlights, removing yellowing, oxidation, and haze for improved clarity and visibility
Cleaning Inside the Headlight Housing
While exterior lens restoration addresses surface-level cloudiness, interior contamination demands a different approach that requires accessing the sealed headlight housing. You’ll need to remove the entire assembly from your vehicle to access internal surfaces. Once removed, detach the back cover to expose the interior lens. Pour rubbing alcohol inside, swirl thoroughly to dissolve grime, then drain completely. For stubborn residue, use a soft microfiber cloth attached to magnets creating a cleaning tool that scrubs through vents. After cleaning, dry the housing with compressed air or low-heat hairdryer. Moisture prevention requires inspecting seals and gaskets for cracks before reassembly. Replace damaged seals to fix leaks and prevent moisture buildup that can lead to electrical issues and decreased brightness. Ventilation tips include checking that factory vents remain unblocked to balance air pressure properly. Consider adding desiccant packs inside to absorb residual moisture before resealing.
Applying Protective Coatings and UV Sealants
Once you’ve restored your headlights to clarity, protective coatings and UV sealants become essential barriers against future degradation. You’ll find ceramic options like Gtechniq G1 and CarPro Cquartz DLight provide hydrophobic, chemical-resistant layers lasting 1–5 years. For polycarbonate lenses, anti-UV plastic coatings prevent yellowing while improving heat resistance. Clear film applications such as Lamin-x offer physical protection against rocks and debris.
Before applying any protective coatings or UV sealants, thoroughly clean and polish your headlights. Follow product-specific curing times—some require multiple layers. Ceramic formulations need proper surface preparation for ideal adhesion, while films demand wrinkle-free installation using provided kits. Reapply every 1–5 years depending on environmental exposure. Cquartz Dlight kits provide UV protection for plastic surfaces and headlights. Avoid harsh chemicals during maintenance to preserve these protective layers and maintain maximum visibility.


10+ Years of Extreme Protection: Advanced ceramic coating for cars with 20H hardness – the toughest shield against UV rays, acid rain, and oxidation, keeping your paint flawless for over a decade.

WATERLESS CAR WASH: Say goodbye to traditional car washing methods! Our Car Wax Spray delivers a pristine shine without the need for anything else. Effortlessly clean, wax, and ceramic coat your vehicle in one simple step, achieving maximum gloss and shine.
Maintenance Tips to Keep Headlights Clear Longer
Protecting your headlights with sealants and coatings provides the foundation, but consistent maintenance determines how long that clarity lasts. Establish a cleaning frequency of every three months using mild car soap and microfiber cloths to prevent dirt buildup that degrades headlight lifespan. Integrate this cleaning into your regular vehicle washing routine, working in shaded areas to avoid streaking. Inspect lenses quarterly for early signs of oxidation, cracks, or yellowing—addressing issues promptly prevents extensive restoration work later. Reapply UV sealants annually or when water no longer beads on the surface. Avoid ammonia-based cleaners that accelerate plastic degradation. For stubborn grime between deep cleanings, use baking soda paste or non-gel toothpaste with gentle circular motions. Regular cleaning with these abrasive cleansers helps dissolve UV damage and buildup that causes fogginess over time. Upgrading to higher-quality replacement bulbs can also complement your maintenance efforts by providing better visibility during nighttime driving. After cleaning, apply car wax as protection to shield headlights against dirt and oxidation. This proactive approach maximizes headlight lifespan while maintaining ideal nighttime visibility and safety.

CLEAR LIGHTS: Meguiar's Clear Headlight Coating is the ultimate solution to maintain exceptional optical clarity on both new and restored headlights, ensuring optimal visibility and safety during nighttime driving

PREVENTS HEADLIGHT FADING: Protects headlights from damaging UV rays that cause yellowing, fading, and discoloration.

HEADLIGHT RESTORE MADE EASY: Professional-grade 2K clear coat spray with a build in adhesion promoter to restore clarity to yellowed, foggy, or scratched headlights for improved visibility and appearance.