To replace your Mercedes-Benz headlight bulb, first disconnect the battery and wear nitrile gloves to prevent skin oil contamination. Identify your bulb type—halogen (H7), xenon HID (D1S/D2S), or LED—using your owner’s manual. Access the bulb housing from the engine bay or wheel well depending on your model, twist the protective cover counterclockwise, disconnect the wiring connector, and install the new bulb by rotating clockwise until it clicks. Test functionality before reassembly, and explore model-specific procedures and troubleshooting techniques to guarantee peak performance.
Tools and Safety Precautions Before You Begin
Before replacing a Mercedes-Benz headlight bulb, you’ll need to gather the right tools and understand critical safety protocols to prevent injury and component damage.
Safety Gear
Wear nitrile or latex gloves to prevent skin oils from contaminating halogen bulbs, which causes hot spots and premature failure. Safety goggles protect your eyes from debris in tight engine bay spaces. Never touch bulb glass surfaces with bare skin.
Tool Selection
Assemble screwdrivers (flathead or pocket-sized), plastic trim removal tools, and socket wrenches (8mm, 10mm) for accessing obstructed bulb housings. Keep clean cloths for handling bulbs.
Critical Precautions
Ensure the engine is cool and the ignition is off before starting. Disconnect the battery to eliminate electrical hazards. Prop the hood securely and verify clean, dry conditions around connectors to prevent corrosion. Work in a well-lit area for better visibility during the replacement procedure.
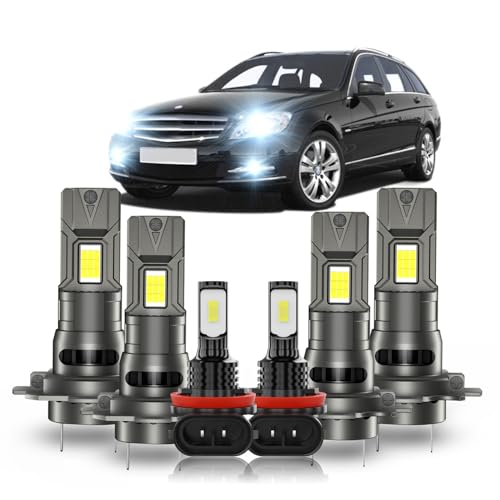
【600% BRIGHTER】This kit includes H7 high beam, H7 low beam and H8 fog light bulbs. Each PCKXAZL bulb features 18 high-performance 3570 CSP chips, delivering 600% higher brightness than stock halogen lamps. The 6000K pure white light offers strong light penetration and broad illumination, greatly upgrading your nighttime driving visibility.Note:Only compatible with vehicles fitted with factory halogen low & high beams; not for bi-xenon HID setups. Reach out to us if you need D1S HID bulbs.

For Mercedes-Benz Sprinter 1500 3500 2019 2020 2021 2022 2023.
Understanding Mercedes-Benz Headlight Bulb Types and Compatibility
With your tools assembled and safety protocols in place, you’ll need to identify the correct bulb type for your specific Mercedes-Benz model. Mercedes vehicles utilize three primary bulb technologies: halogen (H-prefix like H7, H11), xenon HID (D-prefix such as D1S, D2S), and LED variants. Your C300 typically uses H7 halogen or D1S xenon depending on trim and year, while S-Class models employ H1, H7, or D2R/D2S configurations.
Verify OEM specifications before purchasing replacement options, as incorrect bulbs compromise beam patterns and electrical systems. HID bulbs require compatible ballasts and can’t directly replace halogen without conversion kits. LED conversions demand proper heat dissipation and matching connectors. To avoid shortening your bulb’s lifespan, avoid touching the glass portion of the bulb during installation and removal. For 2020 C300 models, interior lighting components such as glove box, license plate, dome, and trunk lights all use T10 (194 168) bulbs based on original factory assemblies. Always check your owner’s manual or manufacturer bulb finder tools to guarantee compatibility with your specific model year and trim level.

Lights Dim Over Time, Replace In Pairs: Your lights are a pair, one is never turned on without the other. If one bulb burns out, the other isn't far behind. Replace your H7 XtraVision Halogen bulbs in pairs for optimum performance.

【Experience a Brighter Night】Upgrade with our advanced H7 light bulbs. Each set, featuring 12 high-performance chips, delivers a high lumens. Enhanced by the latest Z10 technology for significantly improved nighttime visibility and safer driving. Ideal for car owners looking for high-quality lights that deliver top performance

【500%+ Brighter & Fanless Cooling】 Upgrade your H7 bulbs with Marsauto M1C. Delivers 30,000LM of 6500K cool white light per pair – significantly brighter than standard bulbs. Fanless passive cooling system provides 0 dB quiet operation with no moving parts to fail. Perfect for long night highway driving. Tail Light Lenses
Accessing the Headlight Assembly on Your Mercedes-Benz
Accessing the headlight assembly on your Mercedes-Benz requires systematic disassembly of surrounding components that vary considerably by model and year. You’ll typically need to perform bumper removal or loosening, which involves undoing multiple bolts, clips, and push pins around the headlight area. Apply masking tape to protect paintwork during this process. The assembly techniques involve removing 8mm and 10mm bolts located at the top, bottom, and sides of the housing. You’ll find fasteners near the fender edge, under the bumper, and behind the wheel liner.
Before extracting the assembly, disconnect all electrical connectors at the rear by pressing safety clips or locking tabs. Once fasteners are removed, gently pull the assembly outward at approximately 45 degrees, maneuvering around retaining tabs carefully to avoid breakage. When removing the headlight unit, pull and shimmy it gently to detach due to rubber attachments securing it in place.
Step-by-Step Low Beam Bulb Replacement Process
Replacing your Mercedes-Benz low beam bulb involves five critical steps that demand precision and careful handling to guarantee peak headlight performance and safety.
First, confirm the correct bulb model and gather gloves—essential bulb longevity tips include avoiding skin contact with halogen glass. The only tool you’ll need for this repair is a small screwdriver. Second, twist the rear cap counterclockwise to access the assembly, inspecting for moisture as part of routine headlight maintenance strategies. Third, disconnect the old bulb by twisting counterclockwise and pulling the connector straight out. Fourth, install the new bulb using gloves, aligning tabs precisely before twisting clockwise until locked. Finally, reseal the cover tightly and test functionality. Check for dashboard warnings and verify proper beam pattern to confirm successful replacement and maximum visibility.
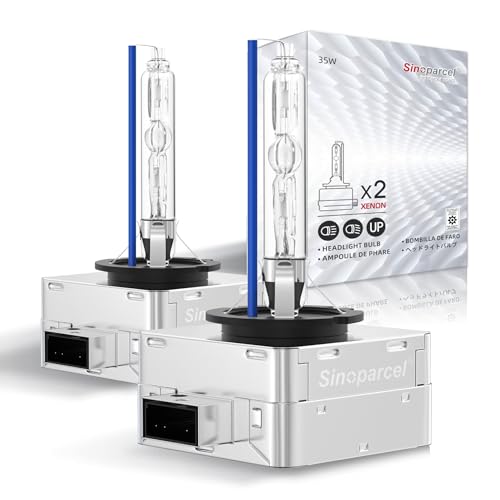
Life time support,2pcs packaged; Replacement part number: 66144 66140 85140 85415 (If there is any problem in the product, please contact us via Account Center,we will reply you within 24 hours)

Super Brightness: This light bulb adopts a 100-watt high-power design, which can provide stronger brightness and lighting effects. It produces a stronger beam than ordinary light bulbs, giving drivers better visibility at night or in adverse weather conditions.

【Visual Enhancement】: The OKOENIEO H7 halogen bulbs are 200% brighter than other halogen bulbs, providing drivers with a wider and farther field of vision. Offering a greater visibility, they allow drivers to spot deer, wildlife, falling rocks, or obstacles ahead of time, ensuring safer nighttime driving.
High Beam and Additional Bulb Replacement Procedures
High beam bulb replacement follows the same fundamental principles as low beam service but requires attention to distinct access points and bulb orientations specific to your Mercedes-Benz model. Locate the access cover behind the headlight assembly, then rotate the bulb housing approximately 20 degrees counterclockwise to release it. Disconnect the electrical connector before removal, wearing gloves to prevent oil contamination on the glass surface.
Ensure bulb compatibility by matching original specifications—common types include H7 halogen and D1S HID Xenon bulbs. Insert the replacement with proper orientation, aligning flat edges or notches correctly. The bulb secures into place using spring clamps at the back of the housing. Rotate clockwise until secured, reconnect the electrical plug, and replace the protective cover. Test high beam function immediately. For cornering and auxiliary bulbs, access rear covers and pull bulbs straight out after unplugging connectors. Many modern vehicles allow bulb replacement without bumper removal, making the process faster and more convenient. After replacement, consider applying protective coatings or wax to maintain headlight clarity and prevent oxidation over time.

800% Brighter Night Vision Powered by advanced chip technology, Marsauto H7 bulbs deliver 8x the brightness of standard halogen bulbs, producing crisp 6500K white light for enhanced visibility and faster reaction time—whether driving at night or in low-light conditions.
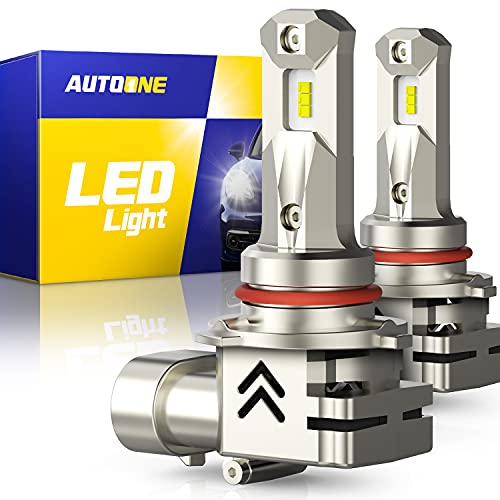
Compatible with Toyota 2003-2022 4Runner, 2004-2020 Sienna, 2007-2013 Tundra/Venza, 1992-2018 Camry/Corolla, 2008-2018 Sequoia, 1995-2012 Avalon, 1998-2005 RAV4/Celia, 1991-2017 Land Cruiser, 2003-2013 Matrix, 2010-2015 Prius; For Jeep Compass 2011-2021, Cherokee 2016-2019, Grand Cherokee 2005-2018, Commander 2006-2010; For Ram 1500/2500/3500 2011-2022; For Honda Accord 1990-2022, Pilot 2006-2022, Ridgeline 2017-2022, Civic 1988-2021, C-RV 2015-2020, Crosstour 2012-2015, CR-Z 2011-2016, HR-V 2019-2022, Odyssey 2005-2020; For GMC Yukon 2002- 2020 Sierra 2500 HD 2001-2020; For Ford F-150 2015-2022, Taurus 2008-2018,Explorer 2002-2019, Expedition 2003-2021

High Brightness: Our H7 headlight bulbs have a power of 100W, sufficient light, and are filled with more than 45% xenon, which can obtain ultra-white light with a color temperature of up to 6000K, so that you can still see the road clearly even in foggy and rainy days
Model-Specific Replacement Guidelines for Popular Mercedes Models
While the general procedures outlined above apply broadly across Mercedes-Benz vehicles, each model series presents unique access requirements, bulb specifications, and installation challenges that demand specific attention. Model specific considerations vary greatly: E-Class models (2011 E-350) require removing 10 mm bolts and plastic clips from wheel well splash guards to access H7 halogen bulbs. C-Class vehicles (2011-2019) use either H7 halogen or D1S HID bulbs depending on factory equipment, while ML-Class SUVs employ H7 or D1S/D2S variants with partial wheel liner removal. S-Class sedans feature complex HID systems using D1S, D2S, or D3S xenon bulbs requiring ballast compatibility verification. The installation process may require loosening lug nuts and jacking up the vehicle to properly access the wheel well area on certain models. Bulb compatibility factors include checking factory OEM specifications versus aftermarket assemblies, as different configurations affect proper fitment and electrical performance.

Lifetime support included. Compatible with H7/PX26D sockets (2-pack). For any issues, contact us via Amazon Buyer-Support for a response within 24 hours.

UP to 300% Brighter—Clearer Warm White Light Vision: Littlelucky H7 halogen bulbs output a 3800K,4000LM warm white light, experience up to 300% brighter for clearer vision in low-light and fog etc conditions, enhancing driving safety and visibility

Lights Dim Over Time, Replace In Pairs: Be sure to replace both H7 headlights at the same time for optimum performance. If one bulb burns out, the other isn't far behind. Replacing in pairs allows for premium visibility
Proper Installation Techniques and Alignment Tips
Successfully installing a Mercedes-Benz headlight bulb requires meticulous attention to preparation, handling procedures, and alignment verification to confirm peak performance and longevity. Before starting, make sure your engine’s off and wear gloves to prevent skin oils from degrading the bulb. Never touch the glass surface directly—this installation common error causes premature burnout through hot spots.
Access the bulb housing by removing the protective cover counterclockwise, then unplug the wiring connector without pulling wires. Rotate the old bulb anti-clockwise for removal. When installing, align the new bulb’s metal tabs precisely with housing slots using proper bulb alignment techniques. Rotate clockwise until it clicks securely. Verify the bulb sits flat and even to prevent uneven light projection. Ensure terminals match the wiring plug for correct installation. Test illumination before reassembling covers to confirm correct installation and beam pattern.
Troubleshooting Common Issues and Maintenance Best Practices
Even with perfect installation technique, headlight malfunctions can occur due to electrical faults, component failures, or system incompatibilities. Start troubleshooting by checking fuses, as blown fuses frequently prevent headlights from activating. Swap bulbs between sides to identify defective units, and inspect the wiring harness inspection for loose or corroded connections. LED and HID systems require attention to polarity—reversing connections on bulbs or decoders often resolves headlight flickering issues. If flickering persists, test for power supply pulsing and consider specialized warning cancellers. Replace faulty control modules or HID ignitors as needed. A full system scan provides insights on all potential malfunctioning components beyond just the headlight assembly. Water or condensation inside the headlight housing can damage the adaptive headlight module or stepper motor control system, requiring inspection and resealing of affected assemblies. Some vehicles feature automatic lighting systems that keep headlights illuminated based on vehicle settings in the SYNC system, which may need adjustment if lights remain on unexpectedly. Maintain reliability through regular inspections of bulbs, connectors, and weather seals. Keep headlight assemblies dry and test batteries periodically to prevent voltage-related failures. Always use manufacturer-recommended components to preserve system compatibility.