To replace your Honda CR-V’s headlight bulb, you’ll first identify the correct type for your model year—9003/H4 for 2000-2007 models or H11 and 9005 for 2017+ versions. Turn off your vehicle, disconnect the electrical connector by pressing its locking tab, remove the rubber dust cover, and release the metal retaining clip. Install the new bulb using gloves to prevent oil transfer, then reconnect all components. Test both high and low beams before driving, and explore advanced techniques below for peak performance.
Identifying the Correct Bulb Type for Your Honda CR-V
Identifying the correct headlight bulb type for your Honda CR-V requires matching three critical specifications: your vehicle’s model year, the specific light function (low beam, high beam, or fog light), and your trim level. For 2007–2011 CR-Vs, you’ll need 9003/H4 dual-filament bulbs for combined high/low beams. Models from 2017 onward use H11/H8/H9 for low beams and 9005/HB3 for high beams. The 2000-2001 models use 9003/H4 LED headlight bulbs, which also serve dual high and low beam functions. Bulb compatibility depends on accurate model year identification—never assume carryover between generations. Consult your owner’s manual or inspect the existing bulb’s base stamp for definitive confirmation. Some trims feature factory LED systems requiring different specifications. When evaluating upgrade options, consider brightness, longevity, and color temperature to ensure you select bulbs that enhance visibility without compromising safety. Before purchasing replacements, verify your specific configuration using online bulb finder tools or manufacturer charts to prevent costly mismatches that compromise safety and function.

Lights Dim Over Time, Replace In Pairs: Your lights are a pair, one is never turned on without the other. If one bulb burns out, the other isn't far behind. Replace your 9003 XtraVision Halogen bulbs in pairs for optimum performance.

Wider Visibility

1:1 Size & Easy Installation: Sealight H4 Fog Light bulbs feature a near-identical 1:1 mini design as original bulbs, requiring no external drivers or wires for a true plug-and-play experience
Tools and Materials Needed
Once you’ve confirmed the correct bulb specification for your CR-V’s model year and trim, gather the necessary tools and materials before beginning the replacement process. You’ll need flathead and Phillips head screwdrivers for clips and fasteners, needle-nose pliers for tight retaining clips, and optionally a socket wrench set for panel removal. Always wear latex or nitrile gloves to prevent oil transfer that compromises headlight brightness and bulb longevity.
Prepare the replacement bulb matching your vehicle’s specifications, along with rubber weather seals, hold-down clips, and electrical connectors if damaged. Keep a flashlight, cleaning cloth, and your CR-V’s manual accessible. Tool organization streamlines the process considerably. Understanding legal requirements regarding headlight modifications ensures your upgrades comply with safety standards. Consider selecting bulbs with appropriate beam pattern quality to maintain optimal visibility and safety during night driving.
For installation, use dielectric grease on connectors to prevent corrosion and anti-seize lubricant on bulb threads. Have a multimeter ready to verify electrical connections and proper headlight operation post-installation. The passenger side headlight uses one bulb for both high and low beam functions.

[Fit For Honda CRV 2015-2021]:This bulb combination is suitable for CRV models from 2015-2021.The package includes:2 high beams 2 low beams and 2 fog light bulbs,totaling 6 bulbs, ensuring a fit and easy installation. Please check the CRV model before purchasing

Halogen Headlight Bulbs for Honda CR-V CRV 2007 2008 2009 2010 2011 2012 2013 2014,High Beam Low Beam 9003/H4 Lights 6000k White

Fit for 99% of vehicles - SYJIIP Halogen headlamp are close to the wattage of the stock halogen headlamp bulb, which can reduce the occurrence of CANBUS problems, avoid erroneous and flickering. As long as your stock light bulb model is the same as ours, then SYJIIP's light bulb will be suitable for your car.
Removing the Old Headlight Bulb
Before attempting to remove the old headlight bulb, make certain the vehicle is turned off with the keys removed and the hood securely propped open. Locate the electrical connector at the rear of the headlight housing. Press the locking tab and pull the connector straight off. Peel back the rubber dust cover to expose the bulb retaining mechanism. Press and lift the metal clip to disengage it completely. Gently pull the bulb straight out of the socket. Proper bulb handling requires wearing gloves or using a clean cloth to avoid skin oils contacting the glass. Examine the socket for corrosion or damage requiring socket care before installation. Note the bulb’s orientation for correct replacement positioning. In certain model years, you may need to remove components like the radiator overflow tank to gain better access to the headlight assembly. Avoid excessive force that could damage components. Shake the old bulb gently and listen for a rattling sound within, which typically indicates filament failure even when no visible burn marks are present. Understanding your vehicle’s factory bulb specifications will ensure you select the correct replacement option for your CR-V model.
Installing the New Headlight Bulb
Prepare the new headlight bulb by removing it from its protective packaging while wearing clean gloves or using a lint-free cloth to prevent skin oils from contaminating the glass surface. Align the bulb’s tabs with the headlight housing slots, ensuring correct bulb orientation for your CR-V’s specific type (H11 for low beam, 9005 for high beam). Insert the bulb firmly until it sits flush, then rotate clockwise approximately one quarter turn to lock it. Engage the securing mechanisms—wire clips or metal brackets—ensuring they snap into their designated grooves. Reattach the electrical connector, pressing until it clicks securely. Position the rubber weather seal around the bulb base, pressing edges down evenly to create a waterproof barrier. After installation, test the bulb’s brightness by shining it on a wall to verify optimal positioning. Test security by gently tugging the bulb, then verify operation before reassembly.
Testing and Adjusting Your Headlights
After securing the new bulb in place, you’ll need to verify it functions correctly and illuminates the road ahead at the proper angle. Park on a level surface 25 feet from a flat wall, ensuring proper tire pressure. Have someone sit in the driver’s seat to simulate normal load conditions.
Turn on your low beams and observe the beam pattern. Both headlight brightness levels should match, with clean horizontal cut-off lines at equal heights. If adjustment is needed, locate the vertical adjustment screw atop the headlight assembly. Turn clockwise to lower or counterclockwise to raise the beam. For adjusting output angle horizontally, use the side-mounted screw if available.
Verify alignment under dark conditions to confirm proper road illumination without glare. Proper alignment prevents glare for oncoming drivers and ensures your safety on the road. Consider upgrading to bi-xenon headlight technology for superior illumination and energy efficiency compared to traditional halogen bulbs. When replacing your headlight bulbs, always compare the replacement bulb type to your original to ensure you’re using the correct specification for your vehicle.
LED Upgrade Considerations
While halogen bulbs remain factory standard on most Honda CR-V models, LED headlight upgrades offer compelling performance advantages that you should carefully evaluate against compatibility requirements. LED brightness notably exceeds halogen output, with quality kits delivering 6,000 to 16,500 lumens per bulb at color temperatures between 6000K and 6500K for improved nighttime visibility.
Before purchasing, verify your CR-V’s exact bulb sizes—typically H11 for low beams and 9005 for high beams, though trim variations exist. Confirm the LED kit offers plug-and-play installation with integrated drivers and adequate cooling systems, either fan-based or passive heat sinks. Popular brands like Sylvania and Philips provide reliable options with established track records for CR-V compatibility.
Energy efficiency advantages reduce electrical load by 50-70% compared to halogen. However, you must verify proper beam pattern alignment post-installation to prevent glare. Check local regulations regarding LED retrofits before proceeding. Many manufacturers now include 90-day return policies that allow you to test compatibility and performance with reduced purchase risk.

The package includes 1 set plug and play adapter wire harness that ONLY FITS GENUINE (ORIGINAL) HEADLIGHTS! Contact us if you have any questions. Thanks.

FITMENT: The CRV/HRV interior LED light kit is compatible with 2013 2014 2015 2016 2017 2018 2019 2020 2021 Honda CR-V HR-V all cab size.

Model Compatibility: TXBILMOO headlight bulbs that are specifically tailored for the CRV, ensuring they match your car's model before you purchase.
Troubleshooting Common Headlight Problems
Even properly installed LED upgrades won’t improve visibility if underlying electrical faults compromise your CR-V’s headlight system. Begin troubleshooting by inspecting fuse #15 under the dashboard—blown fuses are the most straightforward headlight dimming solutions. Check with the ignition off to prevent electrical disruption. If you’ve recently swapped fuses, reset them according to service bulletin A17,100H specifications.
Next, employ wiring inspection techniques by examining low-beam harness terminals for overheating or corrosion. These terminals can fail without warning, causing complete low-beam outages. Test your headlight relay and switch operation systematically—faulty relays produce intermittent failures, while defective switches prevent operation entirely. A healthy relay coil typically shows between 50Ω and 200Ω resistance when tested with a multimeter. If flickering or dim headlights persist after bulb replacement, investigate wiring shorts or loose connections. Before proceeding with complex electrical diagnostics, ensure you have the proper tools and equipment readily available to safely conduct your inspection. Some CR-V owners report both low beams failing simultaneously, suggesting a common power supply issue rather than individual bulb problems. Professional diagnosis becomes necessary when multiple lighting functions malfunction simultaneously, indicating broader electrical system issues.

Integrated Multi-Path Protection: Multiple fuses prevent damage caused by circuit overload, prevent burnout of circuits and electronic components, and improve the overall safety of the system
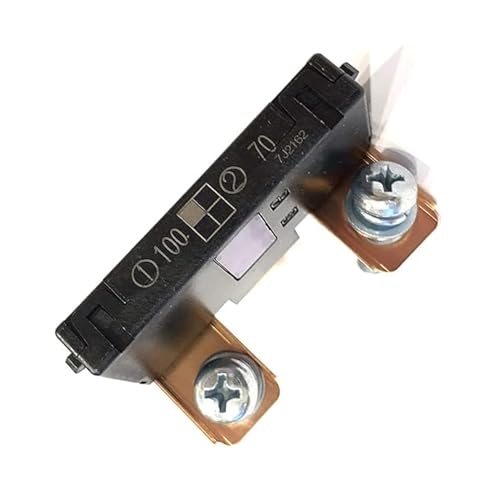
𝟯𝟴𝟮𝟯𝟭-𝗦𝗗𝗔-𝗔𝟬𝟭 - Multi Block (100Amp / 70Amp) Fuse A compatible for Honda and Acura vehicles

Replacement For - 33116-SD4-961; suitable for Honda CR-V 2005-2006; for Honda Prelude 1997-2001; for Acura RL 1996-2004; for Acura TSX 2004-2008
Maintenance Tips for Longer Bulb Life
Maximize your Honda CR-V’s headlight bulb longevity by mastering proper installation techniques that prevent premature failure. Always wear gloves when handling bulbs—skin oils greatly reduce bulb lifespan. Apply dielectric grease to terminals for corrosion prevention and ideal electrical contact. Confirm precise bulb alignment before insertion to maximize light focus and avoid damage.
Establish a maintenance routine that includes regular lens cleaning to prevent oxidation-related dimming. Inspect connectors quarterly for corrosion, moisture, or dirt accumulation. Test your electrical system’s voltage stability and grounding resistance—faulty relays cause premature burnout. Replace worn wiring harnesses immediately. Consider using OEM Honda bulbs rather than third-party alternatives to ensure compatibility and optimal performance.
Enhance usage habits by minimizing on/off cycling and allowing bulbs to cool between extended uses. Store spare bulbs in original packaging, protected from moisture and temperature extremes. Use manufacturer-specified wattage ratings exclusively. Selecting bulbs with appropriate lumens output for your driving conditions ensures optimal visibility and safety during daylight hours. Modern vehicles increasingly utilize adaptive headlight technology that automatically adjusts beam patterns based on driving conditions, so maintaining proper bulb function is essential for these systems to operate effectively.