To keep your headlights clear and bright, wash them monthly with pH-neutral soap, then apply UV-resistant sealant every 3-6 months to prevent oxidation. For existing cloudiness, wet-sand progressively from 400 to 2000-grit sandpaper, polish with compound, and seal immediately. Park in shaded areas when possible, and inspect lenses during routine car washes for early oxidation signs. Consider installing clear protective film for long-term UV protection. Upgrading to LED bulbs enhances light output while reducing heat-related degradation. The following sections outline specific restoration techniques and protective measures for ideal headlight maintenance.
Essential Preparation Before Cleaning
Before restoring headlight clarity, you’ll need to establish proper working conditions and prepare the surface correctly. Position your vehicle in a shaded workspace to prevent cleaning solutions from evaporating prematurely, which causes streaking and uneven application. Direct sunlight accelerates drying, compromising restoration quality.
Begin with initial surface wash using car wash soap and water with a clean cloth. This removes dirt and debris that could scratch during subsequent steps. Allow headlights to air dry completely—moisture dilutes abrasive compounds and reduces effectiveness. For optimal results, consider using common household items like toothpaste or baking soda as gentle cleaning agents during your preparation phase. Applying a UV headlight sealant after cleaning helps maintain clarity and prevent future yellowing or hazing.
Apply automotive masking tape around headlight perimeters to protect adjacent paint from accidental damage during sanding or polishing. Prepare a spray bottle filled with water and add a few drops of soap to provide lubrication during sanding. Conduct thorough surface inspection after washing to assess oxidation levels and determine required grit progression. This evaluation guarantees you select appropriate abrasives for peak restoration results.

【PROFESSIONAL GRADE RESTORE】 This XPERTCHEMY Headlight Restoration Kit is a collection of professional-grade products assembled specifically for removing the heavy-duty yellowing, clouding and stains, even buffs out unsightly hairline scratches, smudges and flaws in easy steps by hand.

KIT INCLUDES: 1 - Disc Pad Holder, 3.25 in (8,2 cm) 6 - 3M Gold Sanding Discs 500 Grit, 3 in (7,6 cm) each 4 - 3M White Finishing Discs 800 Grit, 3 in (7,6 cm) each 1 - 3M Trizact Refining Disc 3000 Grit, 3 in (7,6 cm) 2 - 3M Quick Headlight Clear Co

KIT INCLUDES: 1 - 3M Trizact Refining Disc 1000 grit, 3 in/7.6 cm 1 - 3M Trizact Refining Disc 3000 grit, 3 in/7.6 cm 2 - 3M Quick Headlight Clear Coat Wipes 1 - Foam Pad with 3M Hookit Attachment, 3 in/7.6 cm 1- Disposable Glove
Recommended Cleaning Materials and Solutions
Successful headlight restoration requires selecting appropriate materials based on oxidation severity and desired finish quality. For light oxidation, you’ll need non-gel whitening toothpaste or baking soda mixed with white vinegar (2 tablespoons to 1 tablespoon ratio). Moderate to heavy yellowing demands P400, P1000, and P2000 waterproof sandpaper with progressive grit advancement. Recommended products include V34 Compound for oxidation removal, V36 Cutting Polish for medium scratches, and V38 Final Polish for maximum clarity. Best techniques involve microfiber cloths, foam backing pads for curved surfaces, and orange Hex-Logic cutting pads for compound application. Apply masking tape around headlight edges to protect the surrounding paint from accidental damage during the restoration process. Unlike temporary fixes such as toothpaste or WD40, which only provide short-term improvement, a UV-resistant clear coat offers long-lasting protection against future oxidation and degradation. Complete restoration with rubbing alcohol for residue removal and UV-protective sealants like JetSeal or ceramic-based clear coats for long-term protection against future oxidation. For the most durable results, consider professional wet sanding and machine polishing techniques when dealing with severe headlight deterioration.

Full-Cycle Sanding Support - The car drill polishing kit featuring 3 inch sanding discs range 60/80/120/240/400/800/1000/1500/2000/3000/5000/10000 grit sandpaper for dry and wet use, with orbital sander pads, imitation wool buffing pad, and upgraded backing pads for 1/4 and 1/8 inch shank. Seamlessly transition from sanding to polishing.

Complete Sanding & Polishing Kit: This 3 inch hook and loop sanding disc set master every project stage with 12 included grits (80/120/180/240/400/800/1000/1500/2000/3000/5000/10000 grit). Effortlessly tackle scratches and imperfections on cars, metal, wood, epoxy resin, and shower glass—from coarse grinding to mirror polishing. Ideal for auto shops, furniture makers, and DIYers

Lasts Longer: Made with silicon carbide for 3x the life of aluminum oxide. It works for wet dry sanding, where water cooling actively prevents overheating and burn marks, ensuring a perfectly smooth final surface
Regular Maintenance for Long-Lasting Clarity
While professional headlight restoration delivers immediate clarity improvements, systematic maintenance prevents future degradation and extends your results. Establish a maintenance schedule incorporating monthly cleaning with pH-neutral soap and microfiber cloths to remove oxidation-causing contaminants. Apply UV sealant quarterly to block harmful rays that yellow polycarbonate lenses. For a budget-friendly alternative, you can use toothpaste’s mild abrasiveness to remove grime and oxidation from headlight surfaces. Inspect internal moisture after washing or rain—persistent condensation indicates compromised seals requiring immediate replacement. Test bulb functionality monthly; replace flickering or dim units promptly, as unstable electrical output from failing components can cause headlight brightness issues. Check electrical connections for corrosion, cleaning terminals with contact cleaner and applying dielectric grease for peak current flow. Verify ground wire attachment to unpainted metal surfaces. Well-maintained headlights contribute to higher resale value by demonstrating comprehensive vehicle care to potential buyers. Park in covered areas when possible to minimize UV exposure. These headlight longevity tips maintain optical clarity, promote legal compliance, and preserve nighttime visibility critical for accident prevention.
Step-by-Step Restoration Process
Restoring headlight clarity requires a methodical approach that progresses from damage assessment through protective coating application. You’ll first inspect lenses for structural damage and clean them with isopropyl alcohol to remove contaminants. The sanding process begins with coarse grits (400–800) for heavy oxidation, then advances through incremental steps (1200, 2000, 3000) using continuous water lubrication to eliminate prior scratching patterns. Maintain consistent directional strokes and rinse between grit changes. Next, polishing techniques involve variable-speed machines with progressively finer compounds—heavy-cut, medium, then fine polish—paired with appropriate pads to restore optical clarity. Clean thoroughly with alcohol before applying UV-resistant clear coat or two-component urethane designed for polycarbonate. Understanding UV exposure and oxidation will help you appreciate why consistent protection matters after restoration. Follow manufacturer curing protocols to guarantee long-term protection against re-oxidation. This professional approach addresses deeper surface damage that basic cleaning methods cannot resolve, and unlike headlight bulbs that typically last only 450 to 1,000 hours, a properly restored and protected lens can maintain clarity for years. Ensuring comprehensive restoration of headlight performance requires attention to both the lens condition and the bulb lifespan to optimize overall headlight function.

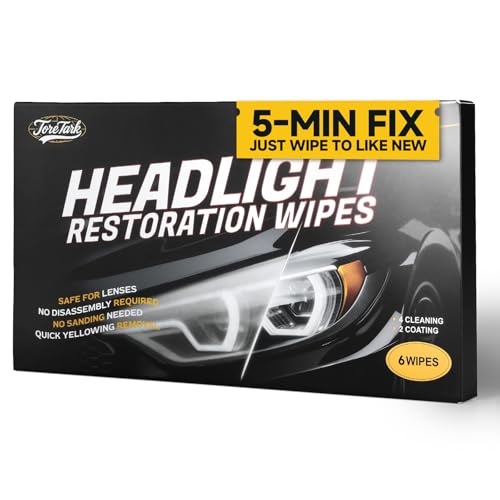
KIT CONTENTS - Each headlight restoration kit includes (8) Step 1 Oxidation Removing Wipes, (1) Step 2 Sanding Kit, and (2) Step 3 Ceramic Coating Wipes.

Easy Headlight Restoration Kit: The Sylvania Headlight Restoration Kit is easy to use and includes everything needed to repair two headlight lenses and restore light output with no tools needed
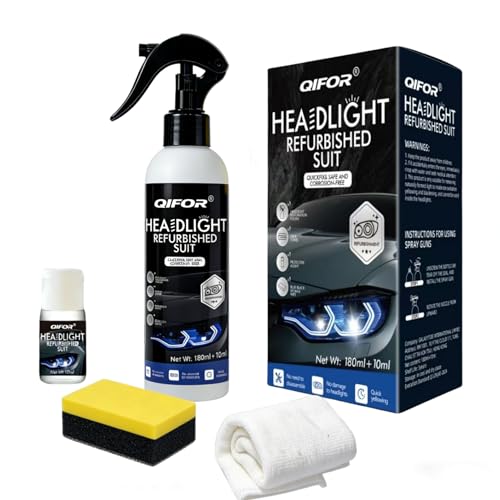
KIT CONTENTS - Each headlight restoration kit includesOne bottle of headlight yellowing removal solution (6.09OZ), one bottle of headlight crystal plating solution (0.34OZ), one towel, and one sponge
Effective Household Cleaning Methods
Several household products offer cost-effective alternatives to commercial headlight restoration kits, though they provide temporary clarity improvements rather than permanent solutions. Non-gel whitening toothpaste contains abrasives that polish oxidized surfaces when applied with a damp microfiber cloth using circular motions for 5-10 minutes. Household ingredients like baking soda and white vinegar create an effective paste through chemical reaction between alkaline and acidic components. WD-40 spray provides quick restoration after initial soap-and-water cleaning. Magic Eraser tackles moderate grime buildup through mechanical abrasion. DEET-containing bug spray applied via dry rag removes cloudiness effectively. Coca-Cola’s acidic properties dissolve foggy deposits when wiped directly onto lightly dampened surfaces. For optimal results, consider that LED and HID headlight options produce clearer light output than traditional halogen bulbs, which can also help reduce the appearance of residual cloudiness. Understanding UV exposure effects helps explain why these temporary solutions require repeated applications for heavily oxidized headlights and work best as interim maintenance between professional restoration procedures. After completing the cleaning process, rinse the headlight thoroughly with water and dry with a clean cloth to reveal the improved clarity.
Please watch the operation video carefully before use

Crystal Clear Restoration: Effectively removes yellowing, cloudiness, and oxidation from headlights, restoring them to a clear, bright finish.

HEADLIGHT CLEANING KIT TO RESTORE CLARITY: Introducing a car detailing kit featuring high-quality car care products that quickly and easily restore headlights; the simple two-step process removes oxidization and yellowing for long-lasting clarity
Protecting Your Headlights From Future Damage
After restoring headlight clarity through household cleaning methods, implementing protective measures prevents recurring oxidation and maintains ideal light output. Apply UV sealant every 3-6 months to block harmful rays that cause yellowing and cloudiness. Use a clean microfiber cloth to spread a thin layer across the lens surface for maximum UV sealant benefits.
Protection film options include clear adhesive films rated for 10-year durability, costing $50-60 per set. These films provide scratch resistance against road debris while blocking UV rays and moisture infiltration. Unlike traditional clear coats, they expand and contract with temperature fluctuations. When installing protection films, eliminate air bubbles during application to ensure proper adhesion and optimal performance. For stubborn scratches that protection films won’t cover, wet sanding with progressive grits followed by polishing compound application can restore clarity before film installation.
Supplement these protections with regular waxing every few months and strategic parking in shaded areas. Consider upgrading to LED or HID bulbs for improved visibility and longer-lasting performance. Inspect headlights routinely during car washes, addressing oxidation signs immediately to prevent extensive deterioration.

PREVENTS HEADLIGHT FADING: Protects headlights from damaging UV rays that cause yellowing, fading, and discoloration.

VViViD Headlight tints are designed to conform and stretch around difficult surfaces.

【Protect Lights】: The film roll can protect your car lights from scratches and UV rays, preventing them from aging or cracking. Additionally, it can effectively cover up previous scratches, giving your car lights a new look.